Arduino Handheld Game System Gets A Grip

With little more than an Arduino, an OLED display, and some buttons, it’s easy to build your own faux-retro game system. There’s even a growing library of titles out there that target this specific combination of hardware, thanks in no small part to the Arduboy project. But unless you’re content to play Circuit Dude on a breadboard, at some point you’ll probably want to wrap the build up in a more convenient form.

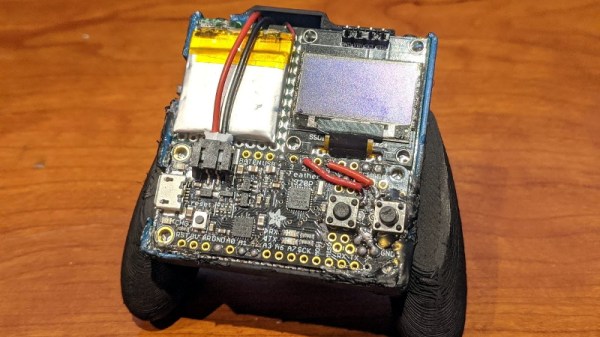
Like many that came before it, the OLED handheld created by [Alex Zidros] takes inspiration from a Nintendo product; but it’s not the Game Boy. Instead, his design is based on a 3D printed grip for the Switch Joy-Cons that he found on Thingiverse. After tacking on a holder for the PCB, he had the makings of a rather unique system.

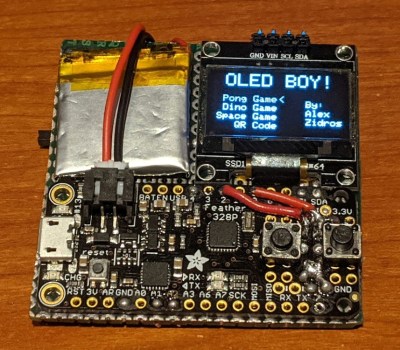
We especially like the offset SSD1306 OLED display. Not because we think a game system with an asymmetrical layout is a particularly sound design decision, but because it gives the whole build a rather cyberpunk feel. When combined with the exposed electronics, the whole system looks like it could have been cobbled together from a futuristic dumpster. Which is high praise, as far as we’re concerned.

Opposite the display is a LiPo pouch battery that [Alex] says was liberated from a portable speaker, and down below is an Adafruit Feather 328P. There are two tactile switches mounted to the front of the Feather, and in something of a departure from these sort of builds, there are two more on the shoulders of the 3D printed case. Everything is held together with nothing more exotic than a scrap of perfboard, making it easy for anyone who might want to build their own version.

If you prefer your Arduino and OLED gaming to come in a slightly more familiar form factor, the build that was done inside of a Dreamcast Visual Memory Unit (VMU) has always been a favorite around these parts.

Vintage Camera Flash Turned OLED Desk Clock

After covering a few of his builds at this point, we think it’s abundantly clear that [Igor Afanasyev] has a keen eye for turning random pieces of antiquated hardware into something that’s equal parts functional and gorgeous. He retains the aspects of the original which give it that unmistakable vintage look, while very slickly integrating modern components and features. His work is getting awfully close to becoming some kind of new art form, but we’re certainly not complaining.

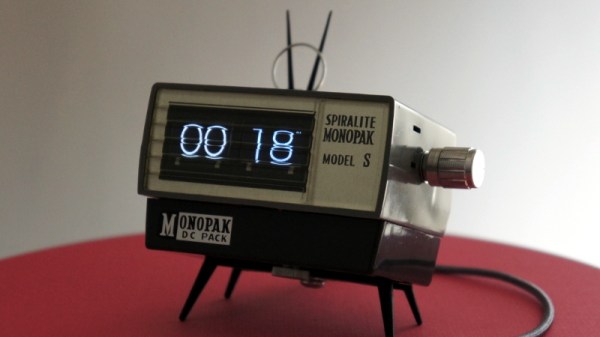
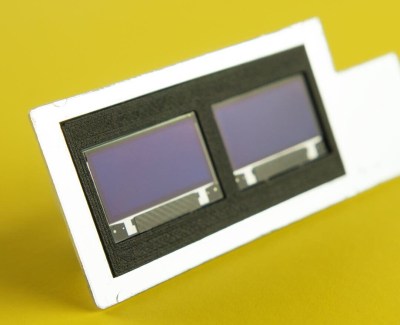
His latest creation takes an old-school “Monopak” electronic flash module and turns it into a desk clock that somehow also manages to look like a vintage television set. The OLED displays glowing behind the original flash diffuser create an awesome visual effect which really sells the whole look; as if the display is some hitherto undiscovered nixie variant.

On the technical side of things, there’s really not much to this particular build. Utilizing two extremely common SSD1306 OLED displays in a 3D printed holder along with an Arduino to drive them, the electronics are quite simple. There’s a rotary encoder on the side to set the time, though it would have been nice to see an RTC module added into the mix for better accuracy. Or perhaps even switch over to the ESP8266 so the clock could update itself from the Internet. But on this build we get the impression [Igor] was more interested in playing with the aesthetics of the final piece than fiddling with the internals, which is hard to argue with when it looks this cool.

Noticing the flash had a sort of classic TV set feel to it, [Igor] took the time to 3D print some detail pieces which really complete the look. The feet on the bottom not only hold the clock at a comfortable viewing angle, but perfectly echo the retro-futuristic look of 50s and 60s consumer electronics. He even went through the trouble of printing a little antenna to fit into the top hot shoe, complete with a metal ring salvaged from a key-chain.

Late last year we were impressed with the effort [Igor] put into creating a retro Raspberry Pi terminal from a legitimate piece of 1970’s laboratory equipment, and more recently his modern take on the lowly cassette player got plenty of debate going. We can’t wait to see what he comes up with next.

Continue reading “Vintage Camera Flash Turned OLED Desk Clock”

Arduboy Brings New Life To Dreamcast VMU

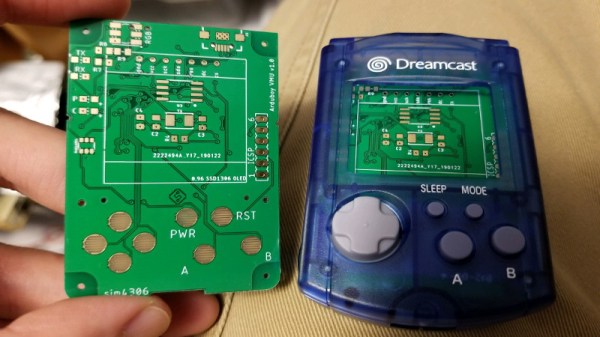
The Dreamcast VMU was a curious piece of hardware. Part memory card, part low-end LCD gaming toy, its fate was sealed once SEGA abandoned the console platform on January 31, 2001. With a limited market penetration and no major killer app, the VMU is a largely forgotten piece of ephemera from a past era. All the more reason to refit one with an Arduboy, instead.

[sjm4306] has taken the Arduboy and repurposed it into a VMU-friendly form factor. The PCB is designed to fit snug inside the plastic case, with conductive traces for the original rubber membrane buttons already in place on the main board. There are some minor fit and finish issues with the first prototype – problems with drill sizes, and connectors that don’t quite fit flush with the housing. Mistakes like these are familiar to any maker who has built a custom PCB or two in their time, and [sjm4306] is confident the bugs will be worked out in the second revision.

It’s a fun project that brings some fun gaming action to an otherwise forgotten platform. If an Arduboy isn’t enough, you could always try to fit a Pi Zero instead. And if you don’t have a VMU, you can always emulate one. Video after the break.

Continue reading “Arduboy Brings New Life To Dreamcast VMU”

Drawing On An OLED With An ATtiny85, No RAM Buffers Allowed

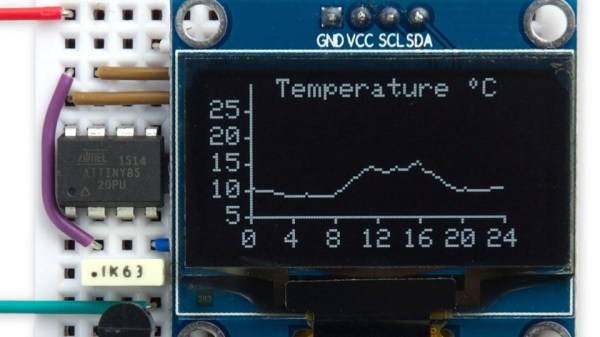
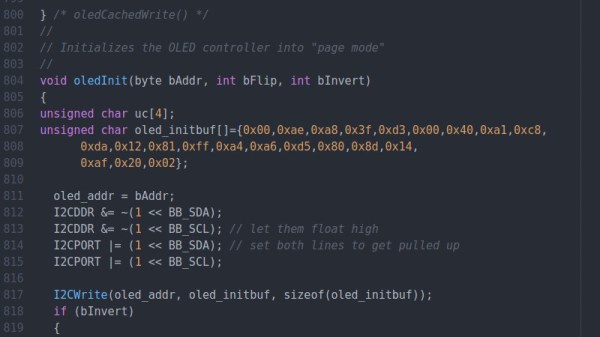
Small I2C OLED displays are common nowadays, and thanks to the work of helpful developers, there are also a variety of graphics libraries for using them. Most of them work by using a RAM buffer, which means that anything one wants to draw gets written to a buffer representing the screen, and the contents of that buffer are copied out to the display whenever it is updated. The drawback is that for some microcontrollers, there simply isn’t enough RAM for this approach to work. For example, a 128×64 monochrome OLED requires a 1024 byte buffer, but that’s bad news if a microcontroller has only 512 bytes of RAM in total like the ATtiny85. [David Johnson-Davies] has two solutions: a Tiny Graphics Library that needs no RAM buffer and an even slimmer Tiny Function Plotter, which we’ll discuss in order.

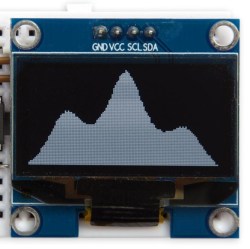
Tiny Function Plotter works on both SSD1306 and SH1106-based displays.

[David]’s Tiny Graphics Library works by taking advantage of a feature of SH1106 driver-based displays: the ability to read the display over I2C as well as write to it. With the ability to perform read-modify-write on a section at a time, using a large RAM buffer can be avoided. The only catch is that the library only works with OLEDs using the SH1106, but the good news is that these are very common at the usual Chinese resellers. ([David] notes that SH1106 is sometimes misspelled as “SSH1106”, so keep that in mind when searching.)

What about all those other SSD1306-based OLED displays out there? Are they out of luck? Not quite. [David] has one more trick up his sleeve: his Tiny Function Plotter works on the SSD1306 and also requires no RAM buffer. It’s unable to write text, but it can easily handle drawing graphs plotting things like values over time while needing very little overhead.

Another approach we’ve seen for using OLEDs driven by microcontrollers with limited memory is the solution [Michael] used in Tiny Sideways Tetris, which was done in part by realizing the smallest screen element he needed was a 4×4 block, and using that premise as the basis of a simple compression scheme.

Tiny Sideways Tetris On A Business Card

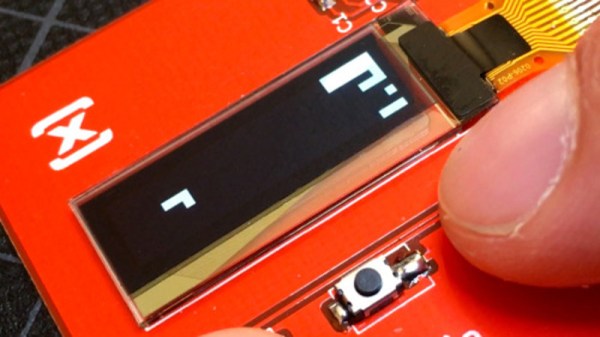
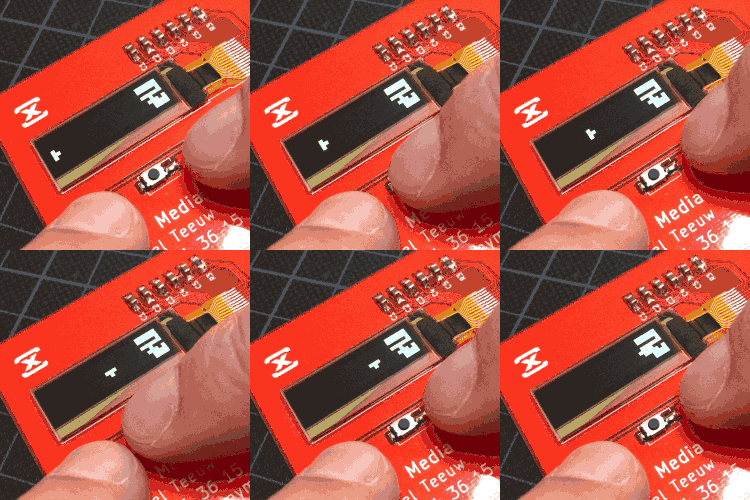
Everyone recognizes Tetris, even when it’s tiny Tetris played sideways on a business card. [Michael Teeuw] designed these PCBs and they sport small OLED screens to display contact info. The Tetris game is actually a hidden easter egg; a long press on one of the buttons starts it up.

It turns out that getting a playable Tetris onto the ATtiny85 microcontroller was a challenge. Drawing lines and shapes is easy with resources like TinyOLED or Adafruit’s SSD1306 library, but to draw those realtime graphics onto the 128×32 OLED using that method requires a buffer size that wouldn’t fit the ATtiny85’s available RAM.

To solve this problem, [Michael] avoids the need for a screen buffer by calculating the data to be written to the OLED on the fly. In addition, the fact that the smallest possible element is a 4×4 pixel square reduces the overall memory needed to track the screen contents. As a result, the usual required chunk of memory to use as a screen buffer is avoided. [Michael] also detailed the PCB design and board assembly phases for those of you interested in the process of putting together the cards using a combination of hot air reflow and hand soldering.

PCB business cards showcase all kinds of cleverness. The Magic 8-Ball Business Card is refreshingly concise, and the project that became the Arduboy had milled cutouts to better fit components, keeping everything super slim.

Push It To The Limit: SSD1306 At 150 FPS

A good deal of the projects we cover here at Hackaday are not, in the strictest sense, practical endeavors. If we required that everything which graced our digital pages had a clear end result, the site would be in a rather sad state of affairs. Sometimes it’s enough just to do something for the challenge of it. But more often than not, you’ll learn something in the process which you can use down the line.

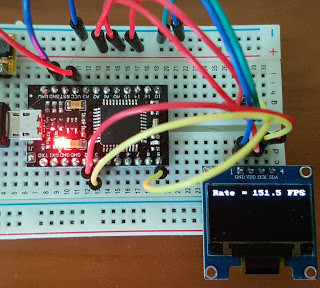
That’s precisely what pushed [Larry Bank] to see how well he could optimize the frame rate on the popular SSD1306 OLED display. After several iterations of his code, he was able to achieve a blistering 151.5 FPS, with apparently still some room for improvement if he’s feeling up to the challenge. But considering his first attempt was only running at 5.5 FPS, we’d say he’s already more than earned his hacker cred on this one.

A few different tricks were used to achieve such incredible performance gains. To start with, while the official I2C specification says you’re supposed to wait for an acknowledgment back from the device when communicating with it, [Larry] realized the SSD1306 didn’t actually care. He could continuously blast commands at the display without bothering to wait for an acknowledgment. He admits there are problems with this method, but you can’t argue with the results.

To really wring all the performance out of the system he could, [Larry] donned his Assembly Cap and examined how the Arduino IDE compiler was interpreting his code. He identified a few areas where changing his C code would force the compiler to generate faster output. He notes that this wouldn’t normally be required when working with more advanced compilers, but that the Arduino toolchain needs its hand held occasionally.

This isn’t the first time we’ve seen somebody try and push more pixels through the very same OLED display, and it’s interesting to see the two very different approaches to the same goal.

High Speed SSD1306 Library

[Lewin] wrote in to tell us about a high speed library for Arduino Due that he helped develop which allows interfacing OLED displays that use the SSD1306 display controller, using DMA routines for faster display refresh time.

Typically, displays such as the Monochrome 1.3″ 128×64 OLED graphic display , are interfaced with an Arduino board via the SPI or I2C bus. The Adafruit_SSD1306 library written by [Limor Fried] makes it simple to use these displays with a variety of Arduinos, using either software or hardware SPI. With standard settings using hardware SPI, calls to display() take about 2ms on the Due.

[Lewin] wanted to make it faster, and the SAM3X8E on the Due seemed like it could deliver. He first did a search to find out if this was already done, but came up blank. He did find [Marek Buriak]’s library for ILI9341-based TFT screens. [Marek] used code from [William Greiman], who developed SD card libraries for the Arduino. [William] had taken advantage of the SAM3X8E’s DMA capabilities to enable faster SD card transfers, and [Marek] then adapted this code to allow faster writes to ILI9341-based screens. All [Lewin] had to do was to find the code that sent a buffer out over SPI using DMA in Marek’s code, and adapt that to the Adafruit library for the SSD1306.

There is a caveat though: using this library will likely cause trouble if you are also using SPI to interface to other hardware, since the regular SPI.h library will no longer work in tandem with [Lewin]’s library. He offers some tips on how to overcome these issues, and would welcome any feedback or testing to help improve the code. The speed improvement is substantial. Up to 4 times quicker using standard SPI clock, or 8 times if you increase SPI clock speed. The code is available on his Github repo.