A DIY Interface for Subaru Select Monitor 1

Hacking A 20 Year Old Subaru

While cars are slowing becoming completely computer-controlled, road vehicles have been relying on computers since the 1970’s. The first automotive use of computers was in engine control units (ECUs) which came along as fuel injection systems started to replace carburetors.

[P1kachu]’s 1997 Subaru Impreza STi, like most cars of this vintage, uses an ECU and provides a diagnostic connector for external communications. [P1kachu]’s Subaru hacking project includes building a diagnostic interface device, dumping the ECU’s firmware, and reverse engineering the binary to understand and disable the speed limiter. If this looks familiar, it’s because we just covered the infotainment hacks in this car on Saturday. But he added information about the communications protocols is definitely worth another look.

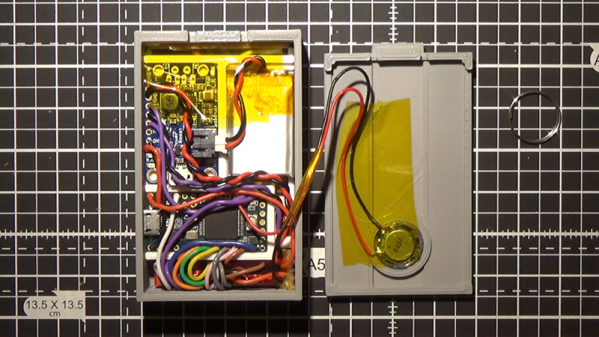
This era of Subaru uses a non-standard diagnostics protocol called SSM1, which is essentially a 5 volt TTL serial line running at 1953 bits per second. The custom interface consists of a Teensy and a 3.3V to 5V level shifter. Once connected, commands can be sent directly to the ECU. Fortunately, the protocol has been quite well documented in the past. By issuing the “Read data from ECU address” command repeatedly, the full firmware can be dumped.

[P1kachu] goes on to locate the various engine tuning maps and discover the inner workings of the speed limiter. With cars getting more computerized, it’s nice to see folks are still able to tune their rides, even if it means using Teensys instead of wrenches.

Incredibly Heavy Ornament Likely Inappropriate To Hang On Tree

It’s that time of year again, and the Christmas hacks are flooding in thick and fast. To get into the Christmas spirit,  the FoxGuard team wanted a custom ornament to hang from the tree. They may have gotten more than they bargained for.

It’s a simple build that demonstrates the basic techniques of working with DACs and scopes in a charming holiday fashion. A Tektronix T932A analog oscilloscope is pressed into service as a display, by operating in XY mode. A Teensy 3.5 was then chosen for its onboard digital to analog converters, and used to output signals to draw a Christmas tree and star on the screen.

Old-school coders will appreciate the effort taken to plot the graphics out on graph paper. While the hack doesn’t do anything cutting edge or wild, it’s impressive how quick and easy this is thanks to modern development methods. While the technology to do this has existed for decades, a hacker in 1998 would have spent hours breadboarding a PIC microcontroller with DACs, let alone the coding required. We’ve come a long way.

It’s a bit of fun, but we highly recommend you don’t try and hang an analog scope off your tree at home. These WiFi-controlled ornaments are perhaps more suitable. Video after the break. Continue reading “Incredibly Heavy Ornament Likely Inappropriate To Hang On Tree”

Teensy Liberates The ThinkPad Keyboard

[Frank Adams] liked the keyboard on his Lenovo ThinkPad T61 so much that he decided to design an adapter so he could use it over USB with the Teensy microcontroller. He got the Trackpoint working, and along the way managed to add support for a number of other laptop boards as well. Before you know it, he had a full-blown open source project on his hands. Those projects can sneak up on you when you least expect it…

The first step of the process is getting your laptop keyboard of choice connected up to the Teensy, but as you might expect, that’s often easier said than done. They generally use a flexible printed circuit (FPC) “ribbon cable” of some type, but may also be terminated in any number of weirdo connectors. [Frank] goes over the finer points of getting these various keyboards connected to his PCB, from searching the usual suspects such as Aliexpress and Digikey for the proper connector to throwing caution to the wind and cutting off problematic nubs and tabs to make it fit.

You might be on your own for figuring out the best way to connect your liberated keyboard up, but [Frank] has done his part by designing a few PCBs which handle routing the appropriate connections to the Teensy LC or 3.2 microcontroller. He’s such a swell guy he’s even written the firmware for you. As of right now there’s currently a dozen keyboards supported by his software and hardware setup, but he also gives tips on how to get the firmware modified for your own board if you need to.

It should come as no surprise that it was a Thinkpad keyboard that got [Frank] going down this path; as we’ve documented over the years, hackers love their Thinkpads. From fitting them with more modern motherboards to going full on matryoshka and putting a second computer inside of one, it’s truly the laptop that launched a thousand hacks.

Continue reading “Teensy Liberates The ThinkPad Keyboard”

Lightsaber Uses Pogo Pins To Make Assembly A Breeze

There was an endless supply of fantastic projects at Supercon this year, but one whose fit and finish really stood out was [Scott]’s lightsaber. If you were walking around and saw someone with a very bright RGB device with a chromed-out handle hanging off their belt it was probably this, though it may have been hard to look at directly. On the outside, the saber looks like a well-polished cosplay prop, and it is! But when Scott quickly broke down the device into component pieces it was apparent that extra care had been put into the assembly of the electronics.

Like any good lightsaber replica the blade is lit, and wow is it bright. The construction is fairly simple, it’s a triplet of WS2812B LED strips back to back on a triangular core, mounted inside a translucent polycarbonate tube with a diffuser. Not especially unusual. But the blade can be popped off the hilt at a moments notice for easy transport and storage, so the strips can’t be soldered in. Connectors would have worked, but who wants flying wires when they’re disconnecting their lightsaber blade. The answer? Pogo pins! Scott runs the power, ground, and data lines out of the strips and into a small board with slip ring-style plated rings. On the hilt, there is a matching array of pogo pins to pass along power and data. The data lines from all the strips are tied together minimizing the number of connections to make, and the outer two power rings have more than one pin for better current-carrying capacity. A handy side effect is that there is nowhere on the blade where there aren’t LEDs; the strips go down to the very end of the blade where it meets the main board inside the hilt.

The hilt is filled with an assembly of 18650’s and a Teensy mounted with a custom shield, all fit inside a printed midframe. The whole build is all about robust design that’s easy to assemble. The main board is book-ended by perpendicular PCBs mounted to the ends, one at the top to connect to the blade and one at the bottom to connect to a speaker. Towards the bottom there is space for an optional Bluetooth radio to allow remote RGB control.

Scott is selling this as a product but also provides detailed instructions and parts lists for each component. Assembly instructions for the blade are here. The hilt is here. And pogo adapters are on OSH Park here. An overview of the firmware with links to GitHub is here. Check out a walkthrough of the handle assembly and blade attachment after the break!

Continue reading “Lightsaber Uses Pogo Pins To Make Assembly A Breeze”

The Portable, Digital, Visual Theremin

The theremin is, for some reason, what people think of first when they think of electronic musical instruments. Maybe that’s because it was arguably the first purely electronic musical instrument, or because there’s no mechanical analog to something that makes sound simply by waving your hand over it. This project takes that idea and cranks it up to eleven. It’s a portable synthesizer that’s controlled by IR reflectors. Just wave your hand in front of it, and that’s what pitch is going to sound.

The audio hardware for this synth is, like so many winners in the Musical Instrument Challenge in this year’s Hackaday Prize, based on the Teensy and its incredible Audio library. The code consists of two oscillators and a pink noise generator. Pressing down button one activates the oscillators, and the frequency is determined by the IR sensor. Button two cycles through various waveforms, while the third and fourth buttons shift the octaves up and down. The output is I2S, and from there everything is out to an amplifier and speaker.

Of course, it’s really not a musical instrument unless it looks cool, and that’s where this project is really great. It’s a fully 3D printed enclosure that actually looks good. There’s an 8×8 LED array to display the current waveform, and this is something that could actually be a product instead of a project. It’s a great synth, and we’re happy to have it in the running for the Hackaday Prize.

Continue reading “The Portable, Digital, Visual Theremin”

Can You Build An Open Source Pocket Operator?

Toys are now musical instruments. Or we’ll just say musical instruments are now toys. You can probably ascribe this recent phenomenon to Frooty Loops or whatever software the kids are using these days, but the truth is that it’s never been easier to lay down a beat. Just press the buttons on a pocket-sized computer.

One of the best examples of the playification of musical instruments is Pocket Operators from Teenage Engineering. They’re remarkable pieces of hardware, and really just a custom segment LCD and a few buttons. They also sound great and you can play real music with them. It’s a game changer when it comes to enabling musicianship.

Of course, with any popular platform, there’s a need for an Open Source copy. That’s where [Chris]’ Teensy Beats Shield comes in. It’s a ‘shield’ of sorts for a Teensy microcontroller that adds buttons, knobs, and a display, turning this into a platform that uses the Teensy’s incredible audio system designer.

When it comes to the world of microcontrollers and audio processing, the Teensy is a champ. The Teensy Audio Library has polyphonic playback, recording, synthesis, analysis, and effects, along with multiple simultaneous inputs and outputs. If you’re building a tiny synth that can fit in your pocket, the Teensy is the way to go, and [Chris]’ Teensy Beats Shield does it all, with a minimal and useful user interface. You can check out a video of the Teensy Beats Shield below.

Continue reading “Can You Build An Open Source Pocket Operator?”

Gaze Upon This Daft Punk Helmet’s Rows Of Utterly Perfect Hand-Soldered LEDs

The iconic robot helmets of Daft Punk feature prominently as challenging DIY hardware projects in their own right, and the results never disappoint. But [Nathaniel Stepp]’s photo gallery of his own version really sets the bar in both quality and attention to detail. The helmet uses a Teensy 3.2 as the main processor, and the visor consists of 328 hand soldered through-hole APA106 addressable RGB LEDs. A laser cut panel serves as the frame for the LEDs, and it was heat-formed to curve around the helmet and mate into the surrounding frame. Each LED is meticulously hand-soldered, complete with its own surface mount decoupling cap; there’s no wasted space or excess wire anywhere to be seen. It looks as if a small 3D printed jig was used to align and solder the LEDs one or two columns at a time, which were then transferred to the visor for final connections with the power bus and its neighboring LEDs.

After the whole array was assembled and working, the back of each LED appears to have then been carefully coated in what looks like Plasti-Dip in order to block light, probably to minimize the blinding of the wearer. A small amount of space between each LED allows the eyeballs inside the helmet to see past the light show in the visor.

The perfectly done array of LEDs in the visor is just one of the design elements showing the incredible workmanship and detail in [Nathaniel]’s helmet. His website promises more build details are coming, but in the meantime you can drink in the details shown in the aforementioned photo gallery.

With Halloween approaching, you might be interested in rolling your own Daft Punk inspired helmet. Not ready to do everything from scratch? No problem, because it’s never been easier to make your own with the help of a 3D printer and some LED strips.

[via SparkFun Blog]