Damaged Power Cord Repaired With Shop-Made Mold

We’ve likely all seen a power tool with a less-than-functional strain relief at one end of the power cord or the other. Fixing the plug end is easy, but at the tool end things are a little harder and often not worth the effort compared to the price of just replacing the tool. There’s no obsolescence like built-in obsolescence.

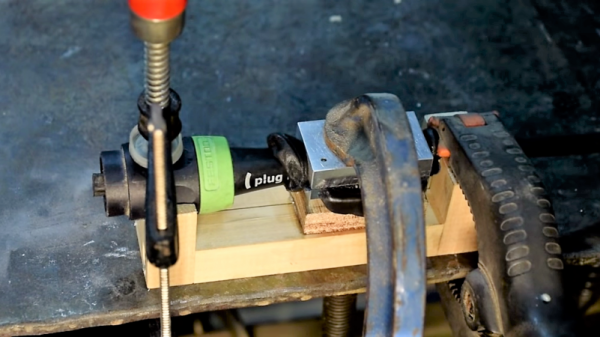
But in the land of Festo, that high-quality but exorbitantly priced brand of premium tools, the normal cost-benefit relationship of repairs is skewed. That’s what led [Mark Presling] to custom mold a new strain relief for a broken Festool cord. The dodgy tool is an orbital sander with Festool’s interchangeable “Plug It” type power cord, which could have been replaced for the princely sum of $65. Rather than suffer that disgrace, [Mark] built a mold for a new strain relief from two pieces of aluminum. The mold fits around the cord once it has been slathered with Sugru, a moldable adhesive compound. The video below shows the mold build, which has some interesting tips for the lathe, and the molding process itself. The Sugru was a little touchy about curing, but in the end the new strain relief looks almost like an original part.

Hats off to [Presser] for not taking the easy way out, and for showing off some techniques that could really help around the shop. We suppose the mold could have been 3D-printed rather than machined; after all, we’ve seen such molds before, and that 3D-printed dies can be robust enough to punch metal parts.

Continue reading “Damaged Power Cord Repaired With Shop-Made Mold”

3D Printed Radius Gauge, Just Add Calipers (And A Wee Bit Of Math)

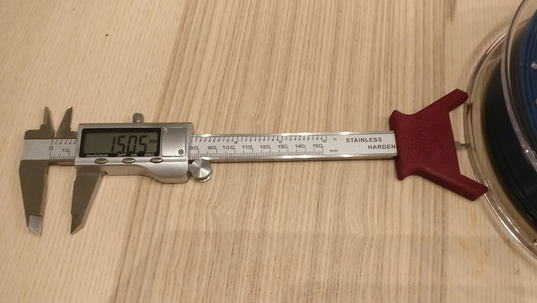
With 3D printed arms of fixed measurements, the depth reading from a set of digital calipers can be used to calculate the radius of a curve.

Specialized tools that focus on one particular job tend to get distilled right down to their essentials and turned in an economical consumer product. One example of this is radius (or fillet) gauges: a set of curves in different sizes that one uses to measure the radius of a curved surface by trial and error. To some, such products represent solved problems. Others see opportunities for a fresh perspective, like this caliper-enabled 3D printed radius gauge by [Arne Bergkvist].

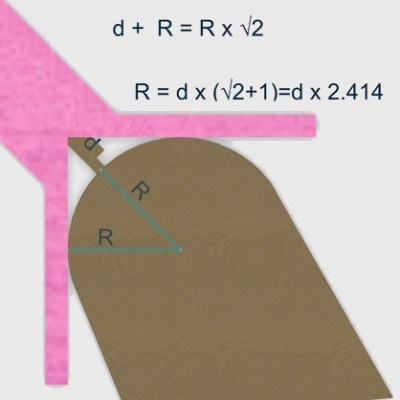
[Arne]’s 3D printed radius gauge is a simple object; a rigid attachment for a nearly ubiquitous model of digital caliper. By placing the curve to be measured between the two arms of the device and using the depth measurement of the caliper to measure distance to the curve’s surface, a simple calculation (helpfully printed on the unit itself) of radius = distance * 2.414 reveals the radius of the curve. However, this shortened calculation makes a number of assumptions and only works for [Arne]’s specific design.

Another version by [Fredrik Welander] represents a more flexible take on the same concept. His RadGauge design (pictured up top) has a few different sizes to accommodate a variety of objects, and his Git repository provides a calculator tool as well as some tips on fine tuning to allow for variations in the dimensions of the printed attachment.

3D printing has opened a lot of doors, and items like this show that the plastic doodads created aren’t always the end result in and of themselves; sometimes they are the glue that enables a tool or part to work in a different way. To help get the most out of 3D printing, check out the in-depth coverage of how to best tap 3D printed parts for fasteners, and [Roger Cheng]’s guide to using 3D printed brackets and aluminum extrusion to make just about anything.

Specialized Knife Sharpener From Old Airplane

“Surely sharpening a knife can’t be that hard” one might think, as they destroy the edge on their pocket knife by flailing it wildly against a whetstone of indeterminate grain. In reality, knife sharpening is as nuanced a practice as virtually any other field, and getting a quality finish is much harder than it seems. It also gets increasingly complex with different blades, as [Turbo Conquering Mega Eagle] shows with is customized knife sharpening jig.

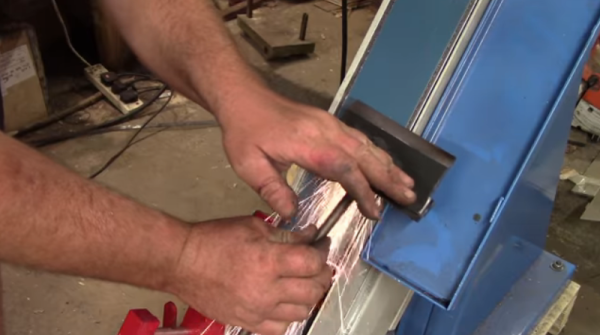
The hardest part in any blade sharpening is getting the proper bevel angle. A heavy angle is good for heavy-duty tools like axes, but for fine work like shaving a more sharp angle is required. Usually, a table-mounted jig is required but due to production constraints, a handheld one was used. It’s made with push rods and a cam follower from an airplane engine (parts are plentiful since this particular engine breaks all the time) and can impart very specific bevel angles on blades. For example, machetes have a heavy angle near the handle but a finer point towards the tip, and this tool helps streamline sharpening many knives quickly.

If you want to try your hand at another project that’s not as straightforward as it might seem, you might want to build a knife from scratch before you make an attempt at a sharpening tool. It’s just as nuanced a process, but with a little practice can be done with only a few tools.

Continue reading “Specialized Knife Sharpener From Old Airplane”

Beats An Extension Cord

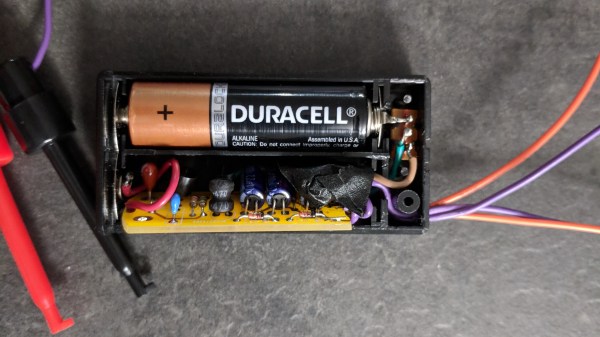
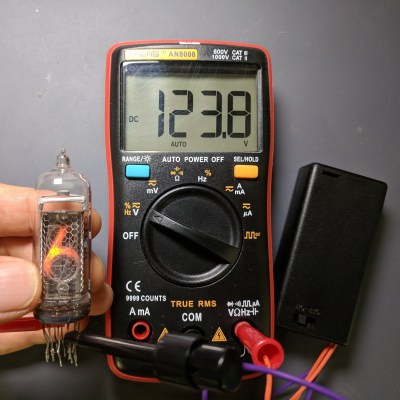
What does your benchtop power supply have that [Pete Marchetto]’s does not? Answer: an extension cord draped across the floor. How often have you said to yourself, “I just need to energize this doodad for a couple seconds,” then you start daisy chaining every battery in the junk drawer to reach the necessary voltage? It is not uncommon to see battery packs with a single voltage output, but [Pete] could not find an adjustable one, so he built his own and put it on Tindie.

Presumably, the internals are not going to surprise anyone: an 18650 battery, charging circuit, a voltage converter, display, adjustment knob, and a dedicated USB charging port. The complexity is not what intrigues us, it is the fact that we do not see more of them and still wind up taping nine-volt batteries together. [Editor’s note: we use one made from an old laptop battery.]

This should not replace your benchtop power supply, it does not have the bells and whistles, like current regulation, but a mobile source of arbitrary voltage does most of the job most of the time. And it’s what this build hasn’t got (a cord) that makes it most useful.

Universal Quick-Release Bar Clamps

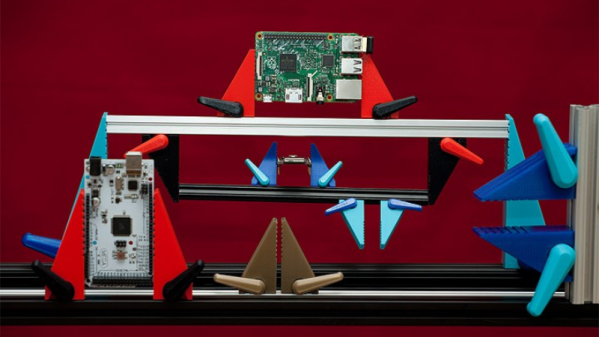
The typical hacker can never say no to more tools. And when it comes to clamps, one just can’t have enough of them. From holding small PCB’s to clamping together large sheets of plywood, you need a variety of sizes and quantities. So it would be pretty neat if we could just 3D print them whenever needed. [Mgx3d] has done that by designing 3D printable bar clamp jaws with a quick release mechanism that can be used with standard T-slot aluminum extrusion. This allows you to create ad-hoc bar clamps of any size and length quickly.

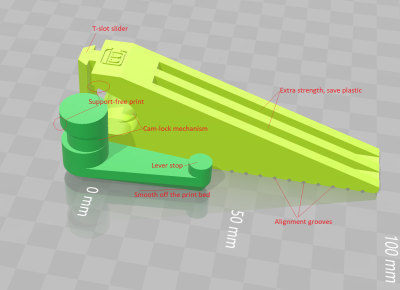
The design consists of two pieces – the jaw and its quick release lever, and does not require any additional parts or fasteners for assembly. Both pieces can be easily 3D printed without supports. The quick release lever is a simple eccentric cam design which locks the jaw in place by pushing down on the extrusion. The design is parametric and can be easily customized for different sizes, either in OpenSCAD or via the online customizer.  The online customizer supports Misumi 15 mm and 20 mm extrusion, 1″ 1010-S and 20 mm 20-2020 from 80/20 Inc., 15 mm from OpenBeam and 10 mm from MicroRax. But it ought to be easy to create fresh designs in OpenSCAD. Check out the video after the break to see the bar-clamps in action.

If you’d like to start equipping your shop with more 3D printed tools, look no further. We’ve featured many types over the years, such as the StickVise and its Gooseneck System, this 3D printed rubber band PCB Vise, and even a 3D printed Mini-Lathe.

Continue reading “Universal Quick-Release Bar Clamps”

Micro Chainsaw Gets A Much Needed Nitro Power Boost

When life hands you the world’s smallest chainsaw, what’s there to do except make it even more ridiculous? That’s what [JohnnyQ90] did when he heavily modified a mini-electric chainsaw with a powerful RC car engine.

The saw in question, a Bosch EasyCut with “Nanoblade technology,” can only be defined as a chainsaw in the loosest of senses. It’s a cordless tool intended for light pruning and the like, and desperately in need of the [Tim the Toolman Taylor] treatment. The transmogrification began with a teardown of the drivetrain and addition of a custom centrifugal clutch for the 1.44-cc nitro RC car engine. The engine needed a custom base to mount it inside the case, and the original PCB made the perfect template. The original case lost a lot of weight to the bandsaw and Dremel, a cooling fan was 3D-printed, and a fascinatingly complex throttle linkage tied everything together. With a fuel tank hiding in the new 3D-printed handle, the whole thing looks like it was always supposed to have this engine. The third video below shows it in action; unfortunately, with the engine rotating the wrong direction and no room for an idler gear, [JohnnyQ90] had to settle for flipping the bar upside down to get it to cut. But with some hacks it’s the journey that interests us more than the destination.

This isn’t [JohnnyQ90]’s first nitro rodeo — he’s done nitro conversions on a cordless drill and a Dremel before. You should also check out his micro Tesla turbine, too, especially if you appreciate fine machining.

Continue reading “Micro Chainsaw Gets A Much Needed Nitro Power Boost”

A Resistor Cutting Robot You Can Build

If you’re populating kits, it can get tiring and time consuming. Like all good repetitive processes, it should be automated. As far as cutting resistors goes, this is one way to do it, thanks to [Pablo].

The build is actually cribbed from earlier work by a gang called [oomlout]. Parts for these cutters are made with either lasercut or CNC milled sheet stock. A stepper motor is used to transport the resistor tape, and the cutting blades are moved by standard hobby servos. The use of servos for the blades allows the action to be controlled precisely without having to go to the effort of implementing extra limit switches and circuitry.

Control is by an Arduino Uno, with an A4988 driver controlling the stepper. Servo control is achieved with the Uno’s onboard peripherals. There’s a video below of the machine in operation, which shows it to be a simple and efficient tool for the job.

This build turns an otherwise maddeningly basic chore into a set-and-forget operation. We’ve seen other work in this area before from the [oomlout] team, too. Video after the break.

Continue reading “A Resistor Cutting Robot You Can Build”