A Bird 43 wattmeter and its homebrew equivalent

Homebrew Wattmeter Pays Homage To Sturdy Original

If there’s one instrument that hams and other radio enthusiasts covet, it’s the venerable Bird 43 Thruline wattmeter. The useful RF tool has barely changed in the nearly 70 years since it was first introduced, and they’re built like a tank. This makes Bird meters highly desirable, and therefore quite expensive either brand new or on the swap-meet circuit.

But radio amateurs are nothing if not resourceful, and building a homebrew version of the Bird wattmeter (in Portuguese; Google translate tool at the bottom of the page) as Brazilian ham [Luciano Sturaro (PY2BBS)] did is a good way to get your hands on one. Granted, [Luciano] had a head start: a spare line set, which is the important bit from a Bird wattmeter. The machined metal part is in effect an air-insulated section of coaxial cable that the RF signal passes through on its way from transmitter to antenna. A “slug” is inserted into the cavity in the line set to sense the RF and couple it to the meter electronics; the slug can be rotated to measure RF traveling in either direction, allowing the user to determine how much RF is getting reflected by the antenna system.

[Luciano]’s version of the meter is faithful to the sturdy construction of the original, with a solid steel case that mimics its classic lines — the case even sports the same color scheme and stout leather carry handle. There are some changes to the electronics, and the meter movement itself is different from the original, but all in all, the “Buzz 50” looks fantastic. We especially love the detailed nameplate as an homage to Bird.

The thing about Bird — and Bird-like — meters is that the slugs are like potato chips; you can’t have just one. Curious as to how these slugs work? Check out this slug repair project.

[Featured image of Bird 43 Wattmeter: Martin RF Supply]

Thanks to [Niko Huenk] for the tip!

Homemade Raman Laser Is Shaken, Not Stirred

You wouldn’t think that shaking something in just the right way would be the recipe for creating laser light, but as [Les Wright] explains in his new video, that’s pretty much how his DIY Raman laser works.

Of course, “shaking” is probably a gross oversimplification of Raman scattering, which lies at the heart of this laser. [Les] spends the first half of the video explaining Raman scattering and stimulated Raman scattering. It’s an excellent treatment of the subject matter, but at the end of the day, when certain crystals and liquids are pumped with a high-intensity laser they’ll emit coherent, monochromatic light at a lower frequency than the pumping laser. By carefully selecting the gain medium and the pumping laser wavelength, Raman lasers can emit almost any wavelength.

Most gain media for Raman lasers are somewhat exotic, but luckily some easily available materials will work just fine too. [Les] chose the common solvent dimethylsulfoxide (DMSO) for his laser, which was made from a length of aluminum hex stock. Bored out, capped with quartz windows, and fitted with a port to fill it with DMSO, the laser — or more correctly, a resonator — is placed in the path of [Les]’ high-power tattoo removal laser. Laser light at 532 nm from the pumping laser passes through a focusing lens into the DMSO where the stimulated Raman scattering takes place, and 628 nm light comes out. [Les] measured the wavelengths with his Raspberry Pi spectrometer, and found that the emitted wavelength was exactly as predicted by the Raman spectrum of DMSO.

It’s always a treat to see one of [Les]’ videos pop up in our feed; he’s got the coolest toys, and he not only knows what to do with them, but how to explain what’s going on with the physics. It’s a rare treat to watch a video and come away feeling smarter than when you started.

Continue reading “Homemade Raman Laser Is Shaken, Not Stirred”

Laser Zaps Cockroaches Over One Meter

You may have missed this month’s issue of Oriental Insects, in which a project by [Ildar Rakhmatulin] Heriot-Watt University in Edinburgh caught our attention. [Ildar] led a team of researchers in the development of an AI-controlled laser that neutralizes moving cockroaches at distances of up to 1.2 meters. Noting the various problems using chemical pesticides for pest control, his team sought out a non-conventional approach.

The heart of the pest controller is a Jetson Nano, which uses OpenCV and Yolo object detection to find the cockroaches and galvanometers to steer the laser beam. Three different lasers were used for testing, allowing the team to evaluate a range of wavelengths, power levels, and spot sizes. Unsurprisingly, the higher power 1.6 W laser was most efficient and quicker.

The project is on GitHub (here) and the cockroach machine learning image set is available here. But [Ildar] points out in the conclusion of the report, this is dangerous. It’s suitable for academic research, but it’s not quite ready for general use, lacking any safety features. This report is full of cockroach trivia, such as the average speed of a cockroach is 4.8 km/h, and they run much faster when being zapped. If you want to experiment with cockroaches yourself, a link is provided to a pet store that sells the German Blattela germanica that was the target of this report.

If this project sounds familiar, it is because it is an improvement of a previous project we wrote about last year which used similar techniques to zap mosquitoes.

Continue reading “Laser Zaps Cockroaches Over One Meter”

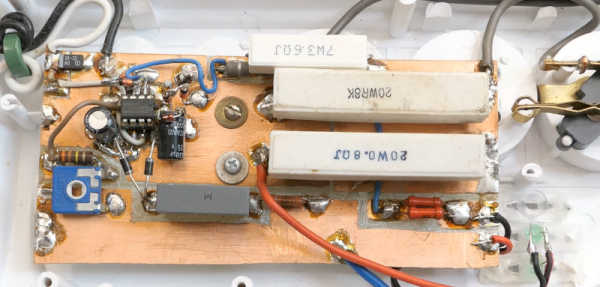
What’s In A Wattmeter?

The idea behind watts seems deceptively simple. By definition, a watt is the amount of work done when one ampere of current flows between a potential of one volt. If you think about it, a watt is basically how much work is done by a 1V source across a 1Ω resistor. That’s easy to say, but how do you measure it in the real world? [DiodeGoneWild] has the answer in a recent video where he tears a few wattmeters open.

There are plenty of practical concerns.  With AC, for example, the phase of the components matters. The first 11 minutes of the video are somewhat of a theory review, but then the cat intervenes and we get to see some actual hardware.

Continue reading “What’s In A Wattmeter?”

Measuring current draw of home shop tools

Using Homebrew Coils To Measure Mains Current, And Taking The Circuit Breaker Challenge

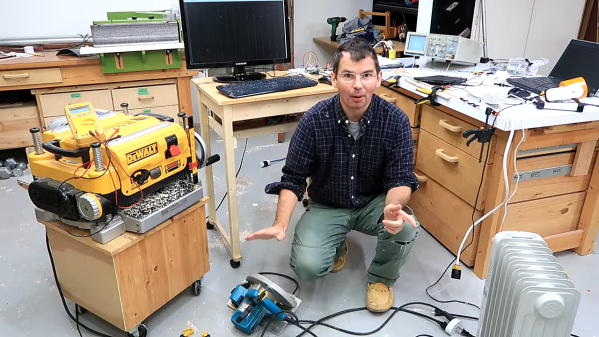
Like many hackers, [Matthias Wandel] has a penchant for measuring the world around him, and quantifying the goings-on in his home is a bit of a hobby. And so when it came time to sense the current flowing in the wires of his house, he did what any of us would do: he built his own current sensing system.

What’s that you say? Any sane hacker would buy something like a Kill-a-Watt meter, or even perhaps use commercially available current transformers? Perhaps, but then one wouldn’t exactly be hacking, would one? [Matthias] opted to roll his own sensors for quite practical reasons: commercial meters don’t quite have the response time to catch the start-up spikes he was interested in seeing, and clamp-on current transformers require splitting the jacket on the nonmetallic cabling used in most residential wiring — doing so tends to run afoul of building codes. So his sensors were simply coils of wire shaped to fit the outside of the NM cable, with a bit of filtering to provide a cleaner signal in the high-noise environment of a lot of switch-mode power supplies.

Fed through an ADC board into a Raspberry Pi, [Matthias]’ sensor system did a surprisingly good job of catching the start-up surge of some tools around the shop. That led to the entertaining “Circuit Breaker Challenge” part of the video below, wherein we learn just what it really takes to pop the breaker on a 15-Amp branch circuit. Spoiler alert: it’s a lot.

Speaking of staying safe with mains current, we’ve covered a little bit about how circuit protection works before. If you need a deeper dive into circuit breakers, we’ve got that too.

Continue reading “Using Homebrew Coils To Measure Mains Current, And Taking The Circuit Breaker Challenge”

Play A Game Of Multimeter

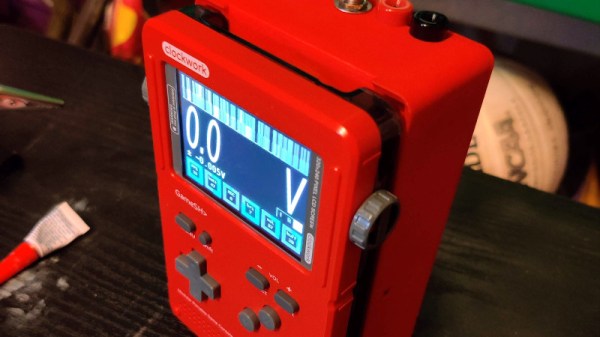
There are many different single board computers that are general purpose, but there’s another breed targeted at specific applications. One such is the Clockworkpi, a handheld Game Boy-style games console, which may be aimed at gamers but has just as much ability to do all the usual SBC stuff. It’s something [UncannyFlanigan] has demonstrated, by turning the Clockworkpi into a multimeter. And it’s not just a simple digital multimeter either, it’s one that sports graphing as well as instantaneous readings.

At its heart is an Arduino board that supplies the analogue to digital conversion, with opto-couplers for isolation between the two boards. A simple three-way switch selects voltage, current, and resistance ranges, and the ClockworkPi interface is written in Python. We can see that this could easily be extended using the power of the Arduino to deliver more functionality, for which all the code is handily available in a GitHub repository. It’s not a perfect multimeter yet because it lacks adequate input protection, but it shows a lot of promise.

If you’re intrigued by this project then maybe you’ll be pleased to know that it’s not the first home made multimeter we’ve featured.

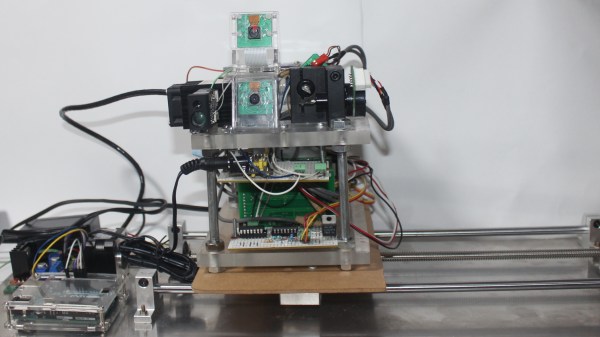
A How-To In Homebrew Design, Fab, And Assembly With Structural Framing Systems

At this point, the internet is crawling with butt-kicking homebrew 3D printers made with extruded profiles, but it’s easy to underestimate the difficulty in getting there. Sure, most vendors sell a suite of interlocking connectors, but how well do these structural framing systems actually fare when put to the task of handling a build with sub-millimeter tolerances?

I’ve been playing around with these parts for about two years. What I’ve found is that, yes, precise and accurate results are possible. Nevertheless, those results came to me after I failed and–dry, rinse, repeat–failed again! Only after I understood the limits of both the materials and assembly processes was I able to deliver square, dimensionally accurate gantries that could carry a laser beam around a half-square-meter workbed. That said, I wrote a quick guide to taming these beasts. Who are they? What flavors do they come in? How do we achieve those precision results? Dear reader, read on.

Continue reading “A How-To In Homebrew Design, Fab, And Assembly With Structural Framing Systems”