A 3D Printed Micro:Bit Nunchuk

As [Paul Bardini] explains on the Thingiverse page for his “Micro:Bit Hand Controller”, the Bluetooth radio baked into the BBC’s educational microcontroller makes it an ideal choice for remotely controlling things. You just need to give it a nice enclosure, a joystick, a couple of buttons, and away you go. You can even use the integrated accelerometer as another axis of control. This is starting to sound a bit familiar, especially to gamers.

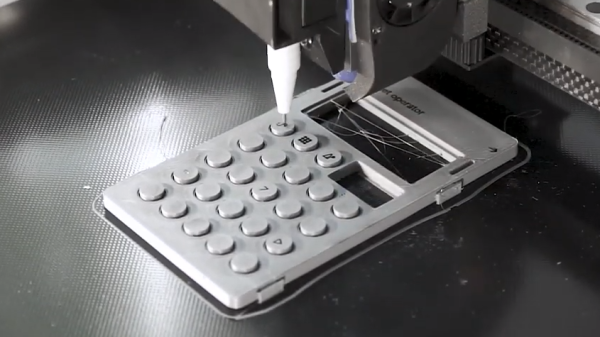
While it might not come with the Official Nintendo Seal of Quality, the 3D printable enclosure [Paul] has come up with for the Micro:Bit certainly takes more than a little inspiration from the iconic Wii “Nunchuck” controller. He’s jostled around the positions of the joystick and momentary buttons a bit, but it still has that iconic one-handed ergonomic styling.

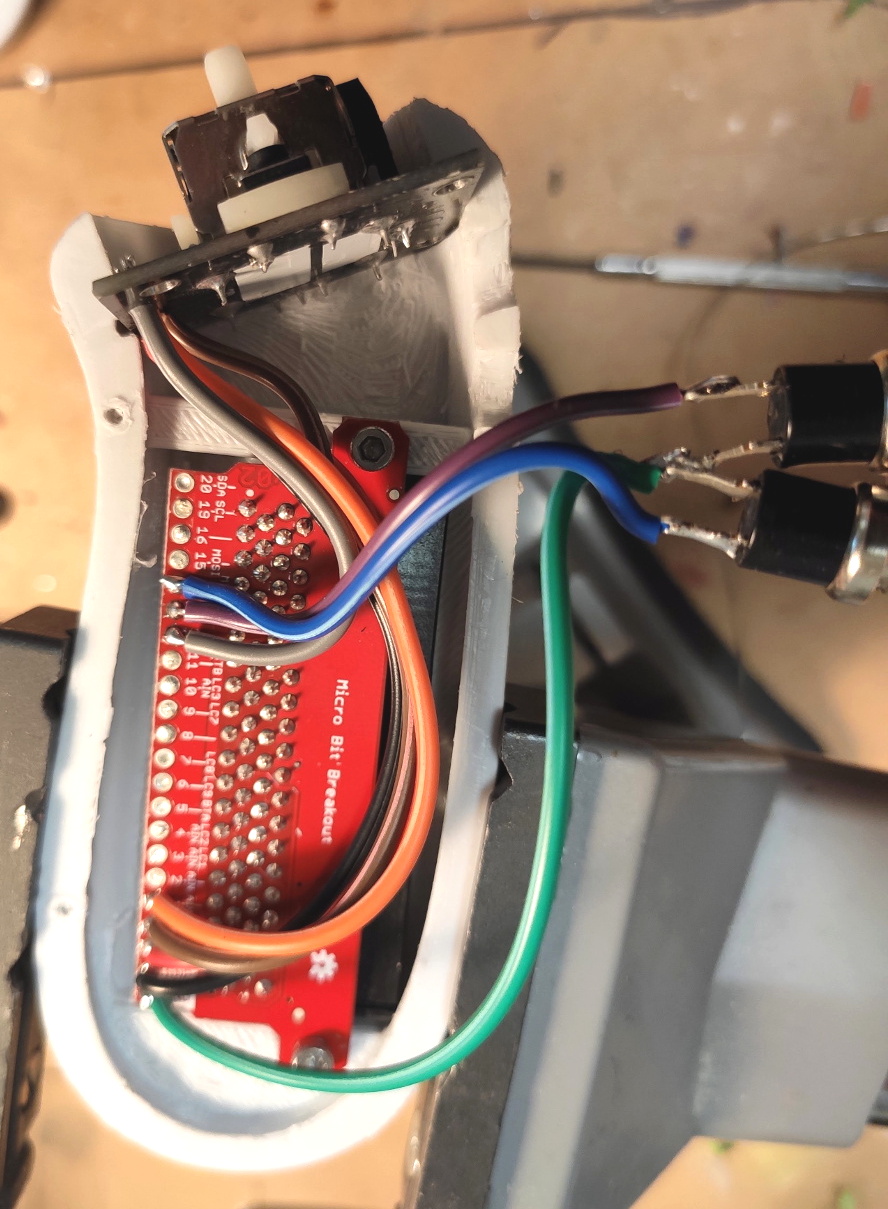
In a particularly nice touch, [Paul] has built his controller around a Micro:Bit breakout board from SparkFun that allows you to plug the microcontroller in via its edge connector. This means you can pull the board out and still use it in other projects. The only other connection to the controller leads to the battery, which uses a two pin JST-PH plug that can easily be removed.

Thanks to this breakout board, the internal wiring is exceptionally simple. The joystick (the type used in a PS2 controller) and the buttons are simply soldered directly to pins on the breakout board. No passives required, just a few short lengths of flexible wiring to snake through the printed enclosure.

The Thingiverse page only has the STLs for the two halves of the controller, and no source code for the Micro:Bit itself. But it shouldn’t be terribly hard to piece together the basic functionality with example code that’s floating around out there. Especially since you can run Python on them now. Of course, you could also add Bluetooth to the original Wii version if you’re not looking to reinvent the wheel nunchuck.

Trap Chess Keeps Players On Their Toes

Chess is a game that originated so long ago, we don’t have concrete information as to its origins. Rules have changed throughout history, and many continue to study and experiment with the game. [Yann Guidon] has a neighbour, [Bob], who is just one such enthusiast, and together, they built a working Trap Chess game.

What is trap chess, you may ask? It’s a variant of chess where pieces randomly fall into traps at the change of turns. This is easy to simulate in a digital game, but that wasn’t enough for [Bob]. Enlisting [Yann] for his electrical skills, the duo built a board with ten trapdoors built in. Whenever the timer is hit, there’s a chance a trapdoor can open, removing a piece from the game.

The build relies on a PIC16F818, an 8-bit microcontroller from Microchip. This helps interface between the timer and servos and generally runs the whole show. The board is built into a table, and we’re impressed by the fit and finish of the final product. From a distance, it’s difficult to notice anything is awry, and it would make a great prank when playing with an unsuspecting mark. Just make sure there’s no money on the table first.

We’ve seen other impressive chess hacks before — like this board that can move the pieces for you. Video after the break. Continue reading “Trap Chess Keeps Players On Their Toes”

Teardown: VeriFone MX 925CTLS Payment Terminal

Regular Hackaday readers may recall that a little less than a year ago, I had the opportunity to explore a shuttered Toys “R” Us before the new owners gutted the building. Despite playing host to the customary fixture liquidation sale that takes place during the last death throes of such an establishment, this particular location was notable because of how much stuff was left behind. It was now the responsibility of the new owners to deal with all the detritus of a failed retail giant, from the security camera DVRs and point of sale systems to the boxes of employee medical records tucked away in a back office.

Clipping from New York Post. September 24th, 2018.

The resulting article and accompanying YouTube video were quite popular, and the revelation that employee information including copies of social security cards and driver’s licenses were left behind even secured Hackaday and yours truly a mention in the New York Post. As a result of the media attention, it was revealed that the management teams of several other stores were similarly derelict in their duty to properly dispose of Toys “R” Us equipment and documents.

Ironically, I too have been somewhat derelict in my duty to the good readers of Hackaday. I liberated several carloads worth of equipment from Geoffrey’s fallen castle with every intention of doing a series of teardowns on them, but it’s been nine months and I’ve got nothing to show for it. You could have a baby in that amount of time. Which, incidentally, I did. Perhaps that accounts for the reshuffling of priorities, but I don’t want to make excuses. You deserve better than that.

So without further ado, I present the first piece of hardware from my Toys “R” Us expedition: the VeriFone MX 925CTLS. This is a fairly modern payment terminal with all the bells and whistles you’d expect, such as support for NFC and EMV chip cards. There’s a good chance that you’ve seen one of these, or at least something very similar, while checking out at a retail chain. So if you’ve ever wondered what’s inside that machine that was swallowing up your debit card, let’s find out.

Continue reading “Teardown: VeriFone MX 925CTLS Payment Terminal”

Manufacturing In China Hack Chat

Join us on Wednesday 10 July 2019 at noon Pacific for the Manufacturing in China Hack Chat with Jesse Vincent!

It started out where many great stories start: as a procrastination project. Open source developer Jesse Vincent decided that messing around with a new keyboard design was a better thing to spend time on than whatever he was supposed to be doing, and thus Keyboardio was born.

Their heirloom-grade keyboards of solid maple and with sculpted keycaps are unique to the eye and to the touch, but that’s only part of the Keyboardio story. Jesse has moved further down the road of turning a project into a product and a product into a company than most of us have, and he’s got some insights about what it takes. Particularly in climbing the learning curve of off-shore manufacturing, which will be the focus of this Hack Chat. Join us to learn all about the perils, pitfalls, and potential rewards of getting your Next Big Idea manufactured in China.

join-hack-chatOur Hack Chats are live community events in the Hackaday.io Hack Chat group messaging. This week we’ll be sitting down on Wednesday July 10 at 12:00 PM Pacific time. If time zones have got you down, we have a handy time zone converter.

Click that speech bubble to the right, and you’ll be taken directly to the Hack Chat group on Hackaday.io. You don’t have to wait until Wednesday; join whenever you want and you can see what the community is talking about.

BGA Hand Soldering Uses Tombstone Resistor Technique, Demands Surgical Precision

Most Hackaday readers will be a pretty dab hand with a soldering iron. We can assemble surface-mount boards, SOICs and TSSOPs are a doddle, 0402s we take in our stride, and we laugh in the face of 0201s. But a Twitter thread from [Greg Davill] will probably leave all but the most hardcore proponents of the art floundering, as he hand-wires a tiny FPGA in a BGA package to the back of a miniature dot-matrix LED display module.

Resistors soldered on-end, awaiting wires to connect to the BGA microcontroller

As far as we can see the module must once have had its own microcontroller which has been removed. We’d guess it was under an epoxy blob but can’t be sure, meanwhile its pads are left exposed. The Lattice LP1k49 fits neatly into the space, but a web of tiny wires are required to connect it to those pads. First, [Greg] populates the pads with a set of “tombstoned” tiny (we’re guessing 0R) resistors, then wires them to the pads with 30μm wire. He describes a moment of confusion as he attempts to tin a stray hair, which burns rather than accepting the solder.

The result is a working display with a new brain, which surprises even him. We’ve seen more than one BGA wiring over the years, but rarely anything at this scale.

It’s worth mentioning that [Greg] was behind the FLIR frame grabber that was a runner-up in last year’s Hackaday Prize. We admire the photos he’s able to get of all of his projects and aspire to reach this level with our own. Take this as inspiration and then check out the Hackaday contest for Beautiful Hardware images happening right now.

Thanks [Sophi] for the tip.

Five Years Of The Raspberry Pi Model B+ Form Factor, What Has It Taught Us?

With all the hoopla surrounding the recent launch of the new Raspberry Pi 4, it’s easy to overlook another event in the Pi calendar. July will see the fifth anniversary of the launch of the Raspberry Pi Model B+ that ushered in a revised form factor. It’s familiar to us now, but at the time it was a huge change to a 40-pin expansion connector, four mounting holes, no composite video socket, and more carefully arranged interface connectors.

As the Pi 4 with its dual mini-HDMI connectors and reversed Ethernet and USB positions marks the first significant deviation from the standard set by the B+ and its successors, it’s worth taking a look at the success of the form factor and its wider impact. Is it still something that the Raspberry Pi designers can take in a new direction, or like so many standards before it has it passed from its originator to the collective ownership of the community of manufacturers that support it?

Continue reading “Five Years Of The Raspberry Pi Model B+ Form Factor, What Has It Taught Us?”

Enclosure Needs Labels? Make The 3D Printer Do It

Tool changing on 3D printers is hot right now, and it’s going to be really interesting to see the ideas that reliable tool changing lets people try out. One such idea is having the 3D printer use a marker to label the enclosure and buttons it just 3D printed.

The 3D print shown is an enclosure for a Pocket Operator by Teenage Engineering. [Marc Schömann] made the enclosure on Blackbox, a tool-changing 3D printer that he designed. The video below shows a pen holder drawing the labels directly onto the printed object. Pocket Operators may look like calculators, but they are clever electronic musical devices capable of producing real music. (The best way to learn about what they are and what they can do is to watch a tutorial video or two.)

Continue reading “Enclosure Needs Labels? Make The 3D Printer Do It”