One of the cringier aspects of AI as we know it today has been the proliferation of deepfake technology to make nude photos of anyone you want. What if you took away the abstraction and put the faker and subject in the same space? That’s the question the NUCA camera was designed to explore. [via 404 Media]
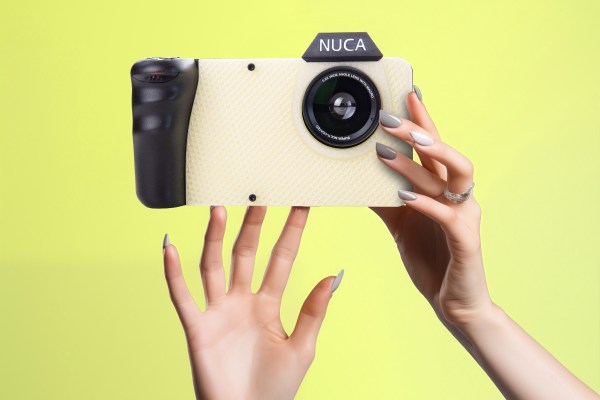
[Mathias Vef] and [Benedikt Groß] designed the NUCA camera “with the intention of critiquing the current trajectory of AI image generation.” The camera itself is a fairly unassuming device, a 3D-printed digital camera (19.5 × 6 × 1.5 cm) with a 37 mm lens. When the camera shutter button is pressed, a nude image is generated of the subject.
The final image is generated using a mixture of the picture taken of the subject, pose data, and facial landmarks. The photo is run through a classifier which identifies features such as age, gender, body type, etc. and then uses those to generate a text prompt for Stable Diffusion. The original face of the subject is then stitched onto the nude image and aligned with the estimated pose. Many of the sample images on the project’s website show the bias toward certain beauty ideals from AI datasets.
Looking for more ways to use AI with cameras? How about this one that uses GPS to imagine a scene instead. Prefer to keep AI out of your endeavors to invade personal space? How about building your own TSA body scanner?
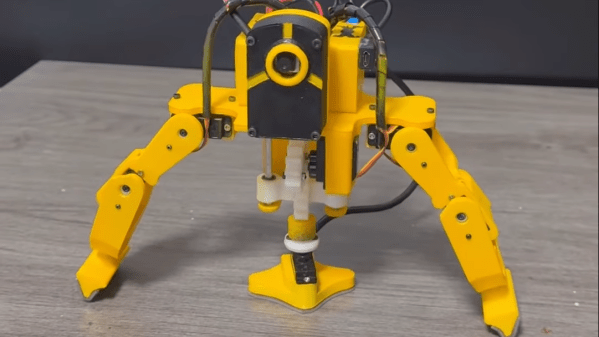
[hannu_hell] created Dodge as a “novel design of tripod.” It’s a small robotic device quite unlike anything else we’ve seen of late. It’s intended to be a self-mobile camera platform that can move itself around to capture footage as needed.
Dodge is essentially a two-legged robot with a large flat “foot” in the center. When stationary, it rests on this flat foot. When it needs to move, it can raise this center foot and rest on its two outside legs. If Dodge needs to move, it can crab back and forth in a line with these two legs. If it wants to turn, it can return to resting on its center foot, and pivot about its central axis. It can thus rotate itself and use its two outer legs to move further as needed.
Dodge does all this while carrying an ESP32 Cam module. The idea is that it’s a small mobile tripod platform with a live camera feed. It reminds us of various small monitoring robots from cartoons and anime.
Ultimately, it’s an interesting take on robot locomotion. Rather than walking with two legs or four legs and dynamic stability, it takes full advantage of static stability instead.
The resulting cake not only looks like a camera it also hasa camera inside. When the camera detects people in its field of view, a NeoPixel is lit up in green to signal it’s spotted something. If you so desire, you can then hit a button and the cakera (cake-camera, keep up) will take your photo.
The cake itself looks to be a sponge of some sort with fondant used to create the camera housing and a surround for the preview screen. Inside the cake is a standard photo-booth style setup built with a Raspberry Pi. The Pi is responsible for taking photos with a USB cam. It does this when instructed via an arcade button acting as the shutter release. After taking a photo, the Pi prints out a receipt with an Adafruit thermal printer. This provides the user a number they can use to receive their photo afterward.
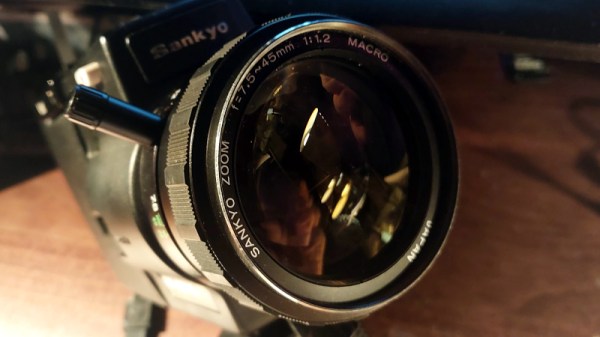
The Raspberry Pi has provided experimenters with many channels of enquiry, and for me perhaps the furthest into uncharted waters it has led me has come through its camera interface. At a superficial level I can plug in one of the ready-made modules with a built-in tiny lens, but as I experiment with the naked sensors of the HD module and a deconstructed Chinese miniature sensor it’s taken me further into camera design than I’d expected.
I’m using them with extra lenses to make full-frame captures of vintage film cameras, in the first instance 8 mm movie cameras but as I experiment more, even 35 mm still cameras. As I’m now channeling the light-gathering ability of a relatively huge area of 1970s glass into a tiny sensor designed for a miniature lens, I’m discovering that maybe too much light is not a good thing. At this point instead of winging it I found it was maybe a good idea to learn a bit about lenses, and that’s how I started to understand what those F-numbers mean.
More Than The Ring You Twiddle To Get The Exposure Right
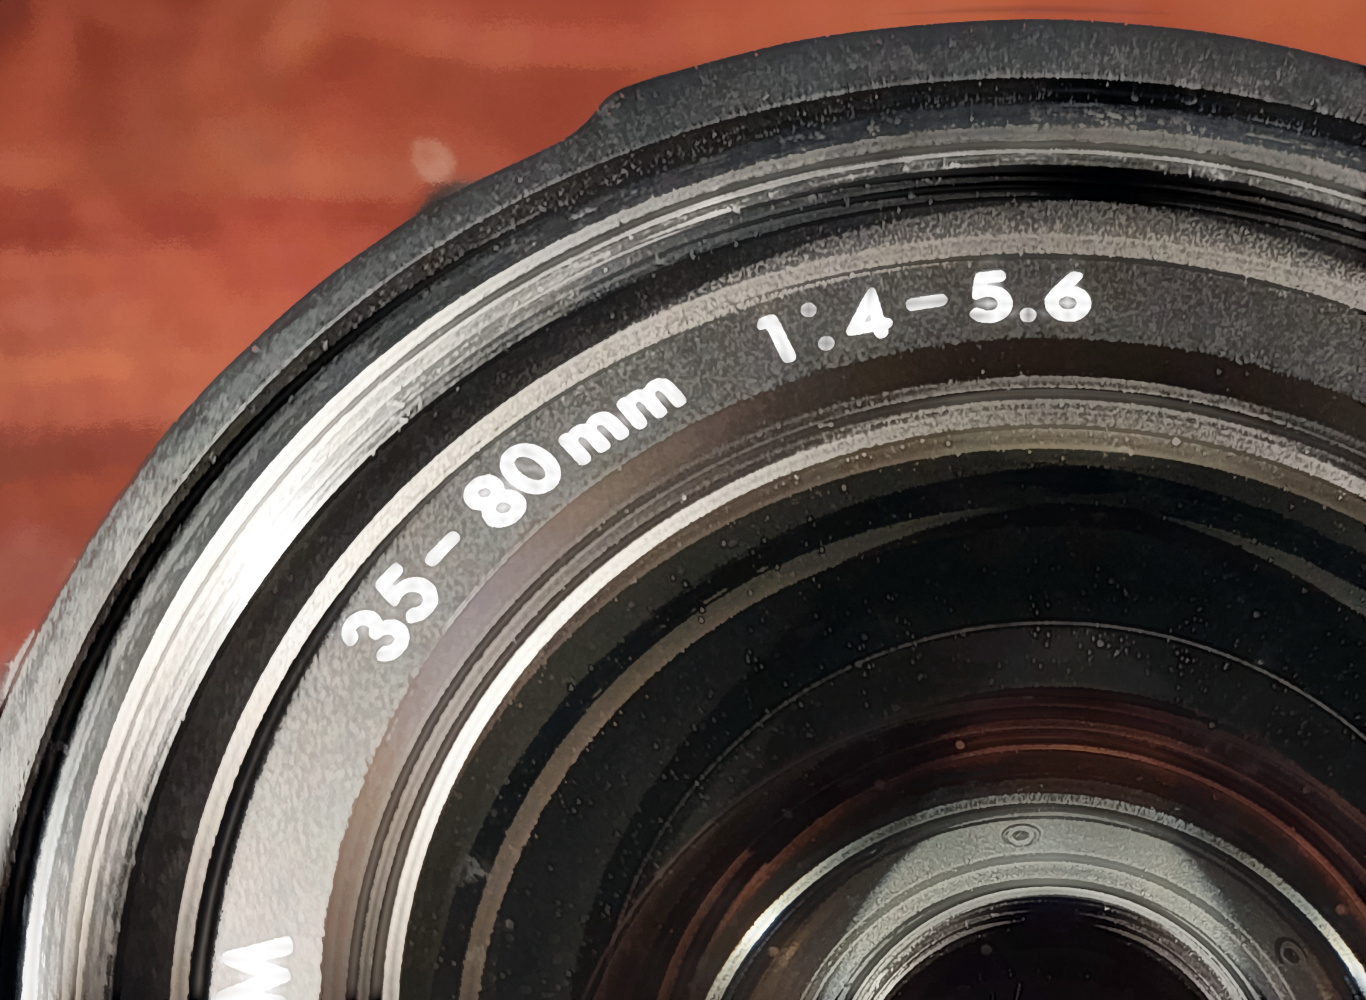
The F-number range of a 1990s Sigma consumer-grade zoom lens.
I’m not a photographer, instead I’m an engineer who likes tinkering with cameras and who takes photographs as part of her work but using the camera as a tool. Thus the f-stop ring has always been for me simply the thing you twiddle when you want to bring the exposure into range, and which has an effect on depth of field.
The numbers were always just numbers, until suddenly I had to understand them for my projects to work. So the first number I had to learn about was the F-number of the lens itself. It’s usually printed on the front next to the focal length and expressed as a ratio of the diameter of the light entrance to the lens focal length. Looking around my bench I see numbers ranging from 1:1 for a Canon 8mm camera to 1:2.8 for a 1950s Braun Paxette 35 mm camera, but it seems that around 1:1.2 is where most 8 mm cameras sit and 1:2 is around where I’m seeing 35 mm kit lenses. The F-stop ring controls an adjustable aperture, and the numbers correspond to that ratio. So that 1:2 kit lens is only 1:2 at the F2 setting, and becomes 1:16 at the F16 setting.
Who’d have thought that $30 doorbell cameras would end up being security liabilities? That’s the somewhat obvious conclusion reached by Consumer Reports after looking at some entry-level doorbell cameras available through the usual outfits and finding glaring security gaps which are totally not intentional in any way.
All these cameras appear to be the same basic hardware inside different enclosures, most supporting the same mobile app. Our favorite “exploit” for these cameras is the ability to put them into a pairing mode with the app, sometimes by pressing a public-facing button. Slightly more technically challenging would be accessing images from the app using the camera’s serial number, or finding file names being passed in plain text while sniffing network traffic. And that’s just the problems CR identified; who knows what else lurks under the covers? Some retailers have stopped offering these things, others have yet to, so buyer beware.
Speaking of our techno-dystopian surveillance state, if you’ve had it with the frustrations and expense of printers, has Hewlett-Packard got a deal for you. They want you to never own a printer again, preferring that you rent it from them instead. Their “All-In Plan” launched this week, which for $6.99 a month will set up up with an HP Envy inkjet printer, ink deliveries, and 24/7 tech support. It doesn’t appear that paper is included in the deal, so you’re on your own for that, but fear not — you won’t go through much since the entry-level plan only allows 20 prints per month. Plans scale up to 700 prints per month from an OfficeJet Pro for the low, low price of $36. The kicker, of course, is that your their printer has to be connected to the Internet, and HP can pretty much brick the thing anytime they want to. The terms of service also explicitly state that they’ll be sending your information to advertising partners, so that’ll be fun. This scheme hearkens back to the old pre-breakup days of AT&T, where you rented your phone from the phone company. That model made a lot more sense when the phone (probably) wasn’t listening in on everything you do. This just seems like asking for trouble.
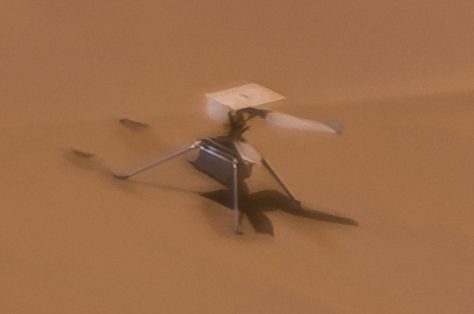
It’s been a while since Ingenuity‘s final rough landing on Mars permanently grounded the overachieving helicopter, long enough that it’s time for the post-mortem analyses to begin. The first photographic evidence we had was a shadowgram from one of the helicopter’s navigational cameras, showing damage to at least one of the rotor tips, presumably from contact with the ground. Then we were treated to a long-distance shot from Ingenuity‘s rover buddy Perseverance, which trained its MASTCAM instruments on the crash zone and gave us a wide view of its lonely resting place.
Now, geovisual design student [Simeon Schmauβ] has taken long shots made with the rover’s SuperCam instrument and processed them into amazingly detailed closeups, which show just how extensive the damage really is. One rotor blade sheared clean off on contact, flying 15 meters before gouging a hole in the regolith. Another blade looks to be about half gone, while the remaining two blades show the damaged tips we’ve already seen. That the helicopter is still on its feet given the obvious violence of the crash is amazing, as well as an incredible piece of luck, since it means the craft’s solar panel is pointing in roughly the right direction to keep it powered up.
When all else fails, blame it on the cloud? It seems like that’s the script for just about every outage that makes the news lately, like the Wyze camera outage this week that kept people from seeing feeds from their cameras for several hours. The outage went so far that some users’ cameras weren’t even showing up in the Wyze app, and there were even reports that some people were seeing thumbnails for cameras they don’t own. That’s troubling, of course, and Wyze seems to have taken action on that quickly by disabling a tab on the app that would potentially have let people tap into camera feeds they had no business seeing. Still, it looks like curiosity got the better of some users, with 1,500 tapping through when notified of motion events and seeing other people walking around inside unknown houses. The problem was resolved quickly, with blame laid on an “AWS partner” even though there were no known AWS issues at the time of the outage. We’ve said it before and we’ll say it again: security cameras, especially mission-critical ones, have no business being connected with anything but Ethernet or coax, and exposing them to the cloud is a really, really bad idea.
The aurora borealis (and its southern equivalent, the aurora australis) is a fleeting and somewhat rare phenomenon that produces vivid curtains of color in the sky at extreme latitudes. It’s a common tourist activity to travel to areas where the aurora is more prevalent in order to catch a glimpse of it. The best opportunities are in the winter though, and since most people don’t want to spend hours outside on a cold night night in high latitudes, an all-sky camera like this one from [Frank] can help notify its users when an aurora is happening.
Because of the extreme temperatures involved, this is a little more involved than simply pointing a camera at the sky and hoping for the best. The enclosure and all electronics need to be able to withstand -50°C and operate at at least -30. For the enclosure, [Frank] is going with PVC tubing with a clear dome glued into a top fits to the end of the pipe, providing a water-resistant enclosure. A Raspberry Pi with a wide-angle lens camera sits on a 3D printed carriage so it can easily slide inside. The electronics use power-over-ethernet (PoE) rather than a battery due to the temperature extremes, which conveniently provides networking capabilities for viewing the images.
This is only part one of this build — in part two [Frank] is planning to build a system which can use this camera assembly to detect the aurora automatically and send out notifications when it sees it. Watching the night sky from the comfort of a warm house or sauna isn’t the only reason for putting an all-sky camera to use, either. They can also be used to observe meteors as they fall and then triangulate the position of the meteorites on the ground.