All About USB-C: Connector Mechanics

There’s two cases when hackers have to think about USB-C connector mechanics. The first is when a USB-C connector physically breaks, and the second is when we need to put a connector on our own board. Let’s go through both of them.

Clean That Connector

What if a socket on your phone or laptop fails? First off, it could be due to dust or debris. There’s swabs you can buy to clean a USB-C connector; perhaps adding some isopropyl alcohol or other cleaning-suitable liquids, you can get to a “good enough” state. You can also reflow pins on your connector, equipped with hot air or a sharp soldering iron tip, as well as some flux – when it comes to mechanical failures, this tends to remedy them, even for a short period of time.

How could a connector fail, exactly? Well, one of the pins could break off inside the plastic, or just get too dirty to make contact. Consider a device with a USB-C charging and data socket, with USB 2.0 but without high-speed pairs – which is to say, sadly, the majority of the phones out there. Try plugging it into a USB-A charger using a USB-A to USB-C cable. Does it charge, even if slowly? Then, your VBUS pins are okay.

Plug it into a Type-C charger using a Type-C cable, and now the CC pins are involved. Does it charge in both orientations? Then both of your CC pins are okay. Does it charge in only one orientation? One of the CC pins has to be busted. Then, you can check USB 2.0 pins, used for data transfer and legacy charging. Plug the phone into a computer using a USB-A to USB-C cable. Does it enumerate as a device? Does it enumerate in both orientations? If not, you might want to clean D- and D+ pins specifically, maybe even both sets. Continue reading “All About USB-C: Connector Mechanics”

All You’ve Ever Wanted To Know About Compilers

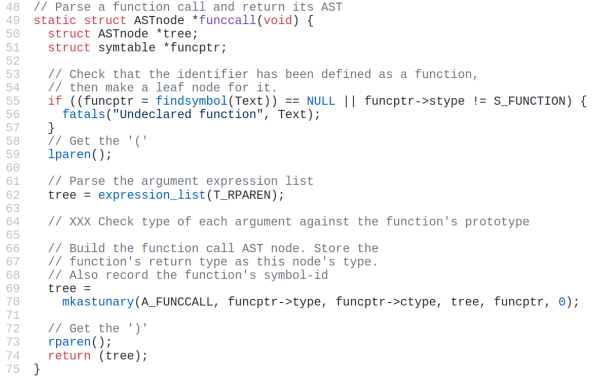
They say that in order to understand recursion, you must first understand recursion. Once you master that concept, you might decide that it’s time to write your own compiler that can compile itself as a fun side project. According to [Warren] aka [DoctorWkt], who documented every step of writing this C compiler from scratch, a true compiler will be able to do that.

Some of the goals for the project included self-compiling, focusing on a real hardware platform, practicality, and simplicity. [Warren] outlines a lot of the theory of compilers as well, including all the lexical, grammar, and semantic analysis and then the final translation into assembly language, but really focuses on making this compiler one for practical use rather than just a theoretical implementation. He focuses on Intel x86-64 and 32-bit ARM platforms too, which are widely available.

This project is a long read and very thoroughly documented at around 100,000 words, so if you’ve ever been interested in compilers this is a great place to start. There are a lot of other great compiler tools floating around too, like the Compiler Explorer which shows you generated code as you write in a higher level language.

[via Hackaday.io]

Four Years Of Learning ESP8266 Development Went Into This Guide

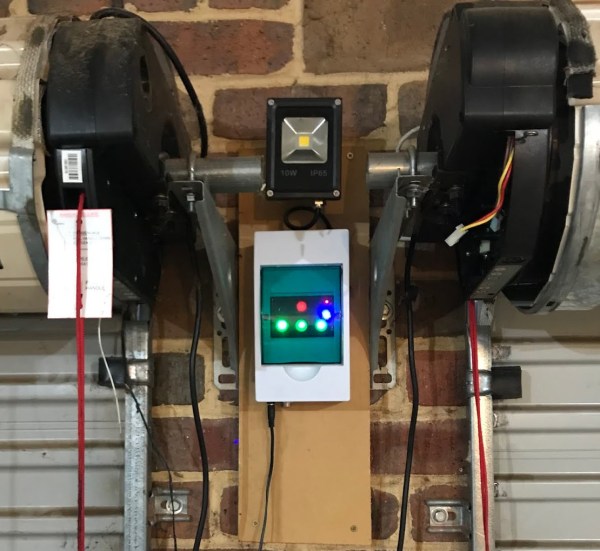
The ESP8266 is a great processor for a lot of projects needing a small microcontroller and Wi-Fi, all for a reasonable price and in some pretty small form factors. [Simon] used one to build a garage door opener. This project isn’t really about his garage door opener based on a cheap WiFi-enabled chip, though. It’s about the four year process he went through to learn how to develop on these chips, and luckily he wrote a guide that anyone can use so that we don’t make the same mistakes he did.

The guide starts by suggesting which specific products are the easiest to use, and then moves on to some “best practices” for using these devices (with which we can’t argue much), before going through some example code. The most valuable parts of this guide especially for anyone starting out with these chips are the section which details how to get the web server up and running, and the best practices for developing HTML code for the tiny device (hint: develop somewhere else).

[Simon] also makes extensive use of the Chrome developers tools when building the HTML for the ESP. This is a handy trick even outside of ESP8266 development which might be useful for other tasks as well. Even though most of the guide won’t be new to anyone with experience with these boards, there are a few gems within it like this one that might help in other unrelated projects. It’s a good read and goes into a lot of detail about more than just the ESP chips. If you just want to open your garage door, though, you have lots of options.

Blacksmithing For The Uninitiated: Curves And Rings

You know the funny looking side of the anvil? That’s where the best curves come from. It’s called the anvil horn and is the blacksmith’s friend when bending steel and shaping it into curves.

The principle of bending a piece of steel stock is very easy to understand. Heat it up to temperature, and hammer it over a curved profile to the intended shape. A gentler touch is required than when you are shaping metal. That’s because the intent is to bend the metal rather than deform. Let’s take a look!

Continue reading “Blacksmithing For The Uninitiated: Curves And Rings”

Blacksmithing For The Uninitiated: Your First Time At The Anvil

For the past few months we’ve been running this series of Blacksmithing For The Uninitiated posts, exploring the art of forge work for a novice. It’s based upon my experience growing up around a working blacksmith’s business and becoming an enthusiastic if somewhat inexpert smith, and so far we’ve spent our time looking at the equipment you might expect to need were you embarking on your own blacksmith work. Having assembled by now a basic forge of our own it’s now time to fire it up and take to the anvil for our first bit of smithing.

Lighting a forge is easy enough. Some people do it with a gas torch, but I break a piece of firewood into sticks using a hammer with the fuller set in the hardy hole on the anvil as an impromptu splitter. Making a small fire by lighting some paper under my pile of sticks placed on the hearth next to the tuyere I start the blower and then pile coke on top of the resulting conflagration. After about ten minutes I will have a satisfying roar and a heap of glowing coals, and as they burn there will be some slag collecting in the bottom of the fire that I will eventually need to rake out. Continue reading “Blacksmithing For The Uninitiated: Your First Time At The Anvil”

Casting Metal Parts And Silicone Molds From 3D Prints

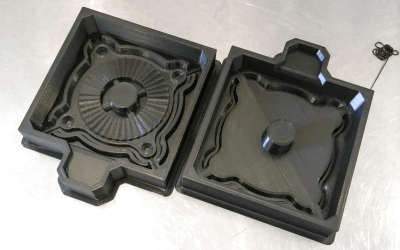
The invention of the relatively affordable 3D printer for home use has helped bring methods used to produce parts for prototypes, samples, and even manufacturing, closer to designers. This tutorial on how to cast metal parts from 3D printed silicone molds is a perfect example of how useful a 3D printer can be when you are looking to make a custom and durable metal part at home.

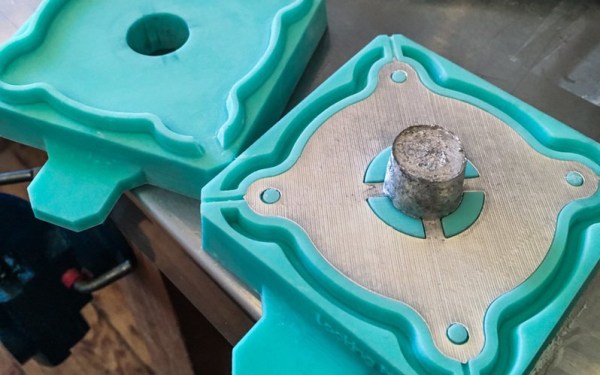
After 3D printing a mold design using an Ultimaker 2 [Matt Borgatti] casts the mold using Smooth-On Mold Star 15 that can withstand heat up to 450 °F (232 °C), which he points out is ideal for the low-temp metal casting alloy tin-bismuth comprised of 58% Bismuth and 42% Tin with a melting point of 281 °F.

You may have heard of molds created from 3D printed parts before, but what makes this tutorial great is that the author, [Matt Borgatti], really sets you up to be successful. He offers up plenty of insights including mold-making techniques and terminology like why you would need a well and runners designed as part of your mold when casting with metal.

You can either reproduce his designs or use the tutorial to create your own which makes it a good start for beginners as well as another method to file away for people who already have experience 3D printing molds. This post is also really a twofer. Not only do you get detailed instructions for the method but [Matt Borgatti] uses his casted metal part for a flat-pack camera arm he designed to document projects with which you can also build using his files found on Thingiverse.

To create molds for precision parts and to learn more about using a 3D printer as a tool in the casting process, check out this method for creating higher resolution molds with a resin printer.

Continue reading “Casting Metal Parts And Silicone Molds From 3D Prints”

Quantum Searching In Your Browser

If you’ve made it through the last two posts on quantum computing (QC), then you’ve seen the Quirk simulator, a little of IBM’s web-based offering, and how entanglement and superposition can do strange and possibly wonderful things. However, the superdense encoding I showed you didn’t really feel like a real computer algorithm. This time we will look at Grover’s algorithm which is often incorrectly billed as an “unstructured database search.” In reality, it is an algorithm for making a state — that is a set of qubits — match some desired state without simply setting the state.

By analogy, consider a web service where you guess a number. Most discussions of Grover’s algorithm will tell you that the service will only tell you if the number is correct or not. If the number was from 1 to 16, using traditional computing, you’d have to query the values one at a time to see which is correct. You might get lucky and hit the first time. Or it might take 16 times. With qubits you can get the same result in only four attempts. In fact, if you try more times, you might get the wrong answer. Of course, what you really get is an answer that is probably correct, because that how QC works.

Continue reading “Quantum Searching In Your Browser”