Ventbot fans with 3D printed brackets and control circuit board with ESP32 breakout and multicolored 3D printed cases

Ventbots Are Fans Of HVAC And Home Automation

[WJCarpenter] had a common HVAC problem; not all the rooms got to a comfortable temperature when the heater was working to warm up their home. As often happens with HVAC systems, the rooms farthest from the heat source and/or with less insulation needed a boost of heat in the winter and cooling in the summer too. While [WJCarpenter] is a self-reported software person, not a hardware person, you will enjoy going along on the journey to build some very capable vent boosters that require a mix of each.

Ventbot control circuit board with ESP32 breakout in a red 3D printed case

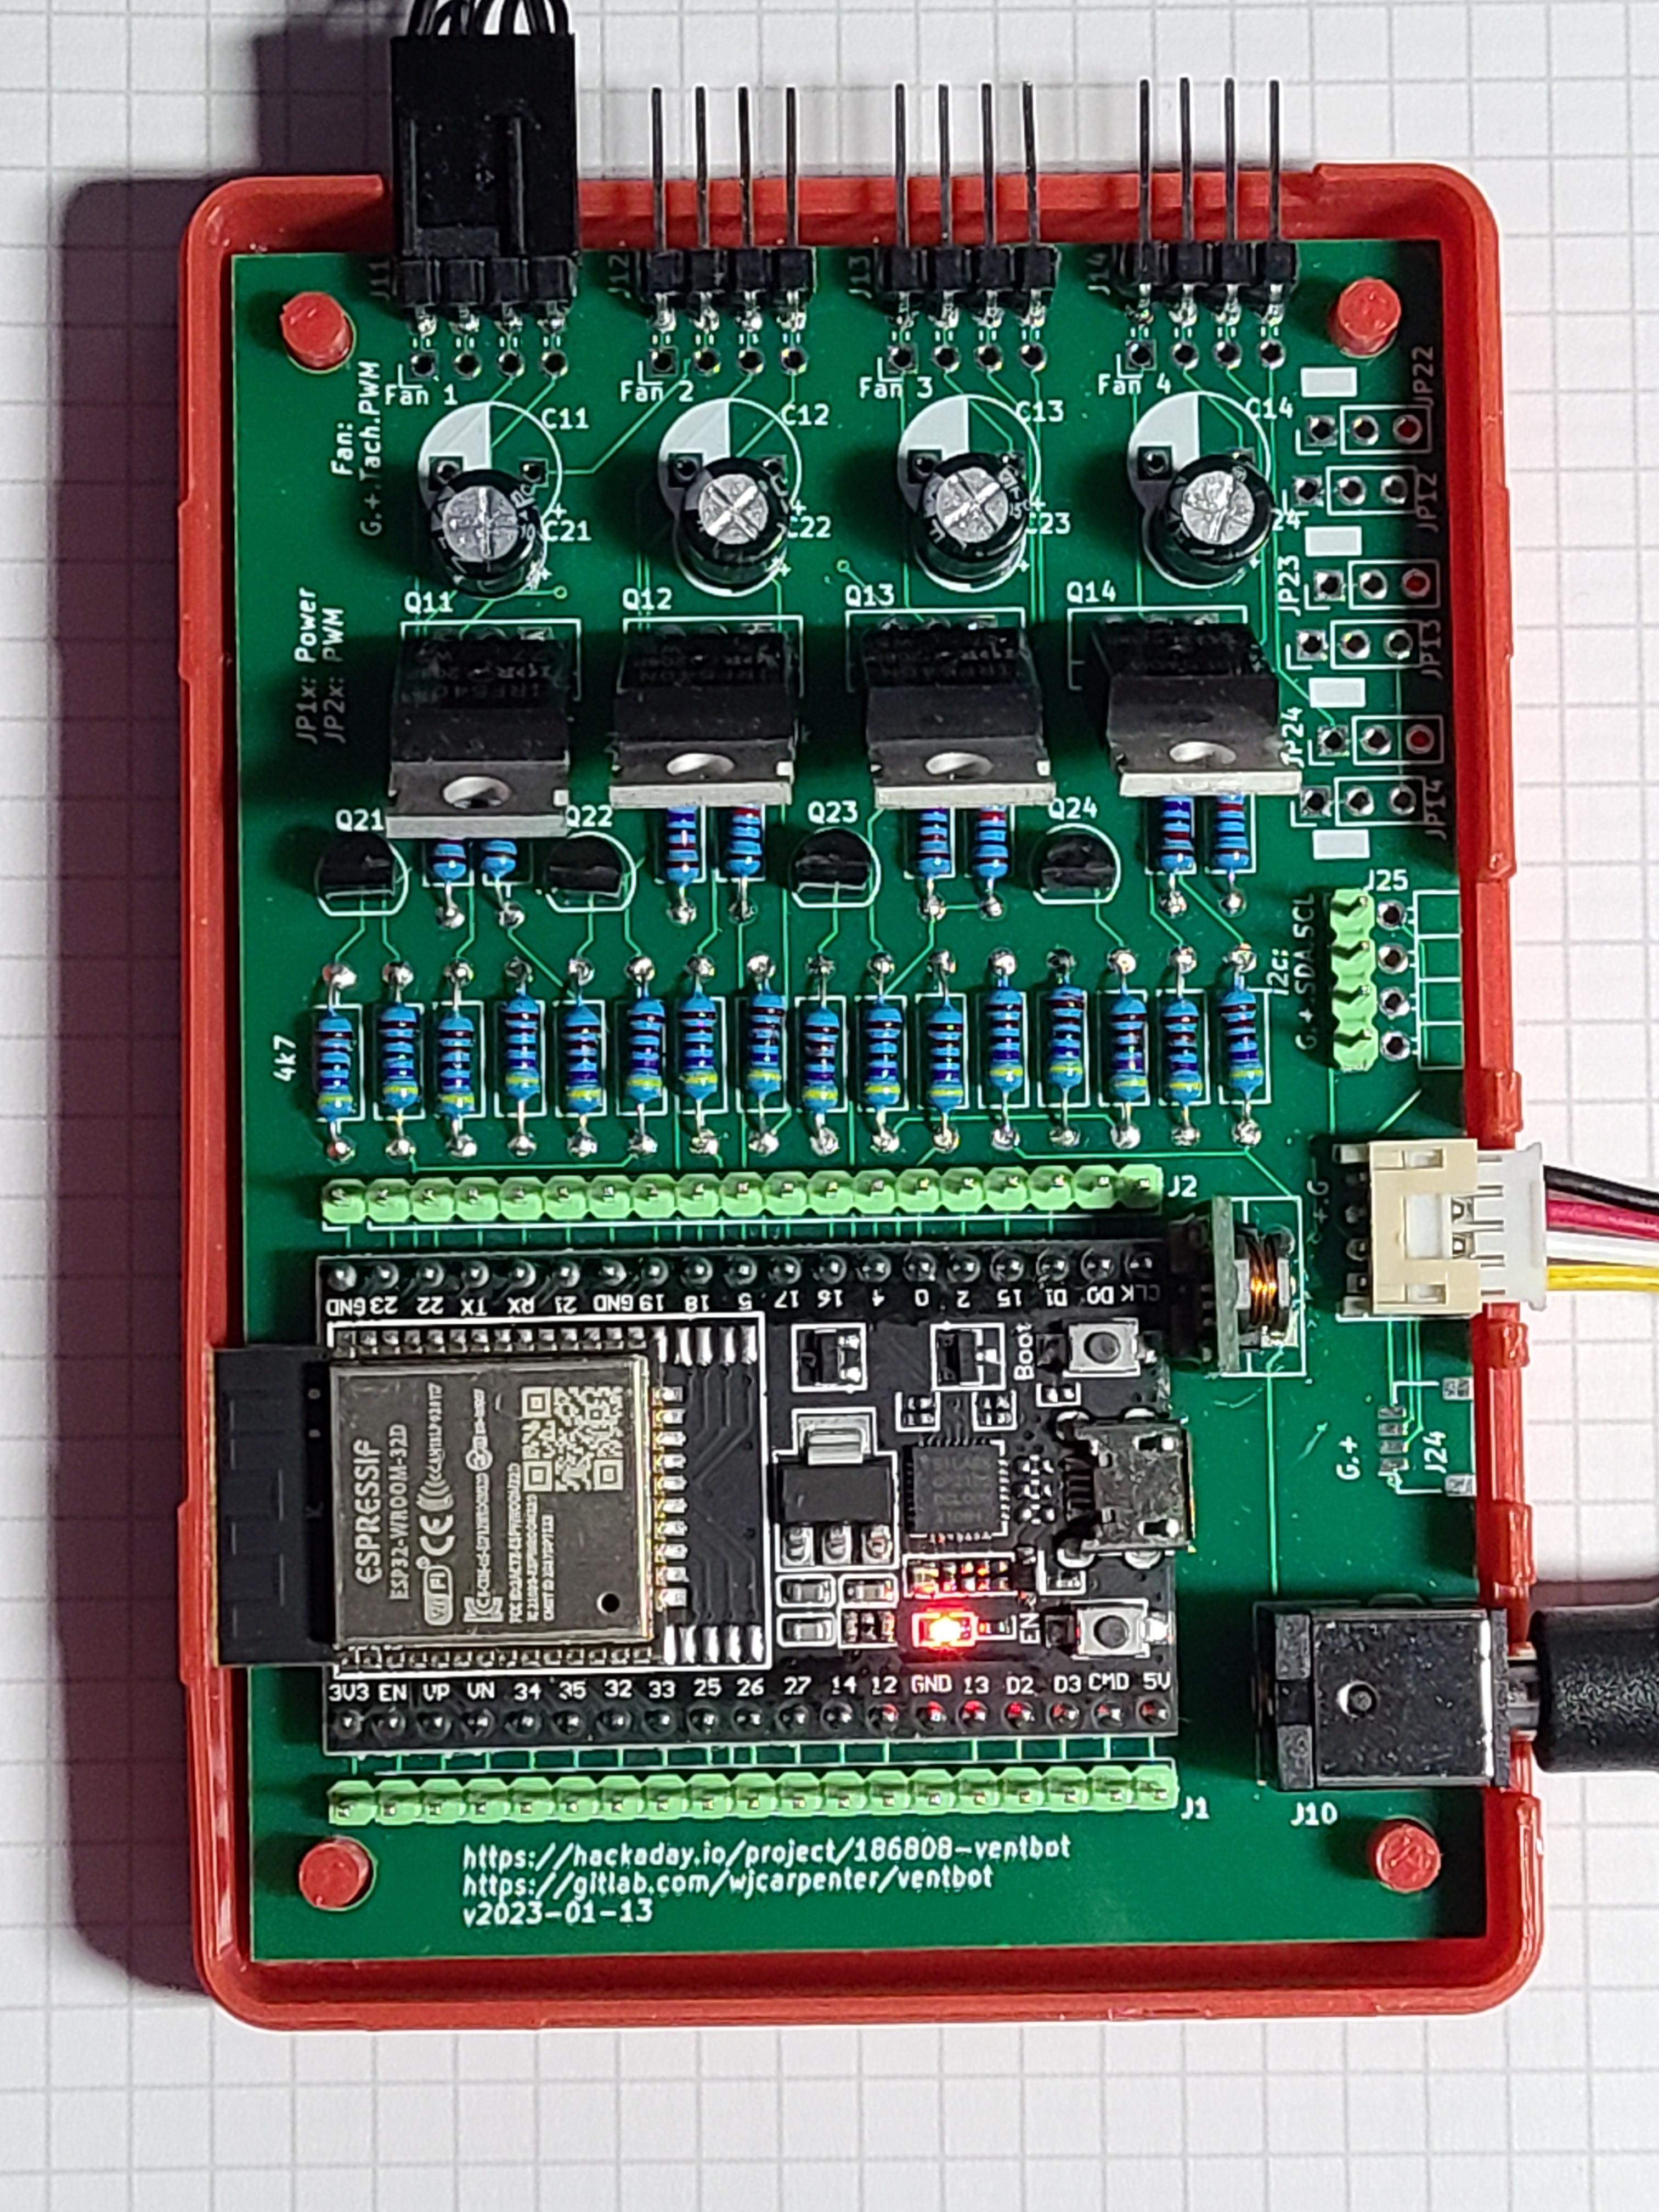
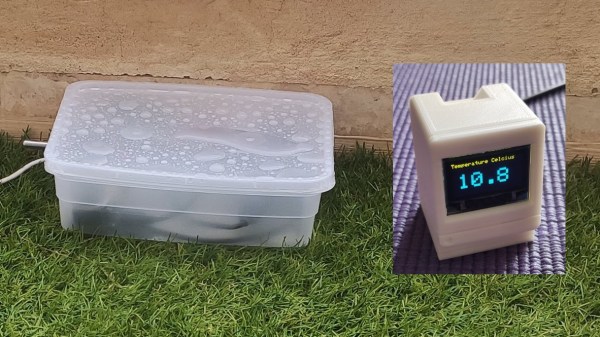
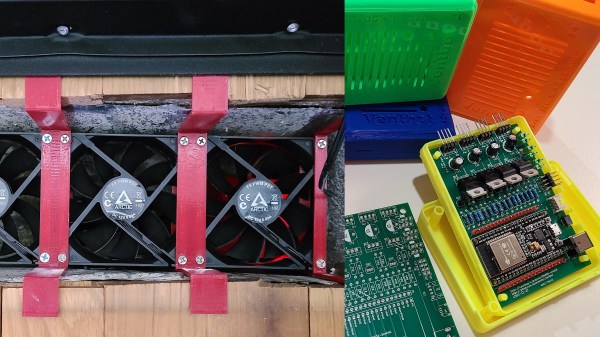
There’s a great build log on hackaday.io here, but for those who need more of a proper set of instructions, there’s a step-by-step guide that should allow even a beginner hardware hacker to complete the project over on Instructables. There you’ll find everything you need to build ESPHome controlled, 3D printed, PC fan powered vent boosters. While they can be integrated into Home Assistant, we were interested to learn that ESPHome allows these to run stand-alone too, each using its own temperature and pressure sensor.

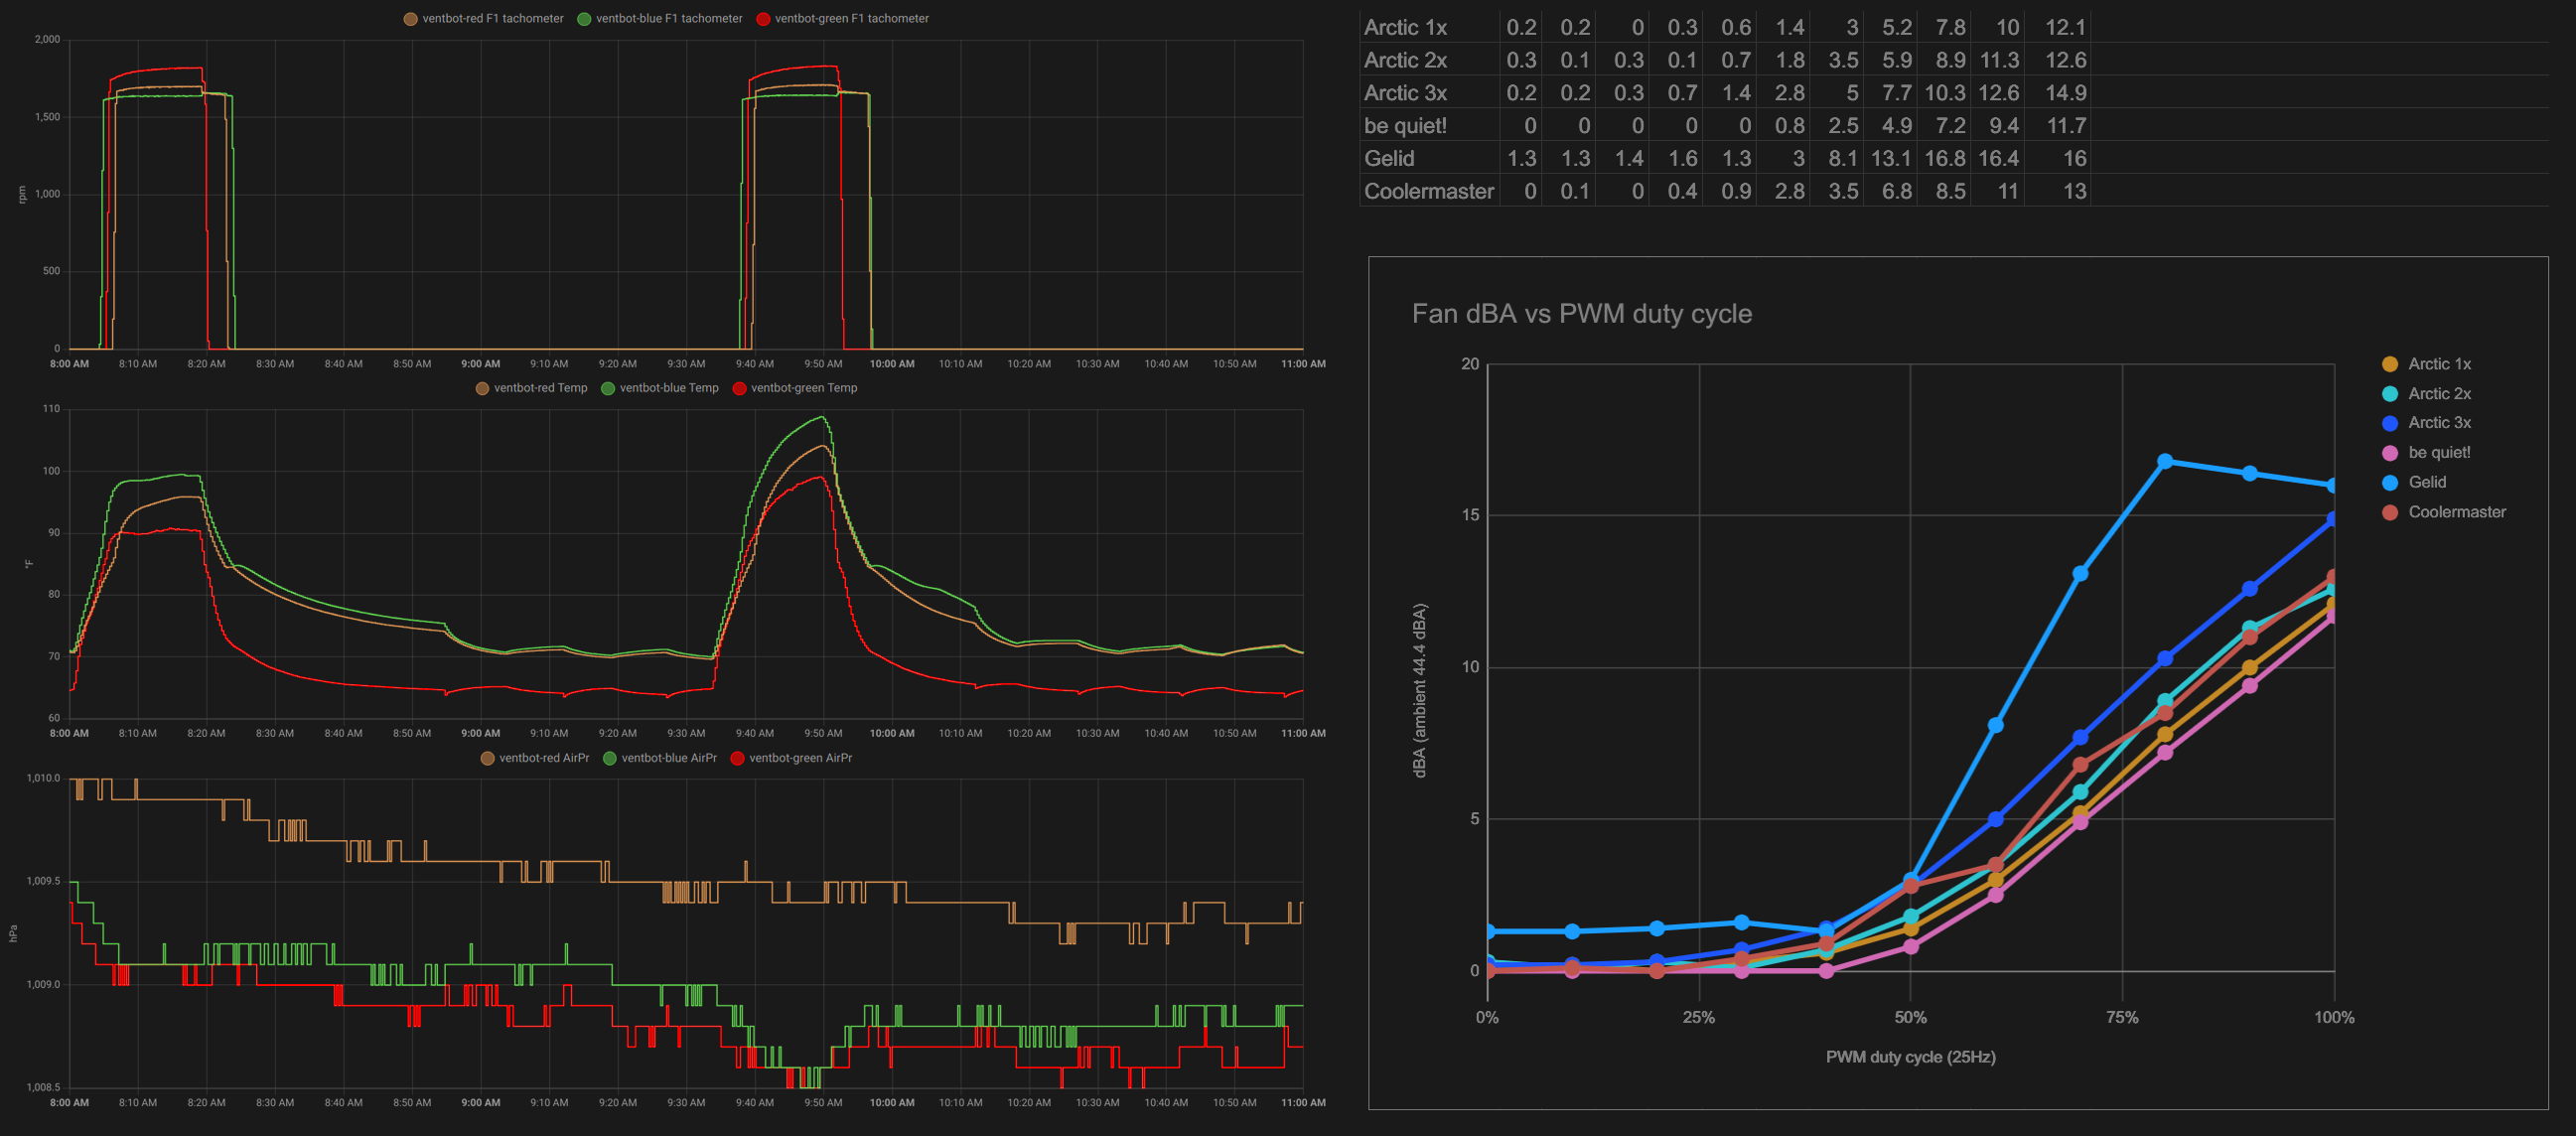
The many iterations of hardware and software show, resulting in thoughtful touches like a startup sequence that checks for several compatible temperature sensors and a board layout that accommodates different capacitor lead spacings. Along the way, [WJCarpenter] also graphed the noise level of different fans running at multiple speeds and the pressure sensor readings against the temperatures to see if they could be used as more reliable triggers for the fans. (spoiler, they weren’t) There are a bunch of other tips to find along the way, so we highly recommend going through all that [WJCarpenter] has shared if you want to build your own or just want some tips on how to convert a one-off project to something that a wider audience can adapt to their own needs.

Ventbot graphing of temperature, pressure, and fan noise

See a video after the break that doesn’t show the whole project but includes footage of the start-up sequence that tests each fan’s tachometer and the customizable ramp-up and ramp-down settings. Continue reading “Ventbots Are Fans Of HVAC And Home Automation”

A Temperature-Sensing Magnetic Stir Bar

Magnetic stirring bars are the coolest piece of equipment you’ll see in a high-school chemistry lab. They’re a great way for agitating a solution without having to stand there manually and do it yourself. [Applied Science] has now made a magnetic stir bar that features an integrated temperature sensor.

The device is essentially an RFID temperature sensor snuck inside a custom-made magnetic stir bar. The bar is paired with a smart hotplate base that displays the temperature readings. As a bonus, it can detect when the magnetic stir bar is out of place or not in sync, prompting it to slow down the spin motor until the stir bar is turning properly again.

The video also notes that the stir bar could be instrumented for even greater functionality. A Hall effect sensor could measure the magnetic slip angle of the stir bar, and provide useful readings of liquid viscosity. Alternatively, a pressure sensor in the stir bar could potentially measure liquid level based on hydrostatic pressure.

It’s a great quality-of-life improvement for regular lab work. It eliminates the need for bulky temperature probes that often get in the way. We’ve featured some interesting temperature sensors before, too.

Continue reading “A Temperature-Sensing Magnetic Stir Bar”

Frequency Tells Absolute Temperature

It is no secret that semiconductor junctions change their behavior with temperature, and you can use this fact to make a temperature sensor. The problem is that you have to calibrate each device for any particular transistor you want to use as a sensor, even if they have the same part number. Back in 2011  1991, the famous [Jim Williams] noted that while the voltage wasn’t known, the difference between two readings at different current levels would track with temperature in a known way. He exploited this in an application note and, recently, [Stephen Woodward] used the same principle in an oscillator that can read the temperature.

The circuit uses an integrator and a comparator. A FET switches between two values of collector current. A comparator drives the FET and also serves as the output.  Rather than try to puzzle out the circuit just from the schematic, you can easily simulate it with LT Spice or Falstad. The Falstad simulator doesn’t have a way to change the temperature, but you can see it operating. The model isn’t good enough to really read a temperature, but you can see how the oscillation works

You can think of this as a temperature-to-frequency converter. It would be easy to read with, say, a microcontroller and convert the period to temperature.  Every 10 microseconds is equal to a degree Kelvin. Not bad for something you don’t have to calibrate.

Thermistors are another way to measure temperature. Sometimes, you don’t need a sensor at all.

Long-Range Thermocouple Sensor Sips Battery Power

Sometimes you need to know the temperature of something from a ways away. That might be a smoker, a barbecue, or even a rabbit hutch. This project from [Discreet Mayor] might just be what you’re looking for.

[Discreet Mayor] remotely keeps an eye on the meat, but doesn’t blab about it.
It consists of a MAX31855 thermocouple amplifier, designed for working with commonly-available K-type thermocouples. This is hooked up to a Texas Instruments CC1312 microcontroller, which sends the thermal measurements out over the 802.15.4 protocol, the same which underlies technologies like Zigbee and Thread. It’s able to send radio messages over long distances without using a lot of power, allowing the project to run off a CR2023 coin cell battery. Combined with firmware that sleeps the system when it’s not taking measurements, [Discreet Mayor] expects the project to run up to several years on a single battery.

The messages are picked up and logged in a Grafana setup, where they can readily be graphed. For extra utility, any temperatures outside a preset range will trigger a smartphone alert via IFTTT.

Keeping a close eye on temperatures is a key to making good food with a smoker, so this project should serve [Discreet Mayor] well. For anyone else looking to monitor temperatures remotely with a minimum of fuss, it should also do well!

Remote MQTT Temperature Sensor Shows How It’s Done

First of all, there are definitely simpler ways to monitor remote temperatures, but [Mike]’s remote MQTT temperature sensor and display project is useful in a few ways. Not only does it lay out how to roll such a system from scratch, but it also showcases system features like solar power.

After all, if one simply wants to monitor temperature that’s easily done, but once one wishes to log those temperatures and use them to trigger other things, then rolling one’s own solution starts to get more attractive. That’s where using someone else’s project as a design reference can come in handy.

[Mike’s] solution uses two Wemos D1 boards: one with a DS18B20 temperature sensor for outdoors, and one with a small OLED screen for an interior display. The external sensor relies on a rechargeable 18650 cell and a solar panel for a hassle-free power supply, and the internal sensor (of which there can be many) has a cute enclosure and is powered by USB. On the back end, a Raspberry Pi running an MQTT gateway and Node Red takes care of the operational side of things. The whole system has been happily running for over two years.

What is MQTT? It is essentially a messaging protocol, and takes care of the whole business of reliably communicating data back and forth between IoT devices. It scales very well and doesn’t need to be hard or intimidating; our own [Elliot Williams] can tell you all about implementing it.

Photo of an automated plant watering system attached to four potted plants.

Automation Allows You To Leaf Your Plants Alone

The greatest threat to a potted plant stems from its owner’s forgetfulness, but [Sasa Karanovic] has created an automation system that will keep his plants from getting too thirsty. Over the past year [Sasa] has been documenting an elegant system for monitoring and watering plants which has now blossomed into a fully automated solution.

If you haven’t seen the earlier stages of the project, they’re definitely worth checking out. The short version is that [Sasa] has developed a watering system that uses I2C to communicate with soil moisture, temperature, and light sensors as well as to control solenoids that allow for individual plants to be watered as needed. An ESP32 serves as a bridge, allowing for the sensors to be read and the water to be dispensed via an HTTP interface.

In this final part, [Sasa] integrates his watering system into a home automation system. He uses a MySQL database to store logs of sensor data and watering activity, and n8n to automate measurement and watering. If something isn’t quite right, the system will even send him a Telegram notification that something is amiss.

If you think automation might be the best way to save your plants from a slow death, [Sasa] has kindly shared his excellent work on GitHub. Even if you don’t have a green thumb, this is still a great example of how to develop a home automation solution from scratch. If you’re more interested in television than gardening, check out [Sasa]’s approach to replacing a remote control with a web interface!

Continue reading “Automation Allows You To Leaf Your Plants Alone”

Vintage Gauges Turned Classy Weather Display

It’s always good to see old hardware saved from the junk pile, especially when the end result is as impressive as this analog gauge weather display put together by [Build Comics]. It ended up being a truly multidisciplinary project, combing not only restoration work and modern microcontroller trickery, but a dash of woodworking for good measure.

Naturally, the gauges themselves are the real stars of the show. They started out with rusted internals and broken glass, but parts from a sacrificial donor and some TLC from [Build Comics] got them back in working order. We especially like the effort that was put into making the scale markings look authentic, with scans of the originals modified in GIMP to indicate temperature and humidity while retaining the period appropriate details.

To drive the 1940s era indicators, [Build Comics] is using an Arduino Nano and a DHT22 sensor that can detect temperature and humidity. A couple of trimmer pots are included for fine tuning the gauges, and everything is mounted to a small scrap of perfboard hidden inside of the custom-made pine enclosure.

This is hardly the first time we’ve seen analog gauges hooked up to modern electronics, but most of the projects are just that: modern. While the end look might be somewhat polarizing, we think maintaining the hardware’s classic style was the right call.