DTG: Improved Printing On T-shirts

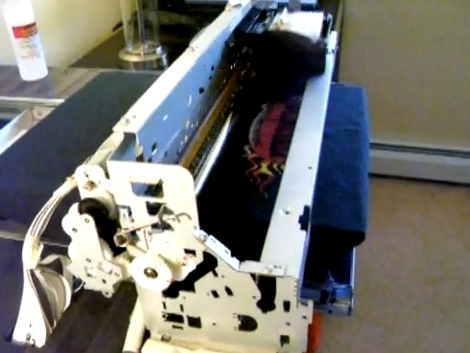
[Jeff German] improved upon his DIY direct to garment printer an ended up with a machine he thinks is equivalent to anything you can buy commercially. We last looked in on this project in June but much has been done since then. Most notably, there are build instructions available (requires login). [Jeff’s] printer is based around an Epson R1900 plus the base that holds and feed a garment. Take a look after the break to see it printing full color designs in high resolution. From the YouTube description it sounds like he wants to go into production with this. Kudos to him for also sharing the build techniques.

Continue reading “DTG: Improved Printing On T-shirts”

Jeri Makes Flexible EL Displays

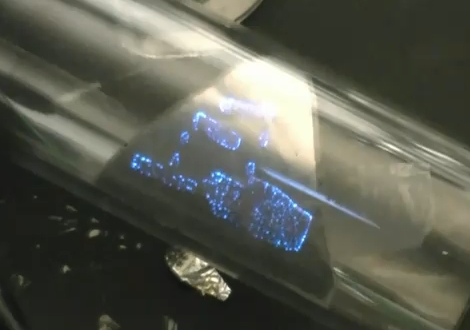
A failed chemistry experiment led [Jeri Ellsworth] to discover a flexible substrate for electroluminescent displays. We’re familiar with EL displays on the back of a glass panel like you would find in an audio receiver, but after making a mesh from aluminum foil [Jeri] looked at using the porous metal to host phosphors. She starts by cleaning foil and using a vinyl sticker to resist etching portions of the aluminum. It then goes into a bath of boric acid, electrified with the foil as the anode. As the foil etches she tests the progress by shining a laser through the foil. After this the phosphors are applied to the back surface of the foil, covered in a dielectric, and topped off with a conductive ink that will carry the AC necessary to excite the phosphors. This is layering materials in reverse compared to her EL PCB experiments. See [Jeri] explain this herself in the clip after the break.

You can see above that this produces a pretty well-defined display area. It reminds us of that color changing paint display. We think it would be worth a try to build a few 7-segment displays using this method.

Continue reading “Jeri Makes Flexible EL Displays”

Gear Indicator For Suzuki Motorcycle

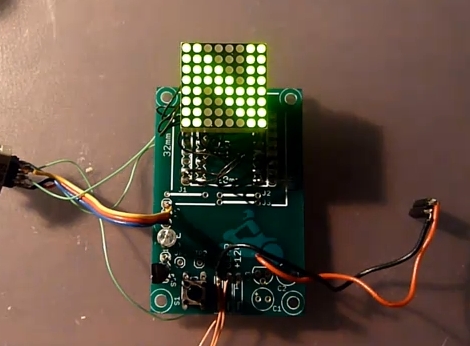
This little board serves as a current gear indicator for a motorcycle. It was designed with the Suzuki V-Storm motorcycles in mind as they have a sensor built into the gearbox. Other gear indicators rely on sensors on the shifters themselves, but reading the voltage level from a gearbox sensor gives much more reliable information.

The voltage measurement is handled by an ATmega88 microcontroller which in turn drives the 8×8 LED display. Also built into the system is a temperature sensor and photoresistor. The firmware takes advantage of both of these inputs, displaying temperature when in sixth gear or at the push of a button, and dimming the display based on ambient light. There are also settings for screen rotation, and user preferences.

We didn’t find schematics or software but this should be pretty easy to replicate. If you need a primer for AVR programming we’ve got you covered.

[Thanks Michal]

Playing Hacker With A Toy Vault

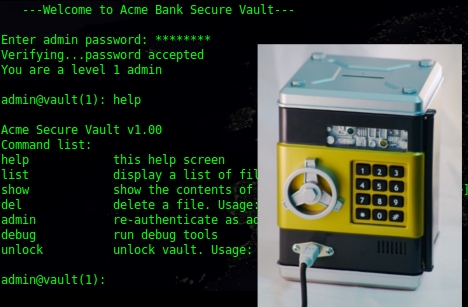
[Thomas Cannon] created his own hacking game by adding some circuitry to this toy vault. The original toy uses the keypad to control a solenoid keeping the door shut. He kept the mechanical setup, but replaced the original circuit board with his own ATmega328 based internals. He also added a USB port to the front. The gist of the game is that you plug-in through USB to gain access to the vault’s terminal software. If you can make your way through the various levels of admin access the loot inside will be yours.

Excuse Me, My Pinky Is Ringing

We get a lot of email challenging us to hack things. Sometimes we ignore them, other times we send some words of encouragement. But this time around we thought [Tait] had really come up with a great hack; to build a Bluetooth handset into his prosthetic finger. He hasn’t done much hacking in the past and was wondering if we could put out a challenge to our readers to make this happen. After a bit of back-and-forth brainstorming he decided to take on the challenge himself and was met with great success.

Like other Bluetooth handset hacks [Tait] started with a simple ear-mounted module. He extended the volume button with a piece of plastic and placed it under the battery. A couple of wooden matchsticks space the battery just enough so that it can be squeezed to adjust the volume level. He then extended the speaker with some wire. Next, he used the Oogoo recipe from our previous post to mold a false-finger and a thumb-ring. The PCB and battery fit in the finger, which places the microphone near a hole in the pad of the plastic pinky. The thumb ring houses the speaker to finish the look. Don’t miss the photos [Tait] sent in after the break.

Continue reading “Excuse Me, My Pinky Is Ringing”

Rendering A 3D Environment From Kinect Video

[Oliver Kreylos] is using an Xbox Kinect to render 3D environments from real-time video. In other words, he takes the video feed from the Kinect and runs it through some C++ software he wrote to index the pixels in a 3D space that can be manipulated as it plays back. The image above is the result of the Kinect recording video by looking at [Oliver] from his right side. He’s moved the viewer’s playback perspective to be above and in front of him. Part of his body is missing and there is a black shadow because the camera cannot see these areas from its perspective. This is very similar to the real-time 3D scanning we’ve seen in the past, but the hardware and software combination make this a snap to reproduce. Get the source code from his page linked at the top and don’t miss his demo video after the break.

Continue reading “Rendering A 3D Environment From Kinect Video”

In-button Display For Your Car’s Dashboard

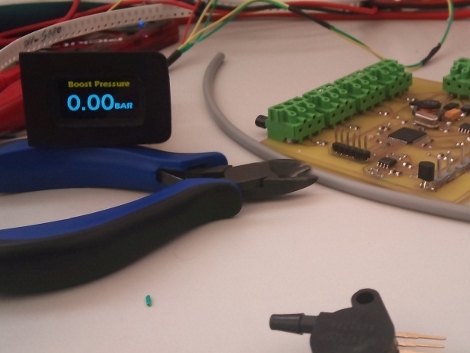
OLED display in a dashboard button

Here’s an interesting take on augmenting a car’s dashboard. [Daniel] is using a button blank to house a 1″ OLED display in his Jetta. It shows auxiliary data such as boost pressure and several sets of temperature readings. The display itself has a tiny little circuit board with a PIC 24 to drive it. A larger board, seen above, collects the temperature data from some sensors that [Daniel] added as part of the hack. There are some pictures of the installed display inside of the dark car and it looks really easy to read. It also sounds like there’s some dimming functionality built into the firmware. This is the easiest way we’ve seen to add a display to your dashboard as it just requires you to pop out a button blank, rather than disassembling the entire console or patching into what’s already there.