Sparkfun Ships 2000 MicroViews Without Bootloaders

microview-fail

Everyone has a bad day right? Monday was a particularly bad day for the folks at Sparkfun. Customer support tickets started piling up, leading to the discovery that they had shipped out as many as 1,934 MicroViews without bootloaders.

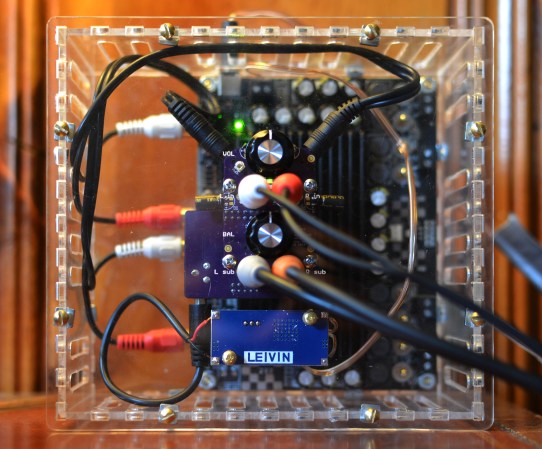
MicroView is the tiny OLED enabled, Arduino based, microcontroller system which had a wildly successful Kickstarter campaign earlier this year. [Marcus Schappi], the project creator, partnered up with SparkFun to get the MicroViews manufactured and shipped out to backers. This wasn’t a decision made on a whim, Sparkfun had proven themselves by fulfilling over 11,000 Makey Makey boards to backers of that campaign.

Rather than downplay the issue, Sparkfun CEO [Nathan Seidle] has taken to the company blog to explain what happened, how it happened, and what they’re going to do to make it right for their customers. This positions them as the subject of our Fail of the Week column where we commiserate instead of criticize.

First things first, anyone who receives an affected MicroView is getting a second working unit shipped out by the beginning of November. Furthermore, the bootloaderless units can be brought to life relatively easily. [Nate] provided a hex file with the correct bootloader. Anyone with an Atmel AVR In-System Programming (ISP) programmer and a steady hand can bring their MicroView to life. Several users have already done just that. The bootloader only has to be flashed via ISP once. After that, the MicroView will communicate via USB to a host PC. Sparkfun will publish a full tutorial in a few weeks.

Click past the break to read the rest of the story.

Continue reading “Sparkfun Ships 2000 MicroViews Without Bootloaders”

Desoldering Surface Mount and Through Hole Components

SMT And Thru-Hole Desoldering

My introduction to electronic manufacturing was as a production technician at Pennsylvania Scale Company in Leola PA in the early 1980’s. I learned that to work on what I wanted to work on I had to get my assigned duties done by noon or thereabouts. The most important lesson I had learned as a TV repairman, other than not to chew on the high voltage cable, was to use your eyes first. I would take a box of bad PCB’s that were essentially 6502 based computers that could count and weigh, and first go through inspecting them; usually the contents were reduced 50% right off by doing this. Then it was a race to identify and fix the remaining units and to keep my pace up I had to do my own desoldering.

Desoldering with IR System

It worked like this; you could set units aside with instructions and the production people would at some point go through changing components etc. for you or you could desolder yourself. I was pretty good at hand de-soldering 28 and 40 pin chips using a venerable Soldapulit manual solder sucker (as they were known). But to really cook I would wait for a moment when the production de-soldering machine was available. There was one simple rule for using the desoldering station: clean it when done! Failure to do so would result in your access to the station being suspended and then you might also incur the “wrath of production” which was not limited to your lunch bag being found frozen solid or your chair soaked in defluxing chemicals.

Continue reading “SMT And Thru-Hole Desoldering”

When Worlds Collide: 68008 Bootstrapped By An Arduino Uno

68008-ardu

[Peter Bjornx] brings classic microprocessors and modern microcontrollers together with his Arduino bootstrapped 68008 computer. The Motorola 68008 is the 8-bit external bus version of the well-known 68000 (or 68k) microprocessor. A friend gave [Peter] one of these chips, so he built a simple computer around it.

This isn’t one of those clean retrocomputers with every connection carefully planned out and wire wrapped. [Peter’s] created a true hack – a working 68k system on a breadboard created with whatever he had on hand at the time. The real gem of this system is the ROM. [Peter] replaced an EPROM chip with an Arduino.

In the not-so-good-old-days, microprocessors (and many microcontrollers) ran from an external ROM chip. This often was a UV-erasable EPROM. Carefully compiled code was burned into the EPROM with a device programmer. If the code wasn’t perfect, the EPROM had to be pulled and placed under a UV lamp for 20 minutes or so to erase it before it was time to try again. EPROM emulators were available, but they were way too expensive for the hobbyist.

Thankfully those days are far behind us now with the advent of EEPROM and then Flash. [Peter] didn’t want to revisit the past either, so he wrote a simple Arduino sketch which allowed it to act as an EPROM emulator, including address logging via the serial port.

The design still caused [Peter] some headaches, though. His major problem was a classic 68k issue, /DTACK timing. /DTACK or Data Transfer Acknowledge is one of several bus control signals used by the 68k. When the 68k performs a read from the data bus, it waits for /DTACK before it transfers data. The Arduino was too slow to release /DTACK in this case, which caused the 68k to think every read was immediately completed. There is a much clearer explanation of the 68k bus cycles on this Big Mess O Wires page. [Peter’s] solution was simple – a D flip-flop connected to the address strobe took care of the timing issues.

It took quite a bit of tinkering, but the system eventually worked. Peter was able to run the 68008 from its reset vector into a simple loop using the Arduino. It’s only fitting that the 68k program loaded by the Arduino was an LED blinker, everyone’s favorite hardware Hello World.

Thanks [Robert!]

From Broken Laptop Screen To Portable Light Table

Light table from broken LCD

If you’re like most of us here at Hack a Day, you probably shudder at the amount of e-waste that gets thrown out — here’s a clever way to make some good use out of a broken laptop screen!

[Victor] recently received a broken laptop from a friend, and as it turned out, only the LCD was broken. It’s old though so he didn’t want to buy a new screen for it. Instead he chopped it in half and used the functioning half as a media HTPC for his TV. He was about to trash the screen when he had an idea — the LCD was busted, but the back light wasn’t!

He carefully took apart the screen and removed the LCD portion, making sure to leave the back-light and various filters in place. The tricky part is getting the back light to work, and even that’s not too difficult. Depending on your donor laptop it may be an LED or CCFL back light — if it’s LED, it’s pretty simple, if it’s CCFL, you’ll have to figure out how to power the inverter board to get it to work. [Victor] reverse-engineered his and found a schematic for the inverter online, throwing together a little circuit to give it power — he even added a potentiometer to have variable brightness!

Continue reading “From Broken Laptop Screen To Portable Light Table”

Axis Glove That Controls A Robot

FKXH5LGHTC696DD.LARGE

This homemade glove and gesture controlled rover was created by [electro18]. It can send temperature, battery level, and object distance to the LCD panel on the wrist. Instead of a typical joystick, this wireless system taps into an embedded accelerometer to maneuver the robot like magic.

The main chassis platform is made of clear acrylic and has additional acrylic strips fixed to the edges for additional strength. A LM35 temperature sensor is wired to the front that monitors the environments that the rover explores. An HC-SR04 Ultrasonic Rangefinder acts as the eyes of the machine. The photodiode is covered with an adaptation of a 6mm heat shrink tube to avoid false readings. Once hooked up and turned on, the robot can be controlled with the futuristic power glove consisting of two parts. An accelerometer strap and a display strap are the biggest parts. The project shows that it is relatively easy to make a system like this. Other items like quadcopters and tiny water boats could be controlled with a similar type of setup.

A video of the axis glove maneuvering the vehicle on a slope can be seen after the break:

Continue reading “Axis Glove That Controls A Robot”

A Hackable Hi-Fi Audio DSP

DSP 01 Hi-fi Signal Processor


Audiophiles tend to put analog systems on a pedestal. Analog systems can provide great audio performance, but they tend to be quite costly. They’re also hard to tinker with, since modifying parameters involves replacing components. To address this, [tshen2] designed the DSP 01.

The DSP 01 is based around the Analog Devices ADAU1701. This DSP chip includes two ADCs for audio input, and four DACs for audio output. These can be controlled by the built in DSP processor core, which has I/O for switches, buttons, and knobs.

[tshen2]’s main goal with the DSP 01 was to implement an audio crossover. This device takes an input audio signal and splits it up based on frequency so that subwoofers get the low frequency components and tweeters get the higher frequency components. This is critical for good audio performance since drivers can only perform well in a certain part of the audio spectrum.

Analog Devices provides SigmaStudio, a free tool that lets you program the DSP using a drag-and-drop interface. By dropping a few components in and programming to EEPROM, the DSP can be easily reconfigured for a variety of applications.

Hackerspace Tour: Syn Shop, Las Vegas

While we were at DEFCON, we had the chance to visit a few places in the area that are of interest to the Hackaday readership. We made it over to Syn Shop, the Las Vegas hackerspace.

Years ago, this area of town was home to the Greyhound bus depot, complete with all the adventures associated with that. Since then, Zappos set up their HQ nearby, massive amounts of money flowed in, and gentrification got a big thumbs up from the decaying casinos in the area. Syn Shop is just down the street from the Denny’s with a bar and the twelve story tall slot machine with a zip line, making this space perfect for the community outreach that is lacking in so many other hackerspaces. In the hour or so I was there, no fewer than two groups of people took a gander through the plate glass asking themselves if this was ‘one of those makerspaces or something’. It’s a far cry from hackerspaces found tucked away in business parks, and something that has worked well for the members of the shop.

[Andrew Bogerri] took me around the space, first showing off the PDP-11/23 which you can drive around with a remote control. Yes, it works. No, not Unix. Yes, the entire stack should weigh about 500 pounds, but the guts of the RL02 drives were replaced with something considerably more modern. Just think of it as a 200 pound remote control car, with the momentum that goes along with that.

Syn Shop has a huge space for classes, and the tutors to go along with it. Classes range from CAM design and CNC operation, to tutorials on how to use the huge ShopBot in the space. There’s also a craft night, plenty of help available for running the laser cutter, and enough electronics paraphernalia to work on anything in the sub-Gigahertz range.

Even though most of the Syn Shop members were away at the Rio getting geared up for the con when I went through, you could still tell the space is constantly buzzing with energy and spurious emissions. I caught up with a few of the other regular members at the Hardware Hacking village at the con, but that’s a subject for another post.

Pics below.

Continue reading “Hackerspace Tour: Syn Shop, Las Vegas”