Build A 3D Printer Workhorse, Not An Amazing Disappointment Machine

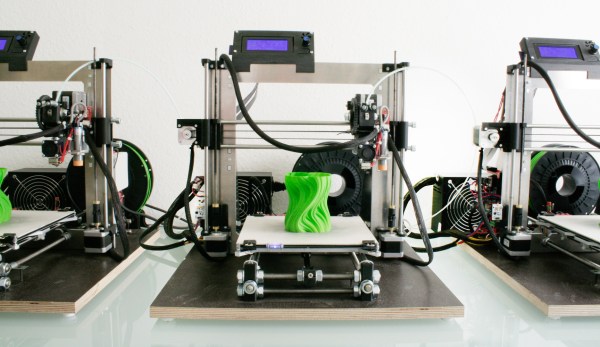
3D printers have become incredibly cheap, you can get a fully workable unit for $200 – even without throwing your money down a crowdfunded abyss. Looking at the folks who still buy kits or even build their own 3D printer from scratch, investing far more than those $200 and so many hours of work into a machine you can buy for cheap, the question “Why the heck would you do that?” may justifiably arise.

The answer is simple: DIY 3D printers done right are rugged workhorses. They work every single time, they never break, and even if: they are an inexhaustible source of spare parts for themselves. They have exactly the quality and functionality you build them to have. No clutter and nothing’s missing. However, the term DIY 3D printer, in its current commonly accepted use, actually means: the first and the last 3D printer someone ever built, which often ends in the amazing disappointment machine.

This post is dedicated to unlocking the full potential in all of these builds, and to turning almost any combination of threaded rods and plywood into a workshop-grade piece of equipment.

Continue reading “Build A 3D Printer Workhorse, Not An Amazing Disappointment Machine”

Using The Vive’s Lighthouse With DIY Electronics

The HTC Vive is the clear winner of the oncoming VR war, and is ready to enter the hallowed halls of beloved consumer electronics behind the Apple Watch, Smart Home devices, the 3Com Audrey, and Microsoft’s MSN TV. This means there’s going to be a lot of Vives on the secondhand market very soon, opening the doors to some interesting repurposing of some very cool hardware.

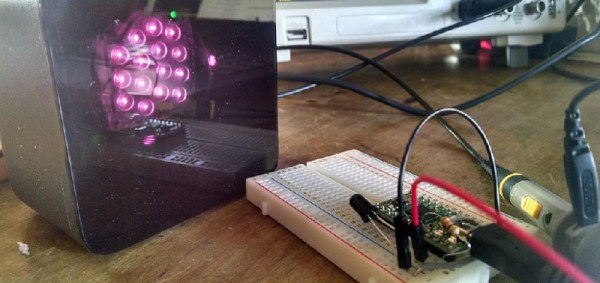
[Trammell Hudson] has been messing around with the Vive’s Lighthouse – the IR emitting cube that gives the Vive its sense of direction. There’s nothing really special about this simple box, and it can indeed be used to give any microcontroller project an orientation sensor.

The Vive’s Lighthouse is an exceptionally cool piece of tech that uses multiple scanning IR laser diodes and a bank of LEDs that allows the Vive to sense its own orientation. It does this by alternately blinking and scanning lasers from left to right and top to bottom. The relevant measurements that can be determined from two Lighthouses are the horizontal angle from the first lighthouse, the vertical angle from the first lighthouse, and the horizontal angle from the second lighthouse. That’s all you need to orient the Vive in 3D space.

To get a simple microcontroller to do the same trick, [Trammell] is using a fast phototransistor with a 120° field of view. This setup only works out to about a meter away from the Lighthouses, but that’s enough for testing.

[Trammell] is working on a Lighthouse library for the Arduino and ESP8266, and so far, everything works. He’s able to get the angle of a breadboard to a Lighthouse with just a little bit of code. This is a great enabling build that is going to allow a lot of people to build some very cool stuff, and we can’t wait to see what happens next.

Seeing The Truly Invisible With DIY Shortwave UV Imaging

We’ve all seen how to peel IR filters off digital cameras so they can see a little better in the dark, but there’s so much more to this next project than that. How about being able to see things normally completely outside the visual spectrum, like hydrogen combustion or electrical discharges?

UV Electrical Discharge

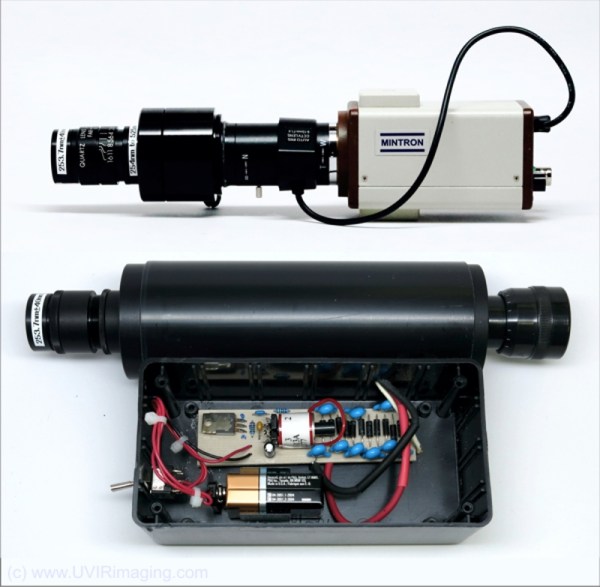
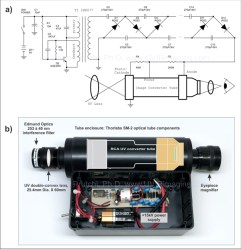
[David Prutchi] has just shared his incredible work on making his own shortwave ultraviolet viewers for imaging entirely outside of the normal visible spectrum – in other words, seeing the truly invisible. The project has not only fascinating application examples, but provides detailed information about how to build two different imagers – complete with exact part numbers and sources.

UV-Viewer-SmallIf you’re thinking UV is a broad brush, you’re right. [David Prutchi] says he is most interested in Solar Blind UV (SBUV):

Solar radiation in the 240 nm to 280 nm range is completely absorbed by the ozone in the atmosphere and cannot reach Earth’s surface…

Without interference from background light, even very weak levels of UV are detectable. This allows ultraviolet-emitting phenomena (e.g. electrical discharges, hydrogen combustion, etc.) to be detectable in full daylight.

There is more to the process than simply slapping a UV filter onto a camera, but happily he addresses all the details and the information is also available as a PDF whitepaper. [David Prutchi] has been working with imaging for a long time, and with his sharing of detailed build plans and exact part numbers maybe others will get in on the fun. He’s also previously shared full build plans for a Raspberry Pi based multispectral imager, [David’s] DOLPHi Polarization Camera was a finalist in the 2015 Hackaday Prize, and he spoke at the Hackaday SuperConference about the usefulness of advanced imaging techniques for things like tissue analysis in medical procedures, and landmine detection for the purposes of cleaning up hazardous areas.

Hackaday Prize Entry: Cheap, Open LiDAR

[adam] is a caver, meaning that he likes to explore caves and map their inner structure. This is still commonly done using traditional tools, such as notebooks (the paper ones), tape measure, compasses, and inclinometers. [adam] wanted to upgrade his equipment, but found that industrial LiDAR 3D scanners are quite expensive. His Hackaday Prize entry, the Open LIDAR, is an affordable alternative to the expensive industrial 3D scanning solutions out there.

The 3D scan of a small cave near Louisville (source: [caver.adam's] Sketchfab repository)
The 3D scan of a small cave near Louisville from [caver.adam’s] Sketchfab repository
LiDAR — Light Detection And Ranging —  is the technology that senses the distance between a sensor and an object by reflectively measuring the time of flight of a light beam between the two. By acquiring a two-dimensional array of multiple distance readings, this can be used for 3D scanning. Looking at how the industrial LiDAR scanners capture the environment using fast spinning mirrors, [adam] realized that he could basically achieve the same by using a cheap laser range finder strapped to a pan and tilt gimbal.

The gimbal he designed for this task uses stepper motors to aim an SF30-B laser rangefinder. An Arduino controls the movement and lets the eye of the sensor scan an object or an entire environment. By sampling the distance readings returned by the sensor, a point cloud is created which then can be converted into a 3D model. [adam] plans to drive the stepper motors in microstepping mode to increase the resolution of his scanner. We’re looking forwards to see the first renderings of 3D cave maps captured with the Open LIDAR.

The HackadayPrize2016 is Sponsored by:

Niklas Roy’s Music Construction Machine

If you think of a music box, the first image that might come to mind is that of a small tabletop device with a simple mechanism and a single instrument. Usually a row of chimes triggered by points etched on a roller. If you are a bit more ambitious maybe you thought of a player piano with a roll of perforated paper carrying a tune, but yet again with only the single voice of one instrument.

mcm_06[Niklas Roy] however has a different vision when it comes to mechanical music. He’s created an entire ensemble with real musical instruments, a drum kit, keyboard, and electric guitar. His Music Construction Machine is no simple music box with a single tune though, it generates a constantly changing melody through a mechanically implemented algorithm with a complex interaction of cyclic variables that periodically alternate between harmonic and discordant. Unfortunately we can’t find any audio examples of the installation at work.

There is a timeliness to this post, the machine is part of an art installation at the Goethe-Institut Pop Up Pavillion on the Nowy Targ square in Wrocław, Poland, and it will be exhibited until the 10th of July. We hope some of our Central European readers will be within range and can make the trip. If you do, we’d love to hear some sample audio from your visit.

We’ve featured [Niklas]’s work many times before here at Hackaday. Just a few highlights are a past musical project powered by water, God on the CB radio, and his all-terrain mobile beer crate.

UPDATE: [Niklas] has posted details of the exhibition in Wroclaw on his blog, including several videos like the on below the break that show the machine in its full glory.

Continue reading “Niklas Roy’s Music Construction Machine”

Build A Circular Aerofoil Kite

[Waalcko] fell in love with kites when he was 13 years old. He saw a NASA Para Wing kite fly and couldn’t get it out of his head. Now, years later, he shares how to build a circular foil kite design he came up with.

We’re all particular about our chosen hobbies. Some of us like one design direction and hate another. For [Waalcko], he really hates internal supports in kites. When he spied a single line kite in a circular foil configuration he was enraptured, but the design had those hideous spars. So, he got to work and pushed himself to the limit coming up with a kite that was a circular foil, flew with one line, and had no internal supports.

His instructable is a great read and goes into deep detail about the basics of kite construction. (After reading it we’re certain that even the shallows have depths when it comes kites.) It goes through the terminology used when talking about kits, the techniques used to assemble them, the common problems, and more.

Many hours later, if all goes well, one should end up with a really cool kite.

A 150MHz 6502 Co-Processor

If you are familiar with ARM processors, you may know of their early history at the 1980s British home computer manufacturer Acorn. The first physical ARM system was a plug-in co-processor development board for Acorn’s BBC Micro, the machine that could be found in nearly every UK school of the day.

For an 8-bit home computer the BBC Micro had an unusually high specification. It came with parallel, serial and analog ports, built-in networking using Acorn’s proprietary Econet system, and the co-processor interface used by that ARM board, the Tube. There were several commercial co-processors for the Tube, including ones with a 6502,  a Z80 allowing CP/M to be run, and an 80186.

As with most of the 8-bit generation of home computers the BBC Micro continues to maintain a strong enthusiast following who have not stopped extending its capabilities in all directions. The Tube has been interfaced to the Raspberry Pi, for instance, on which an emulation of original co-processor hardware can be run.

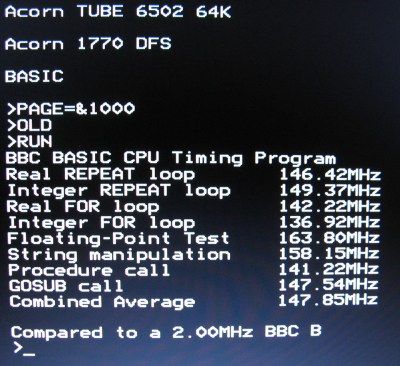
bbc-tube-screenshotAnd thus we come to the subject of this article, [Hoglet] and [BigEd]’s 150MHz 6502 coprocessor for the BBC Micro. Which of course isn’t a 6502 at all, but a 6502 emulated in assembler on an ARM which is in a way the very distant descendant of the machine it’s hosted upon. There is something gloriously circular about the whole project, particularly as the Pi, like Acorn, the BBC Micro, and modern-day ARM, has its roots in Cambridge. How useful it is depends on your need to run 8-bit 1980s software in a tearing hurry, but they do report it runs Elite, which if you were there at the time we’re sure you will agree is the most important application to get running on a BBC Micro.

We’ve featured the Tube interface before when we talked about an FPGA co-processor with a PDP/11 mode that was definitely never sold by Acorn. And we’ve also featured an effort to reverse engineer the primordial ARM from that first BBC Micro-based co-processor board.

BBC Micro image: Stuart Brady, Public Domain, via Wikimedia Commons.