Get Inside A TCXO Clock Chip

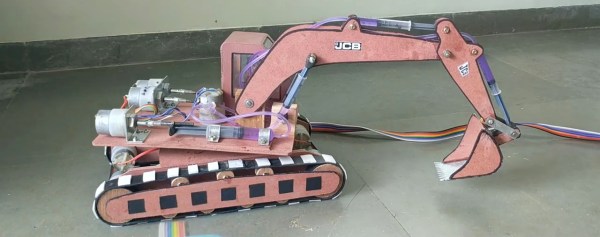
[Pete] wondered how real-time clock modules could be selling on eBay for $1.50 when the main component, the Maxim DS3231 RTC/TCXO chip, cost him more like $4 apiece. Could the cheap modules contain counterfeit chips?

Well, sure they could. But in this case, they didn’t, and [Pete] has the die shots to prove it. He started off by clipping the SOIC leads rather than desoldering — he’s not going to be reusing this chip after he’s cut it in half. Next was a stage of embrittling the case by heating it up with a lighter and dunking it in water. Then he went at it with sandpaper.

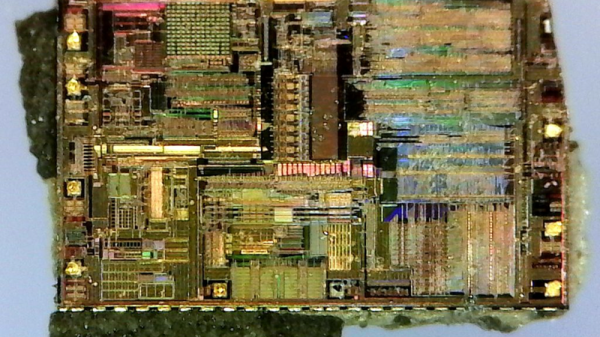
It’s cool. You can see the watch crystal inside, and all of the circuitry. The DS3231 includes a TCXO — temperature-corrected crystal oscillator — and it seems to have a bank of capacitors that it connects and disconnects depending on the chip’s temperature to keep the oscillator running at the right speed. [Pete] used one in an offline situation, and it only lost sixteen seconds over a year, so we’d say that they work fine.

If you’d like to know more about how crystals are used to keep time, check out [Jenny]’s excellent article. And if sixteen second per year is way too much for you, tune up your rubidium standard and welcome to the world of the time nuts.

The Sensors Automating Your Commute

In a bout of frustration I recently realized that the roads have all updated — most people have no idea how — and this sometimes hurts the flow of traffic. This realization happened when an unfortunate person stopped in a left turn lane well before the stop line. The vehicle didn’t trigger the sensor, so cycle after cycle went by and the traffic system never gave the left turn lane a green light, thinking the lane was unoccupied. Had the driver known about this the world would have been a better place. The first step in intelligent automation is sensing, and there are a variety of methods used to sense traffic’s flow.

Continue reading “The Sensors Automating Your Commute”

Simple hydraulics using syringes

Super Simple Hydraulics Using Syringes

When making a toy excavator arm, or any robotic arm, the typical approach is to put motors at the joints, or if there isn’t room, to put the motors somewhere else and transfer the force using fishing line and pulleys. [Navin Khambhala] chose instead to do it more like the real excavators, with hydraulics using syringes. And we have to admit, the result it pretty elegant in its simplicity.

The syringes do the job of single-acting hydraulic actuators, one at the motor and the other where the force is needed. In between them, what appears to be clear vinyl tubes carry the fluid between syringes. 12 volt DC motors with bolts on them move nuts attached to the syringe pistons to push and pull the pistons. It is so simple that no further explanation is needed, though like most apparently simple things, we’re sure a lot of effort went into making it that way. The video below shows the finished product, as well as walks through the making of it.

Continue reading “Super Simple Hydraulics Using Syringes”

Laser Cut Enclosures From Eagle Files

Once a project is finished, it might still need a decent enclosure. While it’s possible to throw a freshly soldered PCB in a standard enclosure, or piece of Tupperware, or cardboard box, these options don’t have the fit and finish of something custom-made. If you have a laser cutter sitting around, it’s a simple matter to cut your own enclosure, but now that process is much easier thanks to [Ray]’s latest project.

Since [Ray] was already using Eagle to design his PCBs, it seemed like a short step to using the Eagle files to design the enclosure as well. The script runs from those files and creates everything necessary to send to the laser cutter for manufacturing. Right now, [Ray] points out that the assembly time for each enclosure can be high, and this method might not be suited for large numbers of enclosures. Additionally, some of the calculations still need to be done by hand, but there are plans to automate everything in the future.

For single projects, though, this script could cut a lot of time off of designing an enclosure and building it from scratch, and could also help improve aesthetics over other options like 3D printed enclosures. Of course, if you have a quality 3D printer around but no laser cutter, there are options for custom enclosures as well.

ColibriNANO USB SDR Receiver Reviewed

At first glance, the ColibriNANO SDR looks like another cheap SDR dongle. But after watching [Mile Kokotov’s] review (see video below), you can see that it was built specifically for software defined radio service. When [Mile] takes the case off, you notice the heavy metal body which you don’t see on the typical cheap dongle. Of course, a low-end RTL-SDR is around $20. The ColibriNANO costs about $300–so you’d hope you get what you pay for.

The frequency range is nominally 10 kHz to 55 MHz, although if you use external filters and preamps you can get to 500 MHz. In addition to a 14-bit 122.88 megasample per second A/D converter, the device sports an Altera MAX10 FPGA.

Continue reading “ColibriNANO USB SDR Receiver Reviewed”

DIY VT220 Keyboard

There’s always been interest in the computers of old, and people love collecting and restoring them. When [peterbjornx] got his hands on a DEC VT220 video terminal, it was in good shape – it needed a bit of cleaning, but it also needed a keyboard. [Peter] couldn’t afford to buy the keyboard, but the service manual for it was available, so he decided to convert a modern keyboard to work with his new terminal. (Editor’s note: Link rot. Try the Internet Archive’s Wayback Machine link instead.)

The original keyboard for the VT220 is the LK201. This keyboard communicates with the terminal using 8-N-1 (eight data bits, no parity, one stop bit) over RS232 at 4800 baud. This meant that it would be pretty simple to implement this on microcontroller in order to communicate with the terminal. [Peter] chose the Arduino Nano. However, the LK200 was more than just a keyboard for communicating with the terminal, it also housed a speaker and LEDs which the terminal used to communicate with the user. Rather than put these into the adapter unit, [Peter] decided to put these into the keyboard – a few holes and a bit of wiring, and they were in.

[Peter]’s write-up includes a description of some of the issues he encountered as well as a picture of the keyboard. He’s put the schematic online and the code up on GitHub. In case you were wondering, he used Vim on the VT220 to write his article. You could also use a Raspberry Pi to help out your dumb terminal, or just hook the terminal directly to your Linux box and go from there.

Starter Guide To Linux Forensics

The old saying is if your data isn’t backed up at least twice, it’s not backed up at all. For those not wise enough to heed this adage, there are a number of options available to you if you wish your data to be recovered. Assuming the drive itself is just corrupted somehow (maybe a malicious attack, maybe a user error) and not damaged beyond physical repair, the first step is to connect the drive to another computer. If that fails, it might be time to break out the computer forensics skills.

[Luis]’s guide is focused on Linux-specific drives and recovery tools, so this isn’t necessarily a general-purpose how-to. That being said, there is a lot of information in this guide such as how to mount the target drive’s partitions, how to set up various timelines, and which of the Linux system’s logs are important for the forensic analysis. This specific example in the guide also goes into detail about noticing which of the recent files had been accessed, what they might have done, and different approaches to piecing the mystery of this corrupted drive together.

[Luis] points out that the world of Linux forensics is much different from that of Windows, but for anyone looking to get started he suggests starting with a clean Linux install and going from there. There are many other avenues of digital forensics, as well; the field has as many avenues of exploration as there are different types of computers.