Improving Indoor Navigation Of Robots With IR

If the booths at CES are to be believed, the future is full of home robots: everything from humanoid robots on wheels to Alexas duct taped to a Roomba. Back in reality, home robots really aren’t a thing yet. There’s an obvious reason for this: getting around a house is hard. A robot might actually need legs to get up and down stairs, and GPS simply doesn’t exist indoors, at least to the accuracy needed. How on Earth does a robot even navigate indoors?

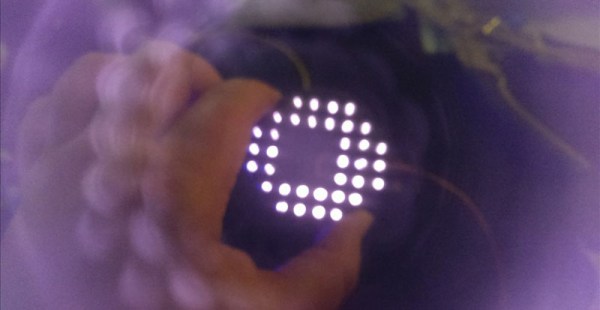
This project for the Hackaday Prize solves the problem of indoor navigation, and it does it in an amazingly clever way. This is using QR codes for navigation, but not just any QR codes. They’re QR codes read by an infrared camera, and painted on the walls and ceilings with a special IR sensitive paint that’s invisible to the human eye. It’s navigation for robotic vision, and it’s a fantastic idea.

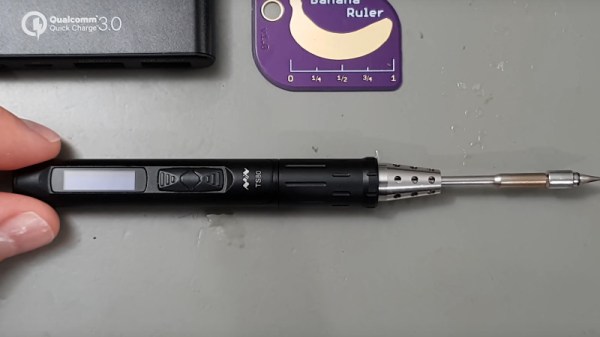
The basic idea behind this project is to use an IR camera — or basically any webcam with the IR blocking filter removed — and a massive amount of IR LEDs to illuminate any target. So far, the proof of concept works. A computer can easily read QR codes, and if paint is invisible to the human eye but visible to an IR camera, the entire project is merely a matter of implementation.

There have been a number of projects that try to add indoor navigation to robots. Some of them use LIDAR, some use computer vision and SLAM. These are computationally expensive. Some even use wireless beacons to navigate indoors like the SubPos Ranger from the 2016 Hackaday Prize. Using IR and QR codes is just so simple and hacker-friendly, and we think it’s fantastic.

After The Sun Set On San Mateo, LED Takes Over Hackaday’s BAMF Meetup

After this Spring’s Bay Area Maker Faire closed down for Saturday night and kicked everybody out, the fun moved on to O’Neill’s Irish Pub where Hackaday and Tindie held our fifth annual meetup for fellow Maker Faire attendees. How do we find like-minded hackers in a crowded bar? It’s easy: look for tables lit by LEDs and say hello. It was impossible to see everything people had brought, but here are a few interesting samples.

Continue reading “After The Sun Set On San Mateo, LED Takes Over Hackaday’s BAMF Meetup”

ESP8266 Home Computer Hides Unexpected Gems

With a BASIC interpreter and free run throughout their hardware, home computers like the ZX Spectrum and Commodore 64 used to be a pervasive way to light that hacker fire. With the advent of cheap single board computers like the Raspberry Pi, devices purpose built to emulate these classic systems have become fairly commonplace. [uli] built a device in this vein called the BASIC Engine which is driven by a microcontroller and a handful of hardware peripherals. Like other examples it can be attached to a keyboard, programmed in a BASIC, play video and sound, etc. But digging into the BASIC Engine reveals that it’s similarity to other devices is only skin deep.

The current version of the BASIC Engine (“rev2”) lives in a Raspberry Pi 3 case for convenience. It has RCA connectors for NTSC or PAL video output and mono audio, plus a bank of headers to tap into GPIOs, connectors for a keyboard, and more. [uli] wanted to aim for extreme low cost so a relatively beefy board like a Raspberry Pi didn’t fit the bill, and we expect it was an enjoyable challenge. Instead its interpreter runs atop an ESP8266 but with the networking stack removed. [uli] was disheartened by how bloated even a “Hello world” program was and ripped it out, discovering that hidden beneath was a very powerful and disproportionately inexpensive general purpose microcontroller. The video is driven by a VS23S010, sold as a 1 Mbit parallel SRAM with a neat trick; it also includes a composite video controller!

The real treat here is [uli]’s history writeup of how the BASIC Engine came to be. We’d recommend brewing a cup of coffee and sitting down for a full read-through. The first version was inspired by the PlayPower project, which was repurposing clones of Nintendo’s Famicom (NES to Americans) game console to make low cost home computers, complete with keyboard and gamepad input. [uli] started out by building a custom cartridge for a particular Famicom clone that ran a BASIC interpreter but after showing it to disinterested adults the project was left fallow. Years later, [uli] was encouraged to pick up the project again, leading down a twisted rabbit hole to where we are today.

If you want to build a BASIC Engine for yourself, Gerbers and build instructions are available on the pages linked above.

Thanks for the tip [antibyte]!

Keep It Close: A Private Git Server Crash Course

At this point, everyone has already heard that Microsoft is buying GitHub. Acquisitions of this scale take time, but most expect everything to be official by 2019. The general opinion online seems to be one of unease, and rightfully so. Even if we ignore Microsoft’s history of shady practices, there’s always an element of unease when somebody new takes over something you love. Sometimes it ends up being beneficial, the beginning of a new and better era. But sometimes…

Let’s not dwell on what might become of GitHub. While GitHub is the most popular web-based interface for Git, it’s not the only one. For example GitLab, a fully open source competitor to GitHub, is reporting record numbers of new repositories being created after word of the Microsoft buyout was confirmed. But even GitLab, while certainly worth checking out in these uncertain times, might be more than you strictly need.

Let’s be realistic. Most of the software projects hackers work on don’t need even half the features that GitHub/GitLab offer. Whether you’ve simply got a private project you want to maintain revisions of, or you’re working with a small group collaboratively in a hackerspace setting, you don’t need anything that isn’t already provided by the core Git software.

Let’s take a look at how quickly and easily you can setup a private Git server for you and your colleagues without having to worry about Microsoft (or anyone else) having their fingers around your code.

Continue reading “Keep It Close: A Private Git Server Crash Course”

A Sneak Peek At The TS100 Soldering Iron’s Younger Sibling

Many readers will be familiar with the TS100 soldering iron, a lightweight and powerful tool with an integrated temperature controller in its handle based upon an STM32 microcontroller. As an iron it’s a joy to use, it has hackable code, and it has become a firm favourite within our community. There have been rumours of a TS100 stablemate for some time now, with the model number being touted as a TS200 and with it being said to be USB-C powered. But beyond those tidbits, until now there has been not a lot to go on.

So [Marco Reps]’ video that we’ve placed below the break is a particularly interesting one, featuring as it does a prototype of the iron in question. It’s called the TS80 but there is evidence on its PCB that it has held the TS200 moniker in the past, it’s USB-C powered, and it features a new integrated heating element and bit with a Weller-style 3.5mm jack connector.

He runs it through a battery of tests and finds it to perform very well indeed, sometimes better than the TS100 despite his not having a USB-C power source capable of supplying the same voltage that his TS100 gets through its DC jack. To be clear, the TS100 is still a very good iron indeed, this one is simply a little bit better. Inside a sturdier metal barrel is a PCB with the STM32 on board as well as an OLED display that looks a little smaller than the one on the TS100. The shorter element receives praise, while the TS100 is hardly a long iron it is always good to get as close to the action as possible.

There is a concern over the lack of a DC jack and its reliance on USB-C, though he points out that with the appropriate cables and increasing USB-C adoption this should not remain a problem for long. We’d be interested to ensure that it can be powered through the USB-C socket from a simple DC power source such as a battery though, as that flexibility is such a bonus with the TS100.

So then, the TS80 is coming, but the TS100 is still a very good iron indeed so there’s no need to throw yours away any time soon. It’s an iron we look forward to seeing when it arrives though, and no doubt we’ll give you our verdict.

You can see our TS100 review if that takes your fancy, and while you’re at it take a look at one of the community’s most awesome TS100 hacks. [Marco] muses on how long it’ll be before someone has their TS80 playing audio through that 3.5mm jack.

Continue reading “A Sneak Peek At The TS100 Soldering Iron’s Younger Sibling”

TL084 die blocks

Ken Shirriff Found Butterflies In His Op-Amp

In 1976, Texas Instruments came out with the TL084, a four JFET op-amp IC each with similar circuitry to Fairchild’s very popular single op-amp 741. But even though the 741 has been covered in detailed, when [Ken Shirriff] focused his microscope on a TL084, he found some very interesting things.

JFETs on the TL084 op-amp

To avoid using acid to get at the die, he instead found a ceramic packaged TL084 and pried off the cover. The first things he saw were four stabilizing capacitors, by far the largest structures on the die and visible to the naked eye.

When he peered into his microscope he next saw butterfly shapes which turned out to be pairs of input JFETs. The wide strips are the gates and the narrower strip surrounded by each gate is the source. The drain is the narrow strip surrounding each gate. Why arrange four JFETs like this? It’s possible to have temperature gradients in the IC, one side being hotter than the other. These gradients can affect the JFET’s characteristics, unbalancing the inputs. Look closely at the way the JFETs are connected and you’ll see that the top-left one is connected to the bottom-right one, and similarly for the other two. This diagonal cross-connecting cancels out any negative effects.

[Ken’s] analysis in his article doesn’t stop there though. Not only does he talk more about these JFETs but he goes over the rest of the die too. It’s well worth the read, as is his write-up about the 741 which we’ve also covered.

Never Go To The Office Breakroom Again

If you’re tired of having to make small talk with random people in the office break room every time you need a cup of coffee, or simply don’t have the time to get up to pour yourself some more, it would be nice if there was a way you could have your cup filled for you, right at your desk. With this new drink dispenser, you won’t have to get up or even pour your drinks yourself!

We’ve certainly seen plenty of automatic drink makers, but those are more suited to parties and complicated drink mixing. This beverage dispenser is more for the person who knows their tastes and simply wants to save some time. It’s also much simpler, using a peristaltic pump for serving a single liquid from a large bottle into a glass, and using a load cell to know when to stop filling. The peristaltic pump is a little slow though, so it’s best to set the glass back in the dispenser and let it top you off each time.

We’re a big fan of time savers around here, especially when it comes to improving workflow. Of course, the best time saver is a clean, well-organized shop which will help you out whether you’re building a drink dispenser or anything else.

Continue reading “Never Go To The Office Breakroom Again”