Medium Machine Mediates Microcontroller Messages

Connecting computers to human brains is currently limited to the scope of science fiction and a few cutting-edge laboratories. Tapping into some nerves farther from our central wetware is possible and [Peter Buczkowski] shows us his stylish machine for implanting a pattern into our brains without actively having to memorize anything.

His Medium Machine leverages a TENS unit to activate forearm muscles in a pattern programmed into an Arduino. Users place their forearm across two aluminum electrodes mounted on a tasteful wooden platform and extend a single finger over a button. Electrical impulses trigger the muscles which press the button. That’s all. After repeating the pattern a few times, the users should be able to recite it back on command even if they aren’t aware of what it means. If this sounds like some [Johnny Mnemonic] memory cache, you are absolutely correct. This project draws inspiration from the [William Gibson] novel which became a [Keanu Reeves] movie.

Users can be programmed with a Morse code message or the secret knock to open an attic library or play a little tune. How about learning a piano song?

Continue reading “Medium Machine Mediates Microcontroller Messages”

TensorFlow In Your Browser

If you want to explore machine learning, you can now write applications that train and deploy TensorFlow in your browser using JavaScript. We know what you are thinking. That has to be slow. Surprisingly, it isn’t, since the libraries use Graphics Processing Unit (GPU) acceleration. Of course, that assumes your browser can use your GPU. There are several demos available, include one where you train a Pac Man game to respond to gestures in your webcam to control the game. If you try it and then disable accelerated graphics in your browser options, you’ll see just what a speed up you can gain from the GPU.

Continue reading “TensorFlow In Your Browser”

Delicious Optics, A Chocolate Diffraction Grating

Diffraction gratings are curious things. Score a series of equally spaced tiny lines in a surface, and it will cause reflected or transmitted light to bend and separate into its component wavelengths. This ability gives them all manner of important applications in the field of optics, but they’re also fun to play with. [Tech Ingredients] has done the hard work to find out how to make them out of candy!

The video starts with a basic discussion on the principles of diffraction gratings. The basis of the work is a commonly available diffraction grating, readily available online. It’s a plastic sheet with thousands of microscopic ridges scored into the surface. The overarching method to create a candy version of this is simple — coat the ridged surface in liquid chocolate or sugar syrup, to transfer the impression on to the candy surface when it solidifies. However, the video goes further, explaining every step required to produce a successful end result. The attention to detail is on the level of an industrial process, and shows a mastery of both science and candy processing techniques. If you’ve ever wondered how to properly crystallize chocolate, this video has the knowledge you need.

It’s not often we see candy optics, but we like it — and if you fail, you can always eat your mistakes and try again. If you’re wondering what you can do with a diffraction grating, check out this DIY USB spectrometer.

Two-Cent Temperature Sensors

When they need to add temperature control to a project, many hackers reach for a K-type thermocouple for their high-temperature needs, or an integrated temperature-sensing IC when it doesn’t get that hot. The thermocouple relies on very small currents and extremely high gain, and you pretty much need a dedicated IC to read it, which can be expensive. The ICs aren’t as expensive, but they’re basically limited to boiling water. What do you do if you want to control a reflow oven?

There’s a cheaper way that spans a range between Antarctic winter and molten solder, and you’ve probably already got the parts on your shelf. Even if you don’t, it’s only going to run you an extra two cents, assuming that you’ve already got a microcontroller with an ADC in your project. The BOM: a plain-vanilla diode and a resistor.

I’ve been using diodes as temperature sensors in three projects over the last year: one is a coffee roaster that brings the beans up to 220 °C in hot air, another is a reflow hotplate that tops out around 210 °C, and the third is a toner-transfer iron that holds a very stable 130 °C. In all of these cases, I don’t really care about the actual numerical value of the temperature — all that matters is reproducibility — so I never bothered to calibrate anything. I thought I’d do it right for Hackaday, and try to push the humble diode to its limits for science.

What resulted was a PCB fire, test circuits desoldering themselves above 190 °C, temperature probes coming loose, and finally a broken ramekin and 200 °C peanut oil all over my desk. Fun times! On the other hand, I managed to get out enough data to calibrate some diodes, and the results are fantastic. The circuits under test included both best practices and the easiest thing that could possibly work, and the results are pretty close. This is definitely a technique that you want to have under your belt for most temperature ranges. The devil is in the details, of course, so read on!

Continue reading “Two-Cent Temperature Sensors”

Low-Resolution Display Provides High-Nostalgia Animations

High-definition displays are the de facto standard today, and we’ve come to expect displays that show every pore, blemish, and bead of sweat on everything from phones to stadium-sized Jumbotrons. Despite this,  low-resolution displays continue to have a nostalgic charm all their own.

Take this 32 x 16 display, dubbed PixelTimes, for instance. [Dominic Buchstaller] has gone a step beyond his previous PixelTime, a minimalist weather clock and home hub built around the same P10 RGB matrix. The previous build was a little involved, though, with a nice wood frame that took some time and skill to create.

Building your own version of PixelTimes is really approachable. The case is mostly 3D-printed, and the acrylic parts [Dominic] laser cut could just as easily be cut with a saw. And that P10 board can be source for peanuts direct from Chine. The software for the project has been upgraded since the original version, supporting flicker-free animations. Everything runs on a NodeMCU, and there are even scripts to convert your favorite GIF to an animation. Oh, and it still displays the weather too.

This looks great and seems like a lot of fun, and [Dominic] kindly provides all the files you’ll need to build your own. It shouldn’t take more than an hour to build once you’ve got all the parts.

Custom Built Vacuum Tube Cassette Player

As we’ve said many times here on Hackaday, it’s not our place to question why people make the things they make. There’s a legitimate need or utility for many of the projects we cover, no doubt about it. But there’s also a large number of them which are so convoluted that they border on absurd. Not that we love the crazy ones any less, in fact, we usually like those the best.

So when we saw this incredible modification to a Panasonic RN-404 microcassette recorder which replaces the audio hardware with a custom built vacuum tube amplifier, we didn’t bother asking what the point was. Perhaps it’s an attempt to make the most impractical method for recording and playing back audio, or maybe it was just to see if it was possible. No matter why it was done, it’s here now and it’s absolutely glorious.

If the look of the hardware didn’t tip you off that this project makes use of old Soviet-era components, the video after the break certainly will. Specifically, it’s using 1ZH25R and 1S38A tubes which were originally intended for military use. Just like all cool old Soviet tech was. Say what you will about the Cold War, it certainly got the engineering juices flowing.

There’s quite a bit of information about how these ancient tubes were brought back to life by way of this gorgeous home-etched PCB. Suffice to say, working with tubes is an art to begin with, but working with such small and unique ones is on a whole new level.

This isn’t the first time we’ve seen some tiny tubes make their way into a piece of consumer audio equipment, but this one certainly takes the top spot in terms of professional final results.

Continue reading “Custom Built Vacuum Tube Cassette Player”

Workshops Announced For Hackaday Belgrade

Hackaday is hosting a full conference in Belgrade, Serbia, on 26 May. Today we’re excited to announce the workshops that will take place at Hackaday Belgrade. Workshop tickets are available now, but space is extremely limited and we expect these workshops to fill up fast so purchase your ticket right now!

Details of each workshop are listed below. Topics this year include bringing art to your PCB designs, learning the fundamentals of e-textiles, and getting up-to-speed with FPGAs.

You must have a Hackaday Belgrade ticket in order to purchase a workshop ticket. This is our premier European conference, with the best hardware and technology culture you’ll find anywhere. We think of it as a Hacker Village that comes together for one incredible weekend in May. There will be a bar meetup the night before, talks and workshops all day on Saturday, followed by IDM and DJ sets during the hardware badge hacking which goes late into the night. In addition to the experience of being around a critical mass of excellent people, we’ll have refreshments and food throughout and the conference badge you’ll get is a piece of custom electronics for you to play with and hack on throughout the day.

It’s entertainment. It’s professional development. It’s the crowd of people you’ve always wanted to hang out with. This isn’t hype, it’s Hackaday Belgrade.

Creating Art in PCB

Brian Benchoff

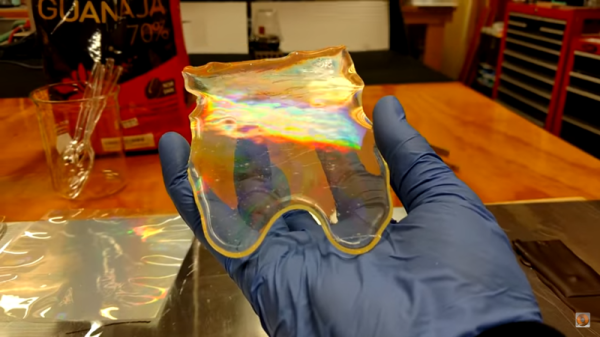
This workshop will guide attendees through the process of creating art in PCBs. Topics covered will be the layer stackup of the modern PCB (copper, fiberglass, soldermask, and silkscreen), the current state-of-the-art using Chinese board houses, and how to implement graphics in PCB art using KiCad.

Interactive Poetic Glove

Lavoslava Benčić

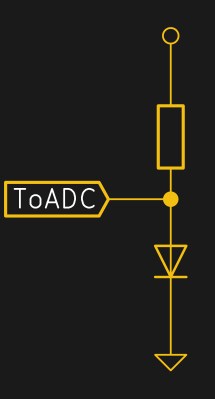
In this e-textile workshop, participants will create a unique interactive wearable that generates sounds of various frequencies and responds to the touch (pressure). This includes learning about electronic elements and circuits with emphasis on the capacitive, conductive, and resistive properties of fabrics and yarns.

FPGA Development 101

Miodrag Milanovic

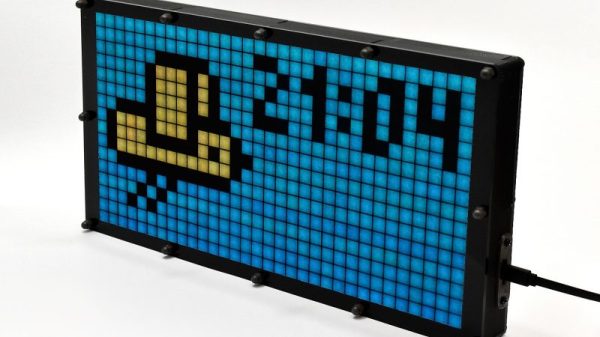
This workshop will show the capabilities of FPGA devices, providing an introduction into FPGA tools used and the Verilog hardware description language. We will go through prepared examples and show the differences in approach when doing design for FPGA and MCU.

Hackaday events always sell out so don’t wait to buy a ticket. Of all the things you could do this year, the Hackaday Belgrade Conference is one that’s worth disrupting your normal routine and making a pilgrimage — we “get” you and we want to see you at the con!