Twitter Celebration Of Scientist Hacks For Lab And Field

If you like reading about scientists creatively using household objects for their work, you will enjoy browsing Twitter hashtag #reviewforscience where scientists are sharing stories of repurposing everyday things for their lab and field.

Research papers focus on the scientific hypothesis and the results of testing it. It is very common for such papers to leave out details of tools and techniques as irrelevant. (A solid scientific conclusion should be reproducible no matter what tools and techniques are used.) This sadly meant much of scientists’ ingenuity never see light.

We can thank Amazon user [John Birch] for this event. His son wished to study how ants from different colonies interact. In order to observe how these groups of ants react to each other while still keeping the populations separate, he wanted to keep one group of ants inside a tea strainer. He posted this technique as a review on the tea strainer’s Amazon product page, where it caught the attention of @RobynJWomack and started spreading, taking off when @DaniRabaiotti suggested the tag #reviewforscience.

Sadly, it appears our original scientist (who posted under his dad’s Amazon account) did not succeed with the tea strainer technique. But he has succeeded in drawing attention to creativity in science worldwide, as well as making his dad internet famous.

We love lab hacks here. For scientists who wish there was a place to document their creative lab hacks, might we suggest Hackaday.io?

[via Washington Post]

The Hard-Learned Lessons Of The Columbia Disaster

On February 1st, 2003 at eighteen seconds past 9:00 AM Eastern Standard Time, the Space Shuttle Columbia broke up during atmospheric entry over Texas. Still traveling at approximately Mach 18.3, the disintegration of Columbia was complete and nearly instantaneous. According to the official accident investigation, the crew had at most one minute from realizing they were in a desperate situation to complete destruction of the spacecraft. Due to the design of the Space Shuttle, no contingency plan or emergency procedure could have saved the crew at this point in the mission: all seven crew members were lost in this tragedy.

While the Space Shuttle, officially known as the Space Transportation System (STS) would fly again after the Columbia disaster, even the program’s most ardent supporters had to admit fundamental design of the Shuttle was flawed. Steps needed to be taken to ensure no future astronauts would be lost, and ultimately, the decision was made to retire the Shuttle fleet after primary construction of the International Space Station (ISS) was complete. There was simply too much invested in the ISS at this point to cancel the only spacecraft capable of helping to assemble it, so the STS had to continue despite the crushing loss of human life it had already incurred.

Between the loss of Challenger and Columbia, the STS program claimed fourteen lives in its thirty year run. Having only flown 135 missions in that time, the STS is far and away the most deadly spacecraft to ever fly. A grim record that, with any luck, is never to be broken.

The real tragedy was, like Challenger, the loss of Columbia could have been prevented. Ground Control knew that the Shuttle had sustained damage during launch, but no procedures were in place to investigate or repair damage to the spacecraft while in orbit. Changes to the standard Shuttle mission profile gave future crews a chance of survival that the men and women aboard Columbia never had.

Continue reading “The Hard-Learned Lessons Of The Columbia Disaster”

Oscilloscope Art From Your Browser

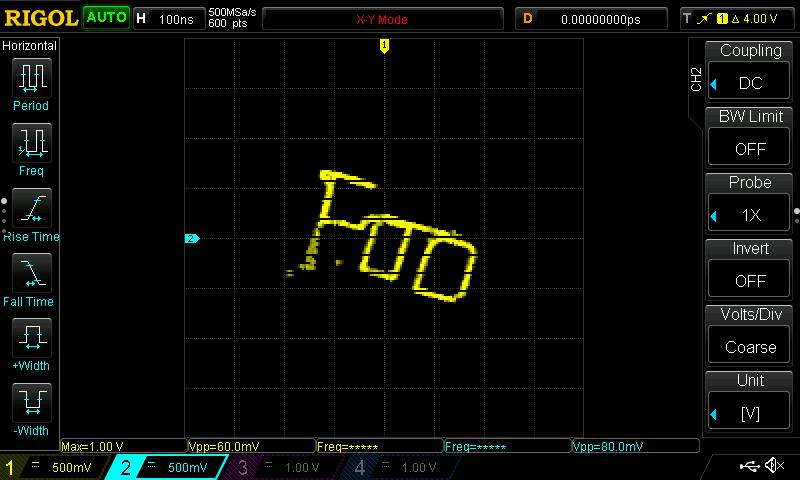
Oscilloscope art is a fascinating pursuit in which waveforms are generated for the X an Y channels of an oscilloscope to draw pictures on its screen. It’s somewhat distinct from vector computer graphics of the type you might see in older arcade machines or the Vectrex console, in that while it uses a similar approach to creating a display it has a very different purpose. Sometimes these works can be breathtakingly beautiful animations, and other times maybe not so much.

If you’d like to explore the topic as a mild diversion, then maybe this Javascript oscilloscope art generator from [Neil Fraser] might be of interest. In around a hundred lines of code he’s created an in-browser scratchpad upon which a waveform can be drawn which will then be created as an audio signal on your computer’s soundcard. Hook up left and right to X and Y of your oscilloscope, and what you scribbled on the pad should pop up on the screen.

Draw it, see it on screen. Magic!

It’s an impressive piece of work that you can see in the video below or try for yourself, and your scribe’s Rigol was pressed into service to give it a go. After a bit of tweaking to find the right voltages and selecting slope triggering rather than edge triggering, we too were making squiggles appear on the screen.

It’s rather funny, he’s saved the best for last. As an afterthought, he also provides a link to another piece of his work, an oscilloscope clock in Javascript. If any of you would like to take this further and make a Javascript oscilloscope Wrencher, we’d love to make it famous.

Continue reading “Oscilloscope Art From Your Browser”

Sculptural Grade M&M Sorter

Sorting M&Ms is really only a major concern if you happen to be working on a Van Halen tour, but it’s a fun exercise nonetheless. It’s for this reason we see plenty of sorting projects come our way, varying from the breadboard and cardboard variety, all the way up to final university projects. Today, [Karl] has blessed us with their sculptural-grade offering, and the attention to detail is stunning.

The project has been in gestation in [Karl]’s mind, on and off, for 10 years or so. The big problem centered around reliably separating out one M&M at a time from a hopper of many. From time to time, [Karl] would speak with other builders using similar techniques to his failed experiments, who often reported that the secret to their machine’s reliability was… careful video editing. It was only when a parts sorter flashed across the Hackaday feed that [Karl] found the mechanism that would work to make his project a reality.

Now that the individual candies could readily be separated and fed through a machine, the rest of the project came together quickly. A color sensor was combined with servos and a stepper motor to duct M&Ms into separate flasks.

The real value of this build, however, is in the overall attention paid to the aesthetics of the final product. The device was built to be a kinetic sculpture, able to run reliably with the minimum of attention at the behest of even an untrained user. By carefully optimising the mechanisms inside and building an attractive enclosure, [Karl] has developed something we’d be proud to show off in a living room.


Putting The Pi In Piano

Working on a PhD in composition, [Stephen Coyle] spends a fair bit of time at his electric keyboard. Setting himself up to work can be a bit of a task, so he felt he could improve the process and make it easy as Pi.

Finding it an odious task indeed to use notation software, connecting his laptop to his keyboard is a must — avoiding a warren of wires in the move is a similar priority. And, what if he could take advantage of the iPad’s unique offerings too? Well, a Raspberry Pi Zero W running Ravelox — an RTP MIDI protocol — makes  his music available on his network to record on whichever device he pleases.

Continue reading “Putting The Pi In Piano”

Router Rebooter Eliminates Hassles

Some low-end or older routers might get you a decent WiFi network in your house or apartment, but often these cheaply made devices are plagued with subtle software problems that cause the router itself to become unresponsive after a few days of operating. One solution is to just power cycle the router by hand whenever the Internet disappears, but a better solution is to build something that does that for you.

[Charlie] had this problem as the de facto IT person in his family, and didn’t want to keep getting bothered for such a simple problem. His solution involves a relay, an ESP8266, and a Wemos D1 mini. The device connects to the Internet through the router and occasionally sends out pings to another address. If it can’t ping the address successfully after a certain time period, the device power cycles the router by activating the relay.

Since this isn’t the newest idea out there, there are many ways to solve this problem if you are constantly annoyed by router issues, whether from your own router or from friends and family who treat you as their personal IT department. One solution doesn’t involve any extra hardware at all as long as you have a computer near your router/modem already, and others solve this problem when it happens to the modem rather than the router.

Continue reading “Router Rebooter Eliminates Hassles”

Junk Build Printer Uses Pencil To Print

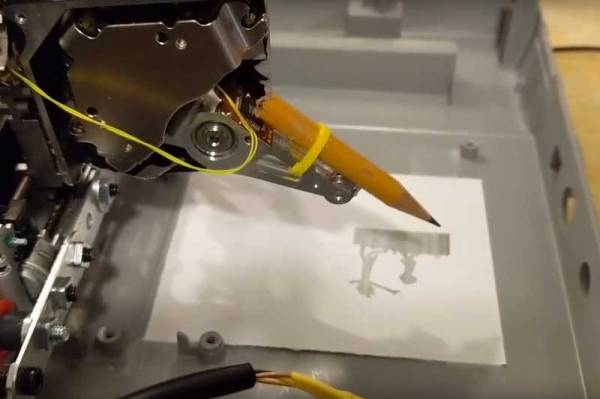
Sometimes, it is interesting to see what you can build from the bits that you have in your junk drawer. [Dr West] decided to build a printer with spare parts including a hard drive, a scanner base and an Arduino. The result is a rather cool printer that prints out the image using a pencil, tapping the image out one dot at a time. The software converts the image into an array, with 0 representing white and 1 representing black. The printer itself works a bit like an old-school CRT TV: the scanner array moves the printer along a horizontal line, then moves it vertically and along another horizontal line. It then triggers the hard drive actuator to create a mark on the paper if there is a 1 in the array at that point.

We’ve seen a few drawing printers before, but most use a plotter or CNC approach, where the motors move the pencil on an X-Y . This type of dot matrix printer (sometimes called a dotter) isn’t as efficient, but it’s a lot of fun and shows what can be achieved with  a few bits of junk and a some ingenuity.

Continue reading “Junk Build Printer Uses Pencil To Print”