Innovative Bird Feeder Design Recycles Recycling’s Garbage

Recycling beverage cartons isn’t 100% efficient. The process yields some unusable garbage as a byproduct. Why? Because containers like juice boxes are mostly paper, but also contain plastic and aluminum. The recycling process recovers the paper fibers for re-use, but what’s left after that is a mixture of plastic rejects and other bits that aren’t good for anything other than an incinerator or a landfill. Until now, anyway!

It turns out it is in fact possible to turn such reject material into a product that can be injection-molded, as shown here with [Stefan Lugtigheid]’s SAM bird feeder design. The feeder is not just made from 100% recycled materials, it’s made from the garbage of the recycling process — material that would otherwise be considered worthless. Even better, the feeder design has only the one piece. The two halves are identical, which reduces part count and simplifies assembly.

[Stefan] makes it clear that the process isn’t without its quirks. Just because it can be injection-molded doesn’t mean it works or acts the same as regular plastic. Nevertheless, the SAM birdfeeder demonstrates that it can definitely be put to practical use. We’ve seen creative reprocessing of PET bottles and sheet stock made from 3D printed trash, but recycling the garbage that comes from recycling drink cartons is some next-level stuff, for sure.

Raspberry Pi Streams Music Using Only The Default Linux Tools

Getting a  home music streaming system off the ground is typically a straightforward task. Using Apple devices with Airplay makes this task trivial, but if you’re a computing purist like [Connor] who runs a Linux machine and wants to keep it light on extra packages, the task gets complicated quickly. His goal is to bring audio streaming to all Linux platforms without the need to install a lot of extra software. This approach is friendly to light-footprint devices like the Raspberry Pi that he used in his proof of concept.

[Connor] created a set of scripts which allow streaming from any UNIX (or UNIX-like) machines, using only dependencies that a typical OS install would already have. His Raspberry Pi is the base station and streams to his laptop, but he notes that this will work between virtually any UNIX or Linux machine. The only limitation is what FFmpeg can or can’t play.

We definitely can appreciate a principled approach to software and its use, although it does seem that most people don’t have this issue at the forefront of their minds. This results in a lot of software that is bulky, making it difficult to maintain, use, or even know what it does, and also makes it harder for those of us that don’t want to use that type of software to find working solutions to other problems. It’s noble that [Connor] was able to create something without sacrificing any principles.

KiCad Gets Banana For Scale

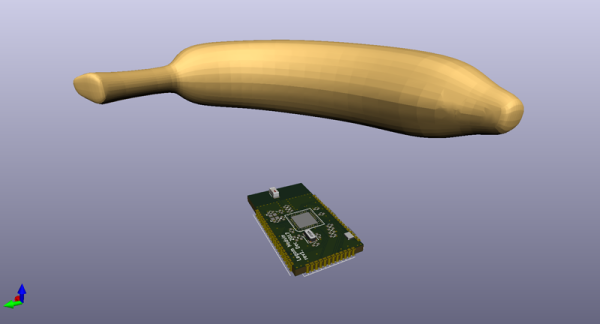
Over the years we’ve seen KiCad grow from a niche, somewhat incomplete, but Open Source PCB design suite to a full-featured extravaganza of schematics and board layouts. We’ve plumbed the depths of keys and kais and queues and quays, and KiCad just had its first conference last weekend. While we wait for the rest of the talks to be published, there’s a special treat for KiCad users everywhere. Here’s a banana for scale.

Have you ever worried your PCB was too big? Confused if you’re working in inches or millimeters? Do you just want to know the scale of your PCB? Just add this footprint to your KiCad project, and you’ll have a banana on your board view. This is immediate visual feedback, giving you all the information you need to continue on with your design. There’s a 2D view and a 3D view. It’s something no electrical engineer should be without. All of this can be yours for the low, low, cost of free because KiCad is Open Source.

If you’re wondering what official features are in the works for the EDA suite, the first two talks from the con delve into that. project leader Wayne Stambaugh’s talk covers features new to version 5.1 and plans for 6.0. There was also a developers panel that provides insight on what goes into a large project like this one.

Auto-Trickler Gently Doles Out Powder To Assist Reloading

Do you even trickle?

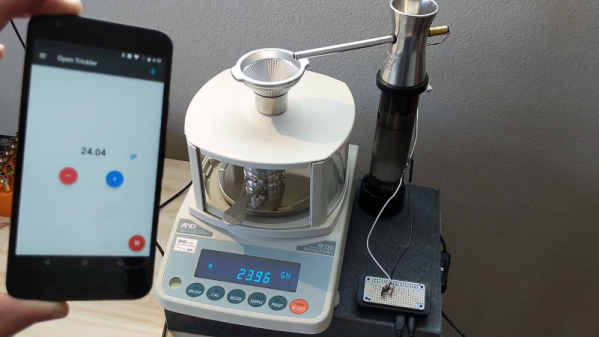
[Eric] does, and like everything else about reloading, trickling is serious business. Getting an exact charge of powder to add to a cartridge is not a simple task, and very tedious when done manually. This smartphone-controlled auto-trickler is intended to make the job easier, safer, and more precise.

Reloading ammunition is a great way for shooters to save money and recycle the brass casings that pile up at the end of a long day at the range. It can be a fairly simple process of cleaning the casings, replacing the spent primers, adding the correct powder charge, and seating a new bullet. It’s all pretty straightforward, but the devil is in the details, especially with the powder charge. A little too much can be a big problem, so tricklers were invented to allow the reloader to sneak up on the proper charge. [Eric]’s auto-trickler interfaces to a digital powder scale and uses a standard cell phone vibration motor to gently coax single kernels of powder from a hopper until the proper charge has accumulated. It’s easier to understand by watching the video below.

The hardware behind the trickler is pretty standard — just a Raspberry Pi Zero to talk to the smartphone UI via Bluetooth, and to monitor and control the scale via USB. [Eric] has made all the code open source so that anyone can build their own auto-trickler, which we applaud; he did the same thing with his rifle-mounted accelerometer. This project might have applications far beyond reloading where precision dispensing is required.

Continue reading “Auto-Trickler Gently Doles Out Powder To Assist Reloading”

A Mainframe Tape Drive Emulator

Retro computer fans come in all shapes and sizes. Some like the big name machines from the dawn of the home computer era, others like collecting quirky pieces like early laptops and handheld devices. Even more obscure are those who choose to collect old mainframe hardware. This can be challenging, due to its relative obscurity and the limited resources available. [skaarj] is just one such fanatic, however, and has begun creating a PERTEC tape drive emulator for his Cold War era mainframe.

For those of us who didn’t work in industrial computing back in the 1980s, the PERTEC interface is an unfamiliar beast. It became somewhat of a defacto standard for connecting tape drives to mainframes. [skaarj] aims to understand and emulate this interface, creating a device with a full suite of capabilities. The PERTEC Whisperer is intended to be capable of reading and writing from PERTEC tape drives, including dumping tapes to an integrated SD card. The device will also be able to emulate a drive when connected to a mainframe.

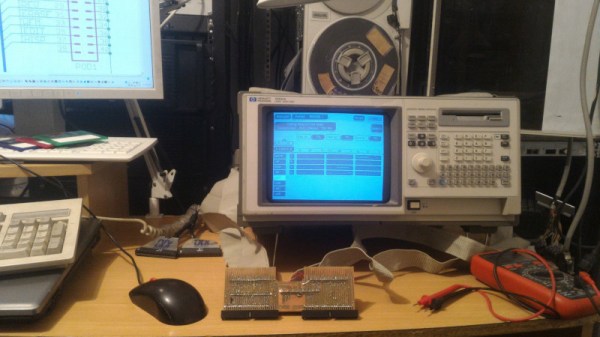
Thus far, the adventure has already netted some successes. [skaarj] learned useful tricks, like rewinding a 9-track Qualstar 1260 with VHS tape, and how to pull apart the protocols involved using an old-school HP1662 logic analyzer. We can’t wait to see where the project goes next, and it might just have us hunting for a mainframe to call our very own.

How-To: Mapping Server Hits With ESP8266 And WS2812

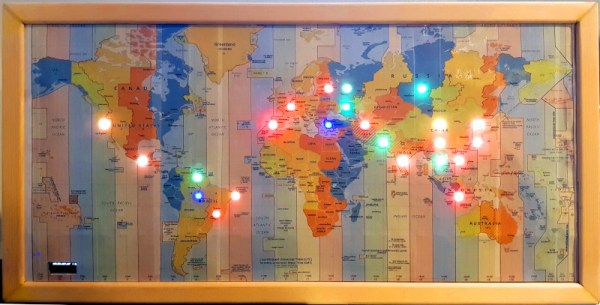
It has never been easier to build displays for custom data visualization than it is right now. I just finished one for my office — as a security researcher I wanted a physical map that will show me from where on the planet my server is being attacked. But the same fabrication techniques, hardware, and network resources can be put to work for just about any other purpose. If you’re new to hardware, this is an easy to follow guide. If you’re new to server-side code, maybe you’ll find it equally interesting.

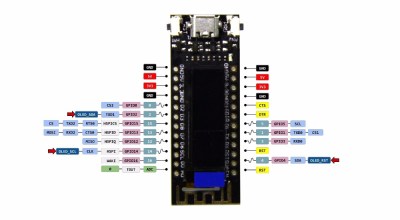
I used an ESP8266 module with a small 128×32 pixel OLED display connected via an SSD1306 controller. The map itself doesn’t have to be very accurate, roughly knowing the country would suffice, as it was more a decorative piece than a functional one. It’s a good excuse to put the 5 meter WS2812B LED strip I had on the shelf to use.

The project itself can be roughly divided into 3 parts:

  1. Physical and hardware build
  2. ESP8266 firmware
  3. Server-side code

It’s a relatively simple build that one can do over a weekend. It mashes together LED strips, ESP8266 wifi, OLED displays, server-side code, python, geoip location, scapy, and so on… you know, fun stuff.

Continue reading “How-To: Mapping Server Hits With ESP8266 And WS2812”

Creating A Touch Pad Without Dedicated Hardware

Year on year, microcontrollers and development platforms are shipping with ever-increasing feature sets. In the distant past, if you wanted an analog to digital converter or a PWM driver, you had to tack extra ICs on to your design. Nowadays, it’s all baked in at the factory. Of course, you may still find yourself working with a platform that lacks capacitive touch inputs. That’s no problem, though – you can do it all without dedicated hardware anyway!

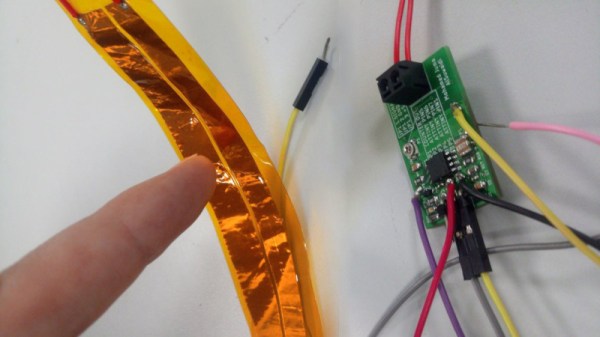
Capacitive touch sensing works by creating an RC oscillator, and allowing the user to affect the capacitance in the circuit through touch or proximity. By sensing the changes in the frequency of the oscillator, it’s possible to determine whether the object or pad is being touched or not. As the capacitance changes can be small, sometimes it’s desired to use a high frequency oscillator, and then pass the output through a frequency divider, which allows changes to be measured more easily by a slower microcontroller.

[Gabriel] does a great job of both explaining the theory involved, as well as presenting a practical way to achieve this with basic hardware. If you need to add touch sensitivity to an existing or otherwise limited platform, this is an easy way to go about doing it. There are definitely some interesting things you can do with the technology, after all.