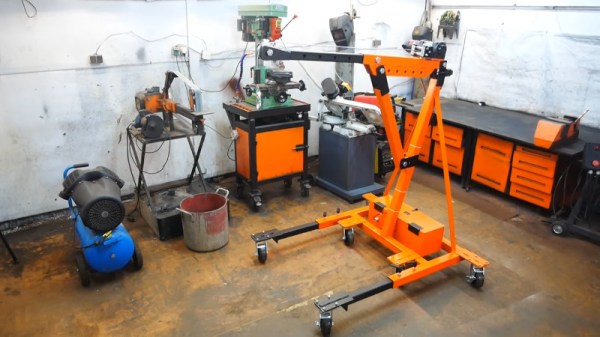
Buying tools is all well and good, but it doesn’t suit the ethos of Youtube channel [Workshop From Scratch]. Building what you need is much more the go, and that’s demonstrated ably with this home-built electric workshop crane.
The crane is put together in a straightforward manner using basic steelworking techniques. Plates and bars are machined with a drill press, bandsaw and grinder, though we could imagine you could use hand tools if you were so inclined. An ATV winch is pressed into service to do the heavy lifting, powered by a set of 12V lead acid batteries placed in the base. This design choice does double duty as both a mobile power supply for the crane, and acts as a counterweight in the base.
The final result looks sharp in its orange paint finish, and does a good job of moving heavy equipment around the workshop. The legs are reconfigurable, so that even very heavy loads can be lifted with appropriate counterweight placed on the back. It’s a significant upgrade on the earlier version we featured last year, which was hydraulic in operation. Video after the break.
On older vehicles, if you noticed that the lights had gone out behind one of your gauges, you knew it was time to snake your hand back there and replace the little incandescent bulb that had given up the ghost. But what are you supposed to do if you’re seeing the same problem on a modern vehicle that’s already made the leap to LED dash lighting? That’s what [Tysonpower] recently had to find out when the fuel indicator on his Alfa Romeo Giuletta QV went dark.
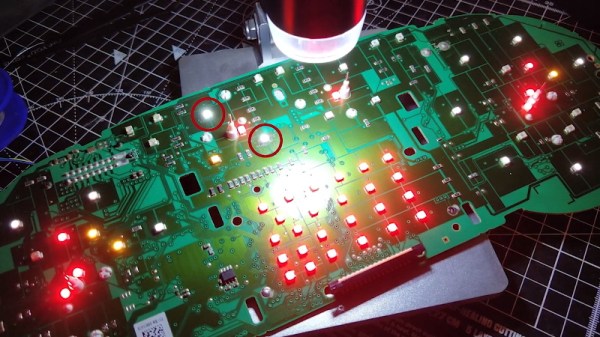
In the video after the break, [Tysonpower] details how to remove the instrument cluster from the Giuletta’s dash, which we imagine would be a useful little tutorial for anyone who owns the same vehicle. Once he has it out on the bench, he strips it down to the bare PCB and starts (literally) poking around.
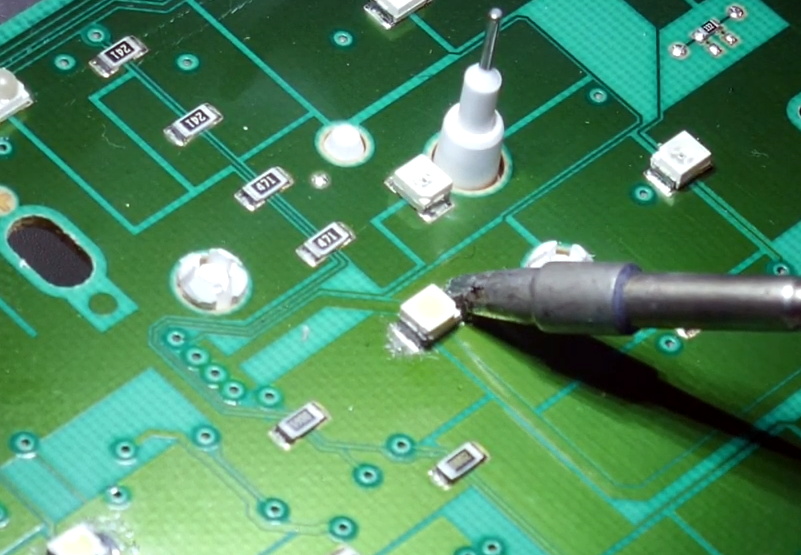
He eventually noticed that if he pushed on the board near the fuel indicator he could get the appropriate 3528 SMD LED to light up, but touching up the solder joints didn’t seem to fix the issue. Assuming the LED must be defective internally, he simply replaced it and all was good again.
Well, not exactly. The light produced by the new part didn’t match the color or brightness of the other dozen or so white LEDs that were installed on the board, so [Tysonpower] decided to just dive in and replace them all. While it obviously took a lot more time and effort, he says the end result is that the instrument cluster looks noticeably brighter and crisper when driving at night. Not bad for an afternoon’s work and a couple bucks worth of LEDs.
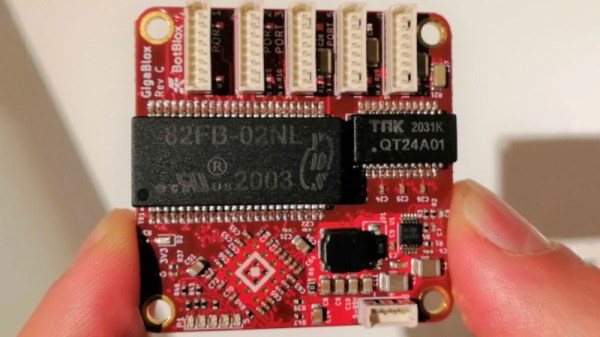
The Gigablox takes its mission seriously, with its compact size the ultimate design goal. The entire switch fits on a tiny 45 mm x 45 mm PCB. To this end, it eschews the common RJ45 connector, which is bulkier than necessary. Instead, thin Molex PicoBlade connectors are used for the five ports on board. Cables are included to convert between the two connectors, and obviously crimping ones own is easy to do, too. For those who need to connect more devices, several Gigablox can be hooked up in the same way as any other Ethernet switch. The Gigablox is a non-blocking switch, too – meaning all five ports can run at full speed simultaneously.
The design is the sequel to the SwitchBlox, and the later SwitchBlox Nano, both designed by [Josh Elijah] earlier this year. The pace of development is impressive, and it’s great to see [Josh] bring Gigabit speeds to the compact form factor. We can imagine a few good uses for these boards; share your best ideas in the comments below! Video after the break.
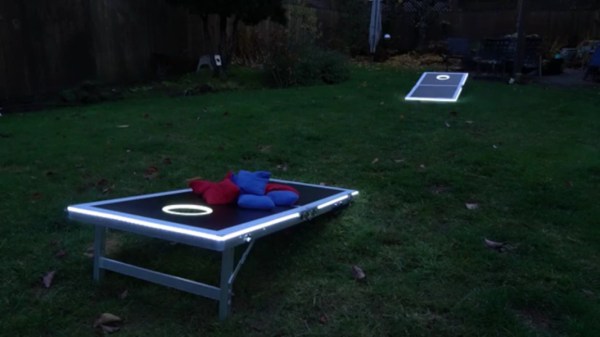
How do you instantly make any game better? By lighting it up and playing at night. We would normally say ‘drinking’, but we’re pretty sure that drinking is already a prerequisite for cornhole — that’s the game where you toss bean bags at holes in angled boards.
Players get a point and a song for landing a bag on top of the board, and three points and a different song for making it in the hole. We love the Easter egg — anyone who manages to trip both the vibration sensor and the break-beam detector at the same time will be treated to the sound of a flock of honking geese. Check out the build journey after the break.
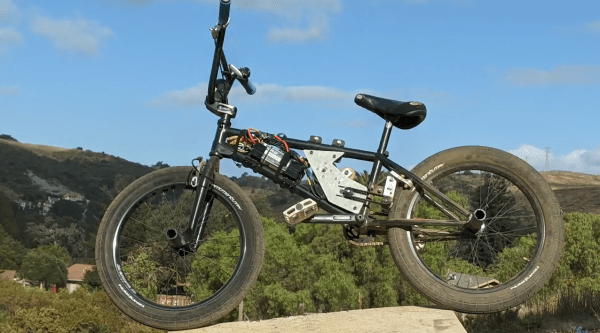
Electric bikes have increased in popularity dramatically over the past few years, and while you can easily buy one from a reputable bicycle manufacturer, most of us around here might be inclined to at least buy a kit and strap it to a bike we already have. There aren’t kits available for every bike geometry, though, so if you want an electric BMX bike you might want to try out something custom like [Shea Nyquist] did with his latest build. (Video, embedded below.)
BMX frames have a smaller front triangle than most bikes, so his build needed to be extremely compact. To that end, it uses two small-sized motors connected together with a belt, which together power a friction drive which clamps against the rear tire to spin it directly. This keeps the weight distribution of the bike more balanced as well when compared to a hub drive, where the motor is installed in the rear wheel. It also uses a more compact lithium polymer battery pack instead of the typical 18650 lithium ion packs most e-bikes use, and although it only has a range of around three miles it’s more than enough charge to propel it around a skate park.
The build boasts impressive numbers too, at 2.5 kW peak power per motor. This puts it in electric motorcycle territory, and it’s indeed fast despite its small stature. For a true high speed e-bike experience, though, you’ll need a slightly larger frame and motor even if it means tossing safety out of the window. Continue reading “Electric BMX With Friction Drive”→
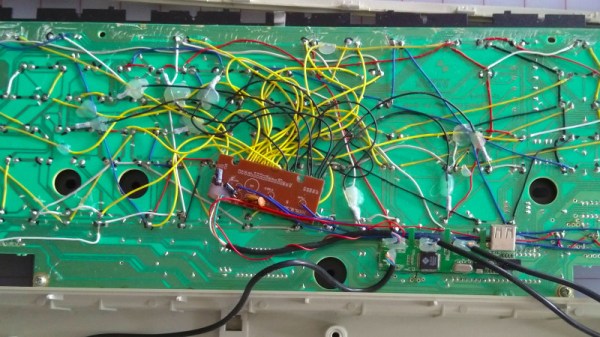
The world of custom keyboards has over the years developed its work into an art form, as mechanical key switches meet USB-HID capable microcontrollers for a plethora of designs as individual as their creators. This was however not always the case, and from the days of 8-bit home computers onwards making a custom keyboard often meant taking a surplus one from elsewhere and adapting its matrix to suit whatever controller interface was at hand. [Julian Calaby]’s USB conversion of an Apple Extended keyboard may be unusual in this day and age and was probably a late example even 15 years ago when he made it, but it remains a glorious piece of bodge-wire hardware hacking at its finest.
The task at hand with this type of conversion is to cut the matrix PCB tracks and replace them with soldered wires to create the new matrix required. This can then be wired to the controller, which in [Julian]’s case came from a cheap USB keyboard. He added a small USB hub to allow for a pair of USB sockets where Apple had put an ADB socket, making for quite a decent older keyboard with an unexpected USB interface.
Now older and wiser, he has plans to revisit his old keyboard with a modern microcontroller board, and needs to revisit the matrix again and give the peripheral new life. We still like the original though, as it captures a moment in time when keyboard matrix hacking made sense, and reminds us of our own youthful hardware follies.
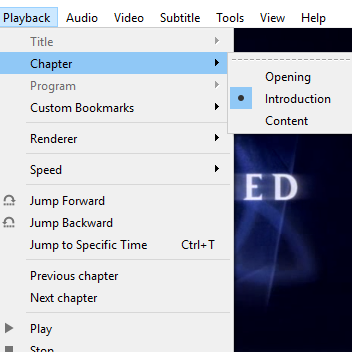
Lacking a DVD drive, [jg] was watching a TV series in the form of a bunch of .avi video files. Of course, when every episode contains a full intro, it is only a matter of time before that gets too annoying to sit through.
Chapter breaks reliably inserted around the intro, even when it doesn’t always occur in the same place.
The usual method of skipping the intro on a plain video file is a simple one:
Manually drag the playback forward past the intro.
Oops that’s too far, bring it back.
Ugh reversed it too much, nudge it forward.
Okay, that’s good.
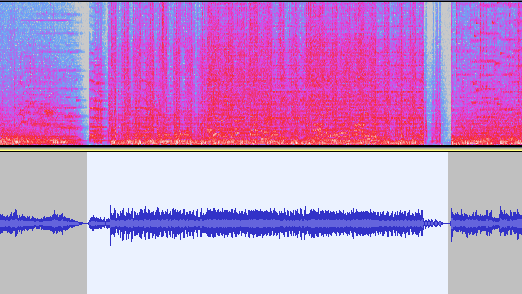
[jg] was certain there was a better way, and the solution was using audio fingerprinting to insert chapter breaks. The plain video files now have a chapter breaks around the intro, allowing for easy skipping straight to content. The reason behind selecting this method is simple: the show intro is always 52 seconds long, but it isn’t always in the same place. The intro plays somewhere within the first two to five minutes of an episode, so just skipping to a specific timestamp won’t do the trick.
The first job is to extract the audio of an intro sequence, so that it can be used for fingerprinting. Exporting the first 15 minutes of audio with ffmpeg easily creates a wav file that can be trimmed down with an audio editor of choice. That clip gets fed into the open-source SoundFingerprinting library as a signature, then each video has its audio track exported and the signature gets identified within it. SoundFingerprinting therefore detects where (down to the second) the intro exists within each video file.
Marking out chapter breaks using that information is conceptually simple, but ends up being a bit roundabout because it seems .avi files don’t have a simple way to encode chapters. However, .mkv files are another matter. To get around this, [jg] first converts each .avi to .mkv using ffmpeg then splices in the chapter breaks with mkvmerge. One important element is that the reformatting between .avi and .mkv is done without completely re-encoding the video itself, so it’s a quick process. The result is a bunch of .mkv files with chapter breaks around the intro, wherever it may be!
The script is available here for anyone to play with, and the project page is a good learning reference because [jg] kindly provides all the command-line options used for each tool. Interested in using audio fingerprinting in your own projects? Remember to also check out Olaf, the Overly Lightweight Acoustic Fingerprinting method that can be implemented in embedded systems and web browsers.