Despite the name, home automation doesn’t have to be limited to only the devices within your home. Bringing your car into the mix can open up some very interesting possibilities, such as automatically getting it warmed up in the morning if the outside air temperature drops below a certain point. The only problem is, not everyone is willing to start hacking their ride’s wiring to do it.
Which is exactly why [Matt Frost] went the non-invasive route. By wiring up an ESP8266 to a cheap aftermarket key fob for his Chevrolet Suburban, he’s now able to wirelessly control the door locks and start the engine without having to make any modifications to the vehicle. He was lucky that the Chevy allowed him to program his own fob, but even if you have to spend the money on getting a new remote from the dealer, it’s sure to be cheaper than the repair bill should you cook something under the dash with an errant splice or a misplaced line of code.
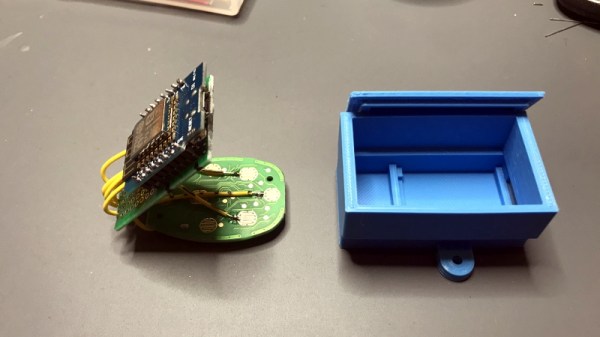
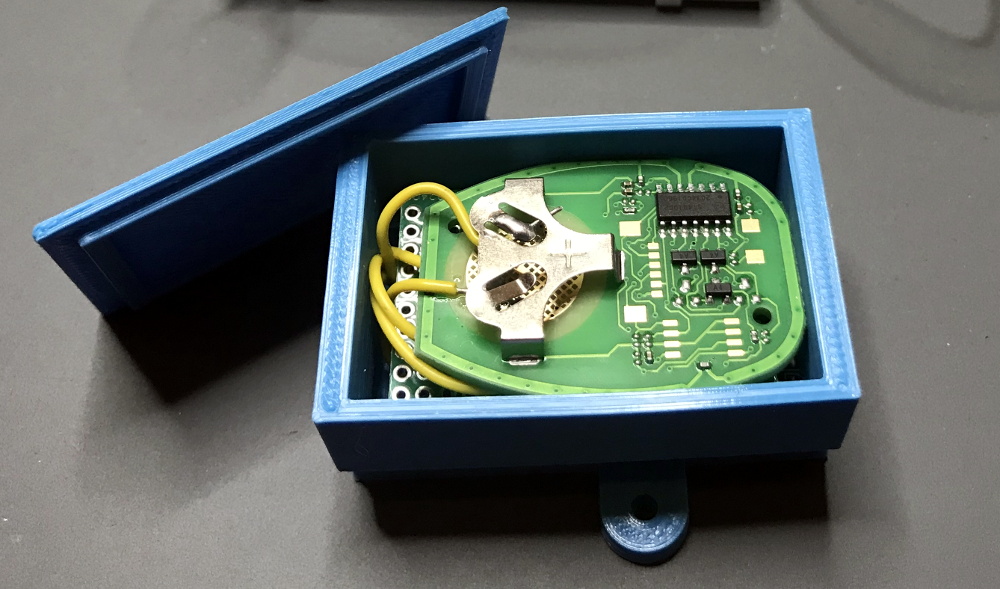 The hardware for this project is about as simple as it gets. The fob is powered by the 3.3 V pin on the Wemos D1 Mini, and the traces for the buttons have been hooked up to the GPIO pins. By putting both boards into a custom 3D printed enclosure, [Matt] came up with a tidy little box that he could mount in his garage and run off of a standard USB power supply.
On the software side of things [Matt] has the device emulating a smart light so it can easily be controlled by his Alexa, with a few helpful routines sprinkled in that allow him to avoid the awkward phraseology that would be required otherwise. There’s also a minimal web server running on the microcontroller that lets him trigger various actions just by hitting the appropriate URLs, which made connecting it to Home Assistant a snap. One downside of this approach is that there’s no acknowledgement from the vehicle that the command was actually received, but you can always send a command multiple times to be sure.
This isn’t the first time we’ve seen an ESP8266 used to “push” buttons on a remote. If you’ve got a spare fob for your device, or can get one, it’s an excellent way to automate it on the cheap.


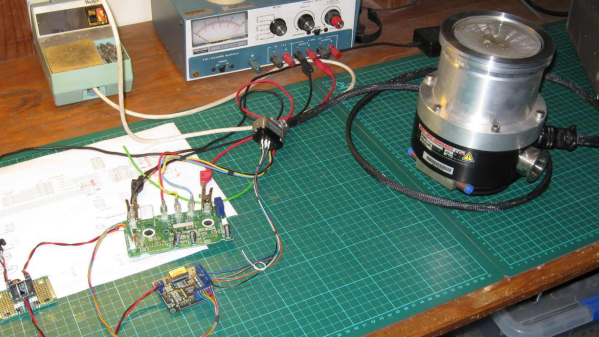
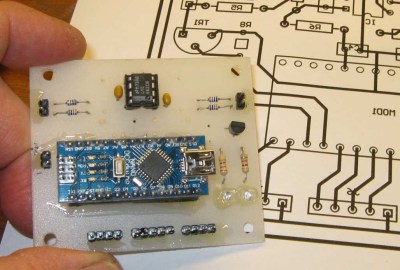 With FPGA code, IGBT wiring and power supply issues sorted, the next step was to add a supervisory micro-controller, using an Arduino Nano. Its functions included interfacing with a touch screen LCD as a user interface, communicating with the FPGA module, and controlling several relays to switch power to the motor power supply, the roughing pump, TMP cooling fan, and a solenoid for the vacuum vent. Spindle current is calculated by measuring voltage drop across shunt resistors on the low side of the IGBT. Motor speed is measured using one of the motor hall sensors, and a thermistor provides motor temperature sensing. [Mark]’s PCB fabrication technique seems a bit different too. Using an Excellon drill file, he drills holes in a piece of plastic using a laser cutter to create a bare board, and then solders copper tracks by hand.


