Milling Dies And Injection Moulding Some Acrylic Lenses

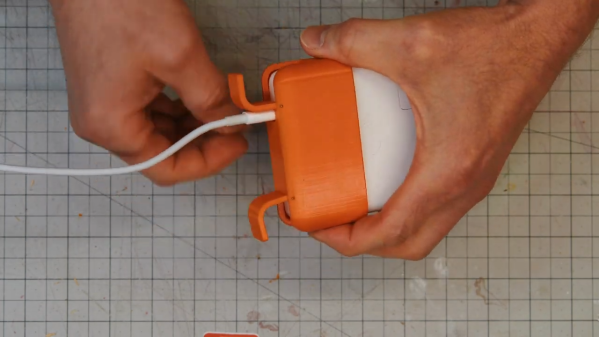
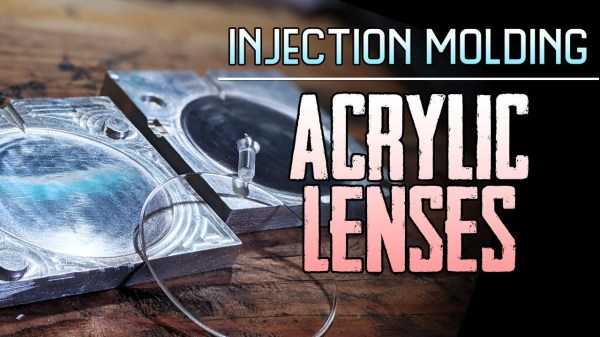
[Zach] over at his channel Breaking Taps has put up an extraordinary account on manufacturing some homemade acrylic lenses. In the end, not only does he produce some beautiful concave lenses, he also covers the complete manufacturing process, from milling the aluminium die used for injection moulding to tweaking the parameters associated with injecting the actual acrylic, he even goes over the limitations of optics produced in this fashion.

What caught our eye in particular, was how [Zach] used the finished product to practically demonstrate photoelasticity originating from the stress induced by the moulding process. You might be familiar with describing the optical properties of a material by a single number, i.e its permittivity. But what happens if in addition to altering speed, the material also alters the polarisation and direction of light depending on the stress distribution within the material? Whilst a quantitative answer gets a bit complicated you can check out [Zach’s] additional videos to visualise the answer in a pretty and colourful way, without resorting to fancy computer simulations! If however, you really want to persist with the simulation route, check out our article on stress analysis in a totally different setting using Finite Element Analysis.

Continue reading “Milling Dies And Injection Moulding Some Acrylic Lenses”

IWings For The New Apple Power Adaptor

You might remember the old Apple MagSafe adaptor with the cute little fold out “wings” that served not only as a pragmatic cable management tool, but in our experience also expedited the inevitable and frayed end of your charger. Apple seems to have remedied the latter by opting for removable USB-C cables in latest designs, but the complete omission of a pop-out cable spooling contraption is problematic.

[Eric], an industrial designer, took it upon himself to design a 3D printed add on for the new generation of chargers. His video is certainty one of those satisfying accounts, where the whole process from conceptional sketch to a working Hack is neatly self-contained in a single video.  The design is largely based off the original version, implemented in PLA together with piano wire serving as the hinge pin. We think this is a very good example of how 3D printers can be used to personalise and tweak commercial products to suite particular needs.

If you are looking for a more general 3D printed cable management tool, check out this geared cable winder we featured earlier.

Custom Packet Sniffer Is A Great Way To Learn CAN

Whilst swapping out the stereo in his car for a more modern Android based solution, [Aaron] noticed that it only utilised a single CAN differential pair to communicate with the car as opposed to a whole bundle of wires employing analogue signalling. This is no surprise, as modern cars invariably use the CAN bus to establish communication between various peripherals and sensors.

In a series of videos, [Aaron] details how he used this opportunity to explore some of the nitty-gritty of CAN communication. In Part 1 he designs a cheap, custom CAN bus sniffer using an Arduino, a MCP2515 CAN controller and a CAN bus driver IC, demonstrating how this relatively simple hardware arrangement could be used along with open source software to decode some real CAN bus traffic. Part 2 of his series revolves around duping his Android stereo into various operational modes by sending the correct CAN packets.

These videos are a great way to learn some of the basic considerations associated with the various abstraction layers typically attributed to CAN. Once you’ve covered these, you can do some pretty interesting stuff, such as these dubious devices pulling a man-in-the-middle attack on your odometer! In the meantime, we would love to see a Part 3 on CAN hardware message filtering and masks [Aaron]!

Continue reading “Custom Packet Sniffer Is A Great Way To Learn CAN”

Guide: Why Etch A PCB When You Can Mill?

I recall the point I started taking electronics seriously, although excited, a sense of dread followed upon the thought of facing the two main obstacles faced by hobbyists and even professionals: Fabricating you own PCB’s and fiddling with the ever decreasing surface mount footprints. Any resistance to the latter proves futile, expensive, and frankly a bit silly in retrospect. Cheap SMD tools have made it extremely easy to store, place, and solder all things SMD.

Once you’ve restricted all your hobbyist designs/experiments to SMD, how do you go about producing the PCBs needed for prototyping? Personally, I dread the thought of etching my own boards. The process is laborious and involves messy chemicals and specially sensitized PCB’s — none of which interest me. I’ve only ever done it a few times, and have promised myself never to do it again. Professional but cheap PCB manufacturing is more like it board pooling services such as OSH park have made this both easy and affordable — if you can wait for the turnaround.

So what are the alternatives? If you are really serious about swift prototyping from your own Lab, I put forth the case of milling your own PCB’s. Read on as I take you through the typical workflow from design to prototype and convince you to put up with the relatively high start up cost of purchasing a PCB mill.

Continue reading “Guide: Why Etch A PCB When You Can Mill?”

Learning ARM Assembly With VisUAL

Learning assembly is very important if you want to get a grasp of how a computer truly works under the hood. VisUAL is a very capable ARM emulator for those interested in learning the ARM assembly.

The GUI: A simply program to ADD two numbers

In addition to supporting a large subset of ARM instructions, the CPU is emulated via a series of elaborate and instructive animations that help visualise the flow of data to/from registers, any changes made to flags, and any branches taken. It also packs very useful animations to help grasp some of the more tricky instruction such as shifts and stack manipulations.

As it is was designed specifically to be used as teaching tool at Imperial College London, the GUI is very friendly, all the syntax errors are highlighted, and an example of the correct syntax is also shown.

Branch visualisation, credits: VisUAL homepage

You can also do the usual things you would expect from any emulator, such as single step through execution, set breakpoints, and view data in different bases. It even warns you of any possible infinite loops!

That being said, lugging such an extravagant GUI comes at a price; programs that consume a few hundred thousand cycles hog far too much RAM should be run in the supported headless mode.


Programmable Christmas Tree Is A JavaScript Interpreter

Here at Hackaday, we find Christmas time very exciting because it means an influx of holiday-themed hacks that really help us get into the festive mood. [Andrew’s] programmable Christmas tree hosted at HackMyXmas is certainly one of our favorites. The project consists of a 500 RGB LEDs wrapped around a typical Christmas tree and controlled by a Teensy.  However, not settling for the typical, simple and cyclical pattern for the LEDs, [Andrew] decided the tree had to be programmable of course! So, a single board computer (a C.H.I.P) running Linux was used to provide a Wifi connection and a web server to easily program the tree.

This is where things get very interesting. The C.H.I.P board hosts a comprehensive website that conveniently gives you the option to program the LEDs using either, Scratch like draggable blocks (using Googles Blockly) or even pure JavaScript. Once the perfect pattern is conceived, you can test run it on the online simulator or even send it off straight to the Tree, watching it blink in all its glory on the provided live stream.

We applaud [Andrew] mammoth effort for invoking programming in such a fun way! You can check out the live stream of [Andrew]’s Christmas tree below.

Continue reading “Programmable Christmas Tree Is A JavaScript Interpreter”

Control A Quadcopter Over Websockets

The interface

Everyone’s favourite IOT module, the ESP8266, is often the go-to choice for any project that needs quick and cheap control over the web. [Andi23456] wanted to control his quadcopter using the luxury of his mobile phone and thought permanently tethering an ESP12-E module to the quadcopter was exactly what he required.

The ESP8266, really showcasing its all-round prowess, hosts both a web server for a HTML5 based joystick and a Websockets server so that a client, such as a phone, could interact with it over a fast, low latency connection. Once the ESP8266 receives the input, it uses interrupts to generate the corresponding PPM (Pule Position Modulation) code which the RC receiver on the quadcopter can understand. Very cool!

What really makes this realtime(ish) control viable is Websockets, a protocol that basically allows you to flexibly exchange data over an “upgraded” HTTP connection without having to lug around headers each time you communicate. If you haven’t heard of Websockets you really should look really check out this library or even watch this video to see what you can achieve.