Displays We Like Hacking: HDMI

I don’t like HDMI. Despite it being a pretty popular interface, I find crucial parts of it to be alien to what hackers stand for. The way I see it, it manages to be proprietary while bringing a lot of the old cruft in. It doesn’t have a native alternative like DisplayPort, so portable implementations tend to suffer power-wise; the connector situation is interesting, and the HDMI Foundation has been doing some weird stuff; in particular, they are pretty hostile to open-source technology.

This article is not the place for such feelings, however, especially since I’ve expressed them enough in the DisplayPort article. We the hackers deserve to be able to handle the interfaces we stumble upon, and I firmly believe in that way more than in my right to animosity towards HDMI.

The HDMI interface is seriously prominent wherever you look, in part because it’s the interface created by the multimedia-involved companies for the multimedia-involved companies. Over the years we’ve had it, it’s been more than sufficient for basically everything we do video-wise, save for the highest resolutions.

It’s also reasonably simple to wire up, hack on, and even bitbang. Let’s go through what makes it tick.

The Core

HDMI is, at its core, three differential pairs for data, plus one pair to clock them and in the darkness bind them. It’s a digital interface, though it is a fun one. This makes it way more suitable for higher-distance video transmissions than interfaces like VGA, and as long as you stick to relatively low resolutions, HDMI won’t have as many asks in terms of PCB layout as DisplayPort might, thanks to HDMI link speeds scaling proportionally with the display resolution.
Continue reading “Displays We Like Hacking: HDMI” →

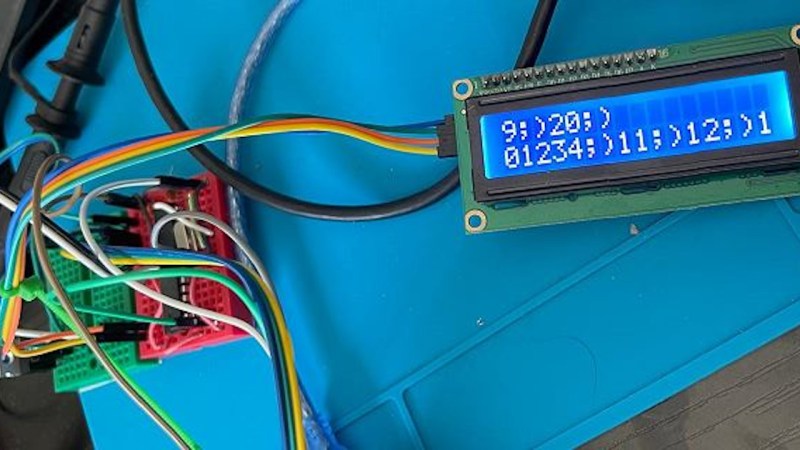
To the left, a breadboard with the ATMega328P being attacked. To the right, the project's display showing multiple ;) smiley faces, indicating that the attack has completed successfully.

Glitching An ATMega328P Has Never Been Simpler

Did you know just how easily you can glitch microcontrollers? It’s so easy, you really have no excuse for not having tried it out yet. Look, [lord feistel] is doing glitching attacks on an ATMega328P! All you need is an Arduino board with its few SMD capacitors removed or a bare 328P chip, a FET, and some sort of MCU to drive it. All of these are extremely generic components, and you can quickly breadboard them, following [lord feistel]’s guide on GitHub.

In the proof-of-concept, you can connect a HD44780 display to the chip, and have the victim MCU output digits onto the display in an infinite loop. Inside of the loop is a command to output a smiley face – but the command is never reachable, because the counter is reset in an if right before it. By glitching the ATMega’s power input, you can skip the if and witness the ;) on your display; it is that simple.

What are you waiting for? Breadboard it up and see for yourself, this might be the method that you hack your next device and make it do your bidding. If the FET-and-MCU glitching starts to fail you at some point, there’s fancier tools you can use, like the ChipWhisperer. As for practical examples, [scanlime]’s elegant glitching-powered firmware hack is hard to forget.

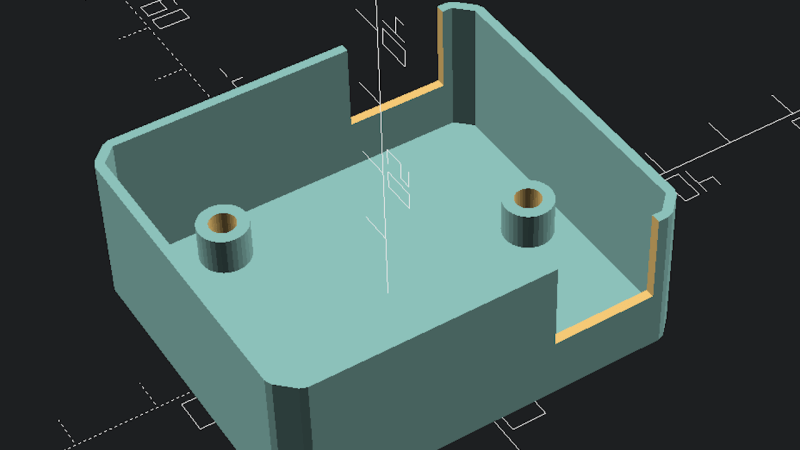
An example of the case generated for a simple PCB, being shown in the OpenSCAD viewer

Turbocase Generates A PCB Shell For You

Our PCBs greatly benefit from cases – what’s with all the pins that can be accidentally shorted, connectors that stick out of the outline, and cables pulling the board into different directions. Designing a case for your PCB might feel like a fair bit of effort – but it likely isn’t, thanks to projects like turbocase from [Martijn Braam].

This script generates simple and elegant OpenSCAD cases for your KiCad PCBs – you only need to draw a few extra lines in the PCB Editor, that’s it. It makes connector openings, too – add a “Height” property to your connector footprints to have them be handled automatically. Oh, and there’s a few quality-of-life features – if your project has mounting holes, the script will add threaded-insert-friendly standoffs to the case; yet another argument for adding mounting holes to your boards, in case you needed more.

Installing the script is a single line, running it is merely another, and that will cover an overwhelming majority of boards out there; the code is all open too, of course. Want some more customization? Here’s some general project enclosure tutorials for OpenSCAD, and a KiCad-friendly StepUp tutorial. Oh, and of course, there’s many more ways to enclose PCBs – our own [Bob Baddeley] has written a guide to project enclosures that you are bound to learn new things from.

We thank [adistuder] for sharing this with us!

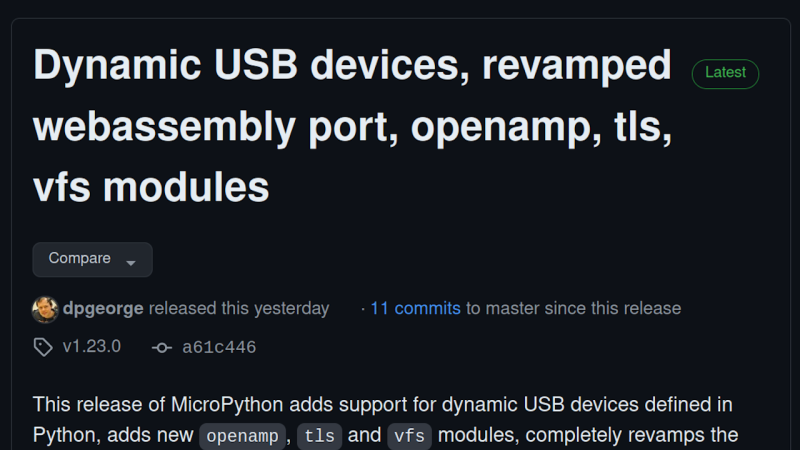
A screenshot of the release page, showing the headline and a crop of the release notes

MicroPython 1.23 Brings Custom USB Devices, OpenAMP, Much More

MicroPython is a wonderful Python interpreter that runs on many higher-end microcontrollers, from ESP8266 to STM32 to the RP2040. MicroPython lets you build devices quickly, and its latest release, 1.23, brings a number of improvements you should be aware of.

The first one is custom USB device support, and it’s a big one. Do you want to build HID devices, or play with MIDI, or do multiple serial streams with help of PIO? Now MicroPython lets you easily create USB devices on a variety of levels, from friendly wrappers for creating HID or MIDI devices, to low-level hooks to let you define your own USB descriptors, with user-friendly libraries to help all the way through. Currently, SAMD and RP2040 ports are supported in this part of code, but you can expect more in the future.

Hooray to 10 years of MicroPython!

There’s more – support for OpenAMP, an inter-core communication protocol, has received a ton of improvements for systems where MicroPython reigns supreme on some of the CPU cores but also communicates with different systems on other cores. A number of improvements have made their way through the codebase, highlighting things we didn’t know MicroPython could do – for instance, did you know that there’s a WebAssembly port in the interpreter, letting you run MicroPython in your browser?

Well, it’s got a significant overhaul in this release, so there’s no better time to check it out than now! Library structure has been refactored to improve CPython compatibility, the RP2040 port receives a 10% performance boost thanks to core improvements, and touches upon areas like PIO and SPI interfaces.

We applaud all contributors involved on this release. MicroPython is now a decade old as of May 3rd, and it keeps trucking on, having firmly earned its place in the hacker ecosystem. If you’ve been playing with MicroPython, remember that there are multiple IDEs, graphics libraries, and you can bring your C code with you!

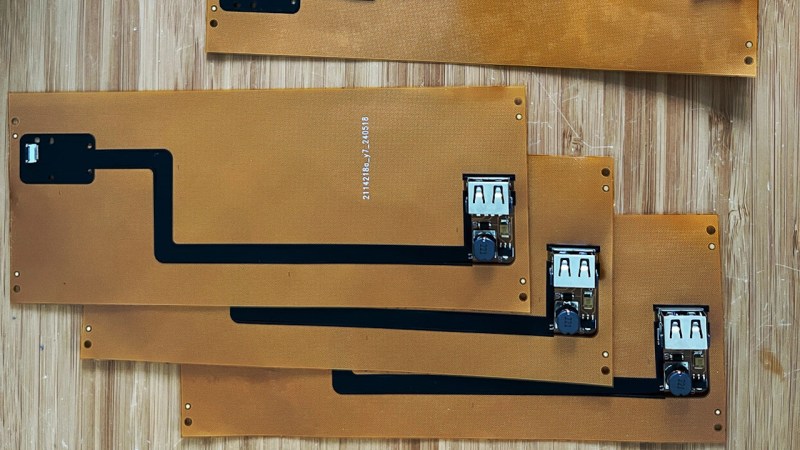
Assembled FPC PCB panels of the project

Give Your Thinkpad X1 Nano An Internal USB Port

How hard could it be to add an extra USB port inside your laptop? As [Joshua Stein] shows, it can be decently hard, but you will have fun along the way. His journey involves a Thinkpad X1 Nano, and his tech setup means it’d be most comfortable for him to have a USB port inside its case, for a Logitech mouse’s USB receiver. It wasn’t smooth sailing all throughout, but the end result is no doubt beautifully executed.

M.2 B-key, A-key and E-key slots have USB 2.0 available on them – you’d think that’s perfect for such a receiver, and there’s even plug and play adapters for this on places like eBay. Unfortunately, none of these, as Lenovo implements wireless card whitelists to this day. Tinkering with the whitelist on [Joshua]’s laptop resulted in BIOS digital signature check failures, and the USB-connected fingerprint reader was ultimately chosen as the most viable path.

Initially, he’s tested the fingerprint reader with an FPC breakout, having the USB connection work – many a hacker would stop here, pulling a few bodge wires from the breakout. [Joshua], however, raised the bar, creating a flexible PCB that would pull the fingerprint connector signals to a spot in the case where the USB receiver could fit neatly, with a 5 V step-up on the board, too.

[Joshua] tops it off by showing a 3D-printed spacer that goes into now-vacant spot where the fingerprint reader used to be. This mod is not open-source as far as we can see, but it’s definitely an inspiration. Want to put even more USB devices inside your laptop? Perhaps a tiny USB hub would help, in line with the EEE PC mods that aimed to stuff the tiny laptop with the largest amount of USB devices possible.

Use That One Port For High-Speed FPGA Data Export

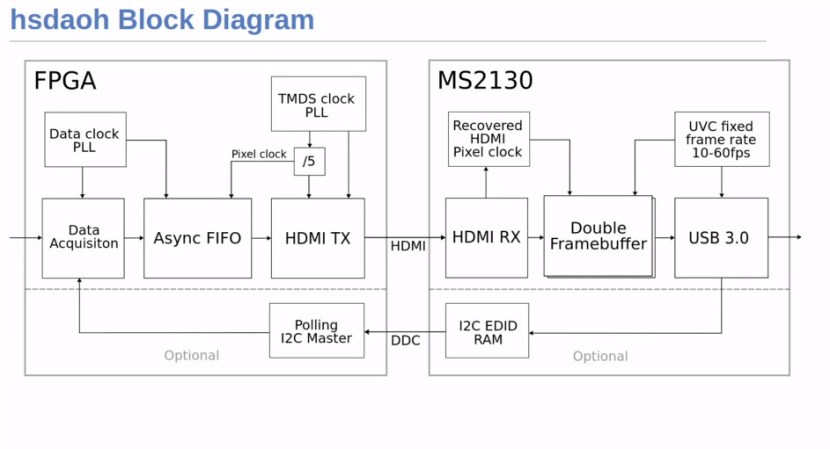
There’s a good few options for exporting data out of FPGAs, like Ethernet, USB2, or USB3. Many FPGAs have a HDMI (or rather, sparkling DVI) port as well, and [Steve Markgraf] brings us the hsdaoh project — High-Speed Data Acquisition Over HDMI, using USB3 capture cards based on the Macrosilicon MS2130 chipset to get the data from the FPGA right to your PC.

Current FPGA-side implementation is designed for Sipeed Tang chips and the GOWIN toolchain, but it should be portable to an open-source toolchain in the future. Make sure you’re using a USB3 capture card with a MS2130 chipset, load the test code into your FPGA, run the userspace capture side, and you’re ready to add this interface to your FPGA project! It’s well worth it, too – during testing, [Steve] has got data transfer speeds up to 180 MB/s, without the USB3 complexity.

As a test, [Steve] shows us an RX-only SDR project using this interface, with respectable amounts of bandwidth. The presentation goes a fair bit into the low-level details of the protocol, from HDMI fundamentals, to manipulating the MS2130 registers in a way that disables all video conversion; do watch the recording, or at least skim the slides! Oh, and if you don’t own a capture card yet, you really should, as it makes for a wonderful Raspberry Pi hacking companion in times of need.

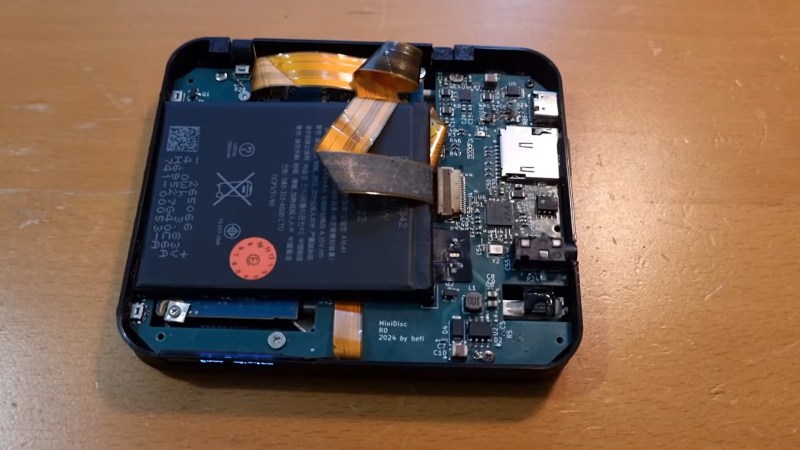
Internals of the Blu-ray player, showing both the blu-ray drive and the custom PCBs

An Ingenious Blu-Ray Mini-Disk Player

[befi] brings us a project as impressive as it is reminiscent of older times, a Blu-Ray mini disk player. Easily fitting inside a pocket like a 8 cm CD player would, this is a labour of love and, thanks to [befi]’s skills both in electronics and in using a dremel tool.

A BluRay drive was taken apart, for a start, and a lot of case parts were cut off; somehow, [befi] made it fit within an exceptionally tiny footprint, getting new structural parts printed instead, to a new size. The space savings let him put a fully custom F1C100S-powered board with a number of unique features, from a USB-SATA chip to talk to the BluRay drive, to USB pathway control for making sure the player can do USB gadget mode when desired.

There’s an OLED screen on the side, buttons for controlling the playback, power and battery management – this player is built to a high standard, ready for day-to-day use as your companion, in the world where leaving your smartphone as uninvolved in your life as possible is a surprisingly wise decision. As a fun aside, did you know that while 8 cm CDs and DVDs existed, 8 cm BluRay drives never made it to market? If you’re wondering how is it that [befi] has disks to play in this device, yes, he’s used a dremel here too.

Everything is open-sourced – 3D print files, the F1C100S board, and the Buildroot distribution complete with all the custom software used. If you want to build such a player, and we wouldn’t be surprised if you were, there’s more than enough resources for you to go off. And, if you’re thinking of building something else in a similar way, the Buildroot image will be hugely helpful.

Want some entertainment instead? Watch the video embedded below, the build journey is full of things you never knew you wanted to learn. This player is definitely a shining star on the dark path that is Blu-Ray, given that our most popular articles on Blu-Ray are about its problems.

Continue reading “An Ingenious Blu-Ray Mini-Disk Player” →