Adding A Battery Gauge To A Project With Zero Parts

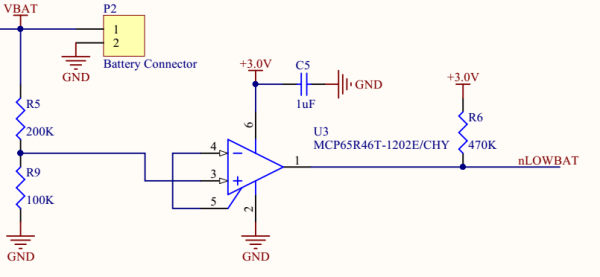
The typical way of doing a low battery detector is throwing a comparator in the circuit, setting it to measure a certain threshold voltage, and sending that signal off to a microcontroller or other circuit to notify someone the battery is going dead. [Josh] has a simpler way using an 8-bit AVR and zero other parts.

The chip [Josh] is using is the ATtiny84. The ADC in this chip is usually used to measure an unknown voltage against a reference voltage. The trick [Josh] is using is to do this in reverse: The internal 1.1 Volt reference voltage is measured against an unknown scale, namely the input voltage.

The value provided by the ADC on the chip will always be Vin times 1024 over the reference voltage. Since Vin will be 1.1 V in this case, the ADC value is known, it’s only a matter of doing some 6th grade algebra to determine the value of the input voltage.

[Josh] put together a small demonstration where the chip blinks out the number of volts its receiving from a bench power supply. By blinking a LED, it can blink out the current value of VCC as integers, but by using this technique you should be able to get a fairly fine-grained reading of what VCC actually is. Video below.

Continue reading “Adding A Battery Gauge To A Project With Zero Parts”

The KIM-1 Computer Minified

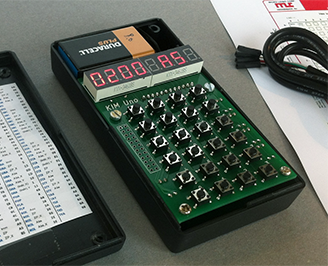
The KIM-1 wasn’t the first microcomputer available to computer hobbyists and other electron aficionados, but it was the first one that was cheap. It was also exceedingly simple, with just a 6502 CPU, a little more than 1k of RAM, 2k of ROM, a hexadecimal keypad and a few seven-segment displays. Still, a lot of software was written for this machine, and one of these boards can be found in every computer history museum.

[Oscar] thought the KIM-1 was far too cool to be relegated to the history books so he made his own. It’s not a direct copy – this one uses an Arduino for the brains, only breaking out some buttons, a pair of four-digit seven-segment displays, and the I2C and SPI pins on the ‘duino. The KIM-1 is emulated by the Arduino, allowing for the same interface as an original connected up to an old teletype, and [Oscar] got his hands on the original code for Microchess and the first 6502 disassembler from [Woz] and [Baum].

[Oscar] put the schematics for his version of the KIM-1 up, and has the PCBs up on SeeedStudio. If you’re looking for an awesome replica of a vintage computer and a nice weekend project, here ‘ya go.

Printing In Metal With A MIG Welder

Whenever the question of metal 3D printers comes up, someone always chimes in that a MIG welder connected to a normal 3D printer would work great. A bit of research would tell this person that’s already been done, but some confirmation and replication is nice. A few students at TU Delft University strapped a welder to a normal, off-the-shelf 3D printer and made a few simple shapes.

This project builds on the work of [Joshua Pearce] et al. at Michigan Tech where an MIG welder and delta bot was used to lay down rather complex shapes on a metal plate substrate. The team at TU Delft used a cartesian bot – a Prusa i3 – for their replication because of the sheer mass of moving a metal build plate, firebricks, and welder around.

In the first few prints on their machine, the team was able to lay down enough metal to build a vertical wall. It’s not much, and to turn this into a finished part would require some machining, but these are only the beginning steps of what could become a legitimate way of creating metal parts. Video below.

Continue reading “Printing In Metal With A MIG Welder”

Hackaday Prize Finalist: A Network Of Satellite Ground Stations

There are astonishing things you can do with a network of sensors spread across the globe, all connected to the Internet. Thousands of people have already installed hardware to detect lightning and flightaware gives out subscriptions to their premium service to anyone who will listen in to airplane transponders and send data back to their servers. The folks behind SatNOGS, one of the five finalists for The Hackaday Prize are using this same crowdsourced data collection for something that is literally out of this world: listening to the ever-increasing number of amateur satellites orbiting the planet.

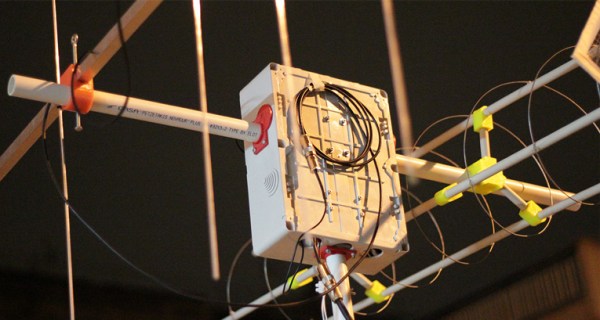
There are dozens of cubesats and other amateur satellites flying every year, and they have become an extremely popular way of experimenting in a space environment, giving some budding engineers an awesome project in school, and testing out some technologies that are just too weird for national space agencies. The problem with sending one of these birds up is getting the data back down; a satellite will pass above the horizon of a single location only a few times a day, and even then for only minutes at a time. The SatNOGS team hopes to change that by planting receivers all around the globe, connecting them to the Internet, and hopefully providing real-time telemetry from dozens of orbiting satellites.

[Pierros] from the SatNOGS team was kind enough to sit down and answer a few questions for us about his entry to The Hackaday Prize. That’s below, right after their finalist video. Some of the SatNOGS team will also be at our Munich event where we announce the winner of the Prize.

Continue reading “Hackaday Prize Finalist: A Network Of Satellite Ground Stations”

Using Router SoCs As WiFi Modules (Yet Again)

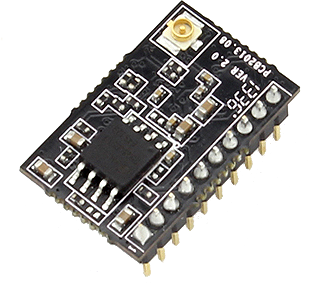
8-bit AVRs and 32-bit ARMs do one thing, and one thing well: controlling other electronics and sensors while sipping power. The Internet of Things is upon us and with that comes the need for connecting to WiFi networks. Already, a lot of chips are using repackaged System on Chips to provide an easy way to connect to WiFi, and the USR-WIFI232-T is the latest of the bunch. It’s yet another UART to WiFi bridge, and as [2XOD], it’s pretty easy to connect to an AVR.

The module in question can be had through the usual channels for about $11, shipped straight from China, and the only purpose of this device is to provide a bridge between a serial port and a wireless network. They’re not that powerful, and are only meant for simple tasks,

[2XOD] got his hands on one of these modules and tested them out. They’re actually somewhat interesting, with all the configuration happening over a webpage served from the device. Of course the standard AT commands are available for setting everything up, just like the ESP8266.

With a month of testing, [2XOD] has found this to be a very reliable device, logging temperatures every minute for two weeks. There’s also a breakout board available to make connection easy, and depending on what project you’re building, these could be a reasonable stand-in for some other popular UART -> WiFi chips.

Nixies And Raspis For A Modern Vintage Calculator

There are a few very rare and very expensive calculators with Nixie tube displays scattered about calculator history, but so far we haven’t seen someone build a truly useful Nixie calculator from scratch. [Scott] did just that. It’s a complete, fully-functional electronic calculator with all the functions you would expect from a standard scientific calculator.

The calculator uses IN-12 Nixies, the standard for anyone wanting to build a clock or other numerical neon discharge display. Each Nixie is controlled by a K155D driver chip, with the driver chip controlled by an I2C IO expander.

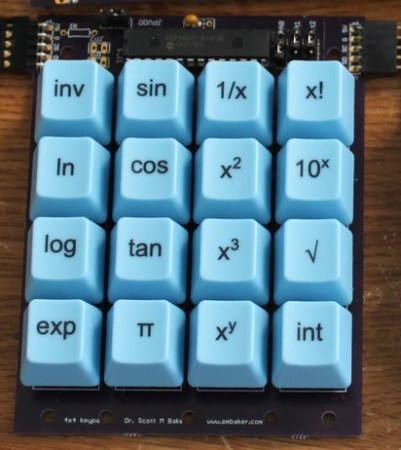
The keypad is where this gets interesting; electronics are one thing, but electromechanicals and buttons are a completely new source of headaches. [Scott] ended up using Cherry MX Blue switches, one of the more common switches for mechanical keyboards. By using a standard keyboard switch [Scott] was able to get custom keycaps made for each of the buttons on his calculator.

The brains of the calculator is a Raspberry Pi, with the I2C pins going off to listen in on the several IO expanders on the device. A Raspi might be a little overkill, but an Internet-connected calculator does allow [Scott] to send calculations off to WolframAlpha, or even the copy of Mathematica included in every Pi.

[Scott] has put his project up on Kickstarter. Videos below.

Continue reading “Nixies And Raspis For A Modern Vintage Calculator”

How A Real 3D Display Works

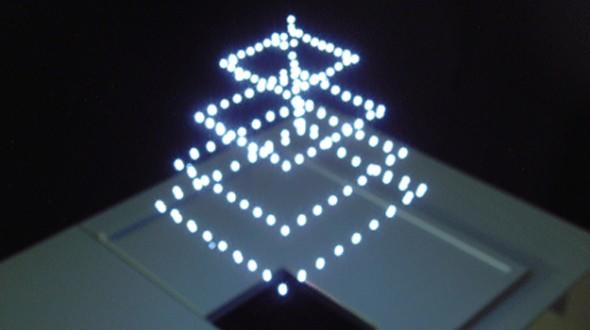
There’s a new display technique that’s making the blog rounds, and like anything that seems like its torn from [George Lucas]’ cutting room floor, it’s getting a lot of attention. It’s a device that can display voxels in midair, forming low-resolution three-dimensional patterns without any screen, any fog machine, or any reflective medium. It’s really the closest thing to the projectors in a holodeck we’ve seen yet, leading a few people to ask how it’s done.

This isn’t the first time we’ve seen something like this. A few years ago. a similar 3D display technology was demonstrated that used a green laser to display tens of thousands of voxels in a display medium. The same company used this technology to draw white voxels in air, without a smoke machine or anything else for the laser beam to reflect off of. We couldn’t grasp how this worked at the time, but with a little bit of research we can find the relevant documentation.

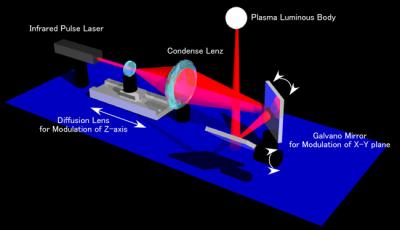
A system like this was first published in 2006, built upon earlier work that only displayed pixels on a 2D plane. The device worked by taking an infrared Nd:YAG laser, and focusing the beam to an extremely small point. At that point, the atmosphere heats up enough to turn into plasma and turns into a bright, if temporary, point of light. With the laser pulsing several hundred times a second, a picture can be built up with these small plasma bursts.
2-fig2

Moving a ball of plasma around in 2D space is rather easy; all you need are a few mirrors. To get a third dimension to projected 3D images, a lens mounted on a linear rail moves back and forth changing the focal length of the optics setup. It’s an extremely impressive optical setup, but simple enough to get the jist of.

Having a device that projects images with balls of plasma leads to another question: how safe is this thing? There’s no mention of how powerful the laser used in this device is, but in every picture of this projector, people are wearing goggles. In the videos – one is available below – there is something that is obviously missing once you notice it: sound. This projector is creating tiny balls of expanding air hundreds of times per second. We don’t know what it sounds like – or if you can hear it at all – but a constant buzz would limit its application as an advertising medium.

As with any state-of-the-art project where we kinda know how it works, there’s a good chance someone with experience in optics could put something like this together. A normal green laser pointer in a water medium would be much safer than an IR YAG laser, but other than that the door is wide open for a replication of this project.

Thanks [Sean] for sending this in.

Continue reading “How A Real 3D Display Works”