A Pair Of Projects To Scare The Trick-or-Treaters

The countdown is on! There’s only a few days left until Halloween, and if you’re still looking for something to spice up the experience for the kids heading to your door, [MagicWolfi] has just what you need. He’s put together two motion-sensing projects that are sure to startle any trick-or-treater.

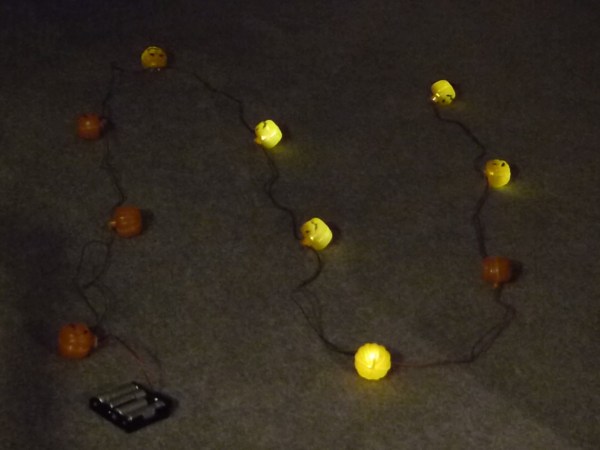
The first project is a chain of LED-lit pumpkins that are activated by a motion sensor. A set of inverters paired with RC delay lines light up the pumpkins sequentially. They are arranged almost like a strand of Christmas lights and are powered by AA batteries, so in theory they could be expanded to make a strand as long as needed. The project was inspired by a motion-sensing dress and works pretty well as a Halloween decoration!

9378581414283863206
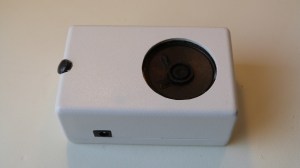
[MagicWolfi] is pairing the LED pumpkins with his second project which uses another motion sensor to play scary sound effects. Dubbed the Scare-o-Matic, this device uses a 45-millimeter speaker connected to a SparkFun microSD audio module to produce the scary sound effects. Each time it is triggered it plays a different sound from the list. There are videos and schematics for each of these projects on the project sites if you are interested in recreating any of these before Friday!

Walkman-esque Human Interface Device

Cheap keyboards never come with extra buttons, and for [Pengu MC] this was simply unacceptable. Rather than go out and buy a nice keyboard, a microcontroller was found in the parts drawer and put to work building this USB multimedia button human interface device that has the added bonus of looking like an old-school Walkman.

The functions that [Pengu MC] wants don’t require their own drivers. All of the buttons on this device are part of the USB standard for keyboards: reverse, forward, play/pause, and volume. This simplifies the software side quite a bit, but [Pengu MC] still wrote his own HID descriptors, tied all of the buttons to the microcontroller, and put it in a custom-printed enclosure.

If you’re looking to build your own similar device, the Arduino Leonardo, Micro, or Due have this functionality built in, since the USB controller is integrated on the chip with everything else. Some of the older Arduinos can be programmed to do the same thing as well! And, with any of these projects, you can emulate any keypress that is available, not just the multimedia buttons.

Solid State Tesla Coil Plays Music

If you’ve ever wanted to build a Tesla coil but found them to be prohibitively expensive and/or complicated, look no further! [Richard] has built a solid-state Tesla coil that has a minimum of parts and is relatively easy to build as well.

This Tesla coil is built around an air-core transformer that steps a low DC voltage up to a very high AC voltage. The core can be hand-wound or purchased as a unit. The drive circuit is where this Tesla coil built is set apart from the others. A Tesla coil generally makes use of a spark gap, but [Richard] is using the Power Pulse Modulator PWM-OCXi v2 which does the switching with transistors instead. The Tesla coil will function with one drive circuit but [Richard] notes that it is more stable with two.

The build doesn’t stop with the solid-state circuitry, though. [Richard] used an Arduino with software normally used to drive a speaker to get his Tesla coil to play music. Be sure to check out the video after the break. If you’re looking for a Tesla coil that is more Halloween-appropriate, you can take a look at this Tesla coil that shocks pumpkins!

Continue reading “Solid State Tesla Coil Plays Music”

modded guitar pedal

Guitar Pedal Hack Via Manufacturer’s Shortcut

There seems to be no shortage of manufacturers that cut costs by using similar components across a wide range of products. This isn’t necessarily a bad thing though, since it makes it easier for someone with some know-how to quickly open up the product and figure out how to get more use out of it. [Lewin] noticed some peculiarities on the PCB of his EHX Screaming Bird guitar pedal, and used a manufacturer’s shortcut to turn this treble-boosting pedal into a flat booster.

Once [Lewin] removed the case, he noticed that there were some unpopulated pads on the PCB. Additionally, the potentiometer was labelled as 10k, but a 100k was actually installed. These were indications that something was awry, so after poking around on the internet, [Lewin] now believes that the same PCB was used to make at least three different effects pedals with similar internal structures.

The Screaming Bird pedal was a little harsh for [Lewin]’s taste, so he changed out some capacitors on the board to get it closer to the flat booster. There are some other things that could be changed, but now he has a pedal that suits his needs much more appropriately, thanks to the manufacturer making only minor changes across a range of similar products. Historically, guitar pedals are pretty easy to modify, but it’s nice that the manufacturer of these has made it so much simpler!

kickstarter notifications

Kickstarter Monitor Will Brighten Your Day

Keeping up with a kickstarter campaign can be quite a task, especially if your project is real (looking at you, Scribble Pen!) and you’re trying to keep up with product fabrication and all the other logistics involved in bringing a product to market. [macetech] are currently in the middle of a campaign themselves and built a loud, bright alert system to notify them of any new kickstarter backers.

The project uses a LED marquee to display the current number of backers, but every time a new backer contributes to the project, a blindingly bright green arrow traffic signal is illuminated and a piezo speaker plays a celebration tune. All of these devices are controlled by an Arduino Yun which, with its built-in Atheros chipset, easily connects to the network and monitors the kickstarter page for changes.

[macetech] used some interesting hardware to get everything to work together. They used a USB-to-RS232 cable with and FTDI chip to drive the LED marquee and a PowerSwitchTail 2 from Adafruit to drive the power-hungry traffic signal. Everything was put together in a presentable way for their workshop and works great! All of the source code is available on their project page, and you can check out their RGB LED Shades kickstarter campaign too.

Remote Control For An Elevator

Electric_Imp_elevator_hack_overview

The elevator at [Alex]’s office building has some quirks which make it very inconvenient to everyone in the building. The major problem was that the doors of the elevator at each floor stay locked until someone walks down the hall to hit a button. Obviously this was a hassle, so [Alex] built a controller that can remotely call and unlock the elevator. (Part 2 of the project is located on a separate page.)

The first step was to source the hardware and figure out exactly how the controls for the elevator worked. [Alex] decided to use an Electric Imp for this project, and after getting it connected to the Internet, he realized that he could power it directly off of the elevator’s 10V supply. From there, he used relays to interface the Electric Imp with the “elevator call” and “elevator unlock” buttons inside the elevator’s control panel.

Once the hardware side was completed, it was time to move on to the software side. [Alex] wrote a mobile app for a user interface that can be accessed from anywhere, and also wrote the code for the Electric Imp agent and the code that runs on the Electric Imp itself. Now, a simple tap of a button on a mobile device is enough to call the elevator or unlock it, rather than in the past where someone had to run down a hall to hit the button.

We hope there is some security on the mobile app, otherwise anyone in the world will be able to call the elevator and turn it into a passenger-less useless machine!

washing machine controller

New Brain For An Old Washing Machine

When the washing machine at [hydronucleus]’s place went on the fritz, he went straight to the toolbox to try to repair it. The problem was with the old mechanical control unit, so [hydronucleus] got an Arduino out of the parts bin to create a brand new electronic controller for his washing machine. (Imgur Link)

drum
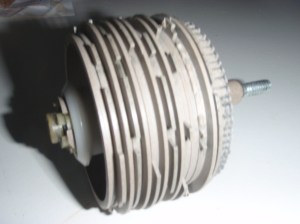
The old mechanical controller functioned like a player piano. A rotating drum with ridges actuate different cycles in the washing machine. Some of the cycles weren’t working properly so [hydronucleus] ripped them out. With the help of a schematic posted on the washing machine itself, the cycles were able to be programmed into the Arduino.

The other obstacle in this repair was getting enough relays together to switch everything in the washing machine. This was solved with a Sainsmart 16 relay block, which has more than enough relays for the job. [hydronucleus] wired up an LCD and a pushbutton to control it and his washing machine is as good as new! The cost of the repair certainly beats a new machine, too. Although if it finally gives up the ghost completely, he could always turn it into a windmill.

Want to read more about [hydronucleus]’s washing machine hack? Check out his Reddit thread!