Retrotechtacular: Submarine Cable Splicing Is Serious Business

Really. As this wonderfully narrated talkie picture from 1939 will attest, keeping even one drop of water from penetrating undersea cables is of the utmost importance.

How do they do it? Many, many layers of protection, including several of jute wrapping. The video centers on splicing a new cable to an existing one in the San Francisco Bay to bring the wonder of telephony to a man-made island created for the Golden Gate International Expo.

The narrator makes these men out to be heroes, and when you see how much lead they came into contact with, you’ll understand what he means. Each of the 1,056 individually insulated wires must be spliced by hand. After that comes a boiling out process in which petrolatum is poured over the splice to remove all moisture. Then, a lead sleeve is pulled over the connections. Molten lead is poured over the sleeve and smoothed out by hand.

At this point, the splice is tested. The sleeve is punctured and nitrogen gas is pumped in at 20psi.  Then comes the most important step: the entire sleeve is painted with soap suds.  Any gas that escapes will make telltale bubbles.

Once they are satisfied with the integrity of the sheath, they wrap the whole thing in what appears to be lead cables and pound them into submission. Surely that would be enough, don’t you think?  Nope.  They weld the cables all around and then apply two coats of tar-treated jute wrapping, which retards saltwater corrosion considerably.

Continue reading “Retrotechtacular: Submarine Cable Splicing Is Serious Business”

IR Theremin Speaks In Four Voices

infraredTheremin

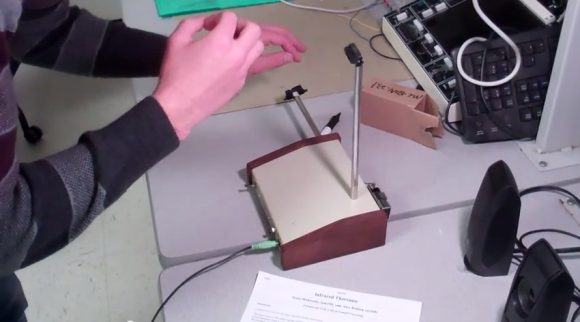
At the end of every semester, we get a bunch of cool and well-documented student projects from Cornell’s ECE4760 class. [Scott] and [Alex]’s infrared theremin is no exception.

The classic theremin design employs each of the player’s hands as the grounded plate of a variable capacitor in an LC circuit. For the pitch antenna, this circuit is part of the oscillator. For the volume antenna, the hand capacitor detunes another oscillator, changing the attenuation in the amplifier.

[Scott] and [Alex] put a twist on the theremin by using two IR sensors to control volume and pitch. The sensors compute the location of each hand and output a voltage inversely proportional to its distance from the hand. An ATMega1284P converts the signal to an 8-bit binary number for processing. They built four voices into it that are accessible through the push-button switch. The different voices are created with wave combinations and modulation effects. In addition to Classic Theremin, you can play in pure sine, sawtooth, and FM modulation.

If you’re just not that into microcontrollers, you could build this digital IR theremin instead. If you find IR theremins soulless or plebeian, try this theremincello.

Continue reading “IR Theremin Speaks In Four Voices”

Automated Drink Mixer Is The Life Of The Party

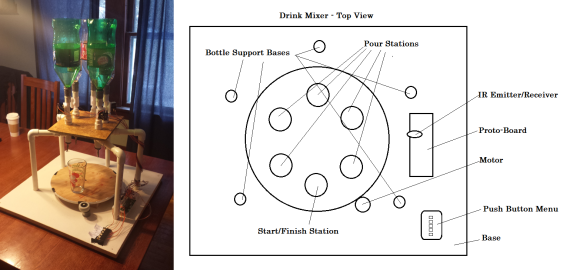
Hosting a New Year’s Eve party, but don’t want to be stuck behind the bar all night? You could set out a bowl or two of spiked punch, but where’s the hack? Free yourself from drink slinging duties with the Automated Drink Mixer created by Cornell University students [Justin] and [Austin]. Their design uses a 14″ diameter lazy Susan powered by a 12V bi-directional motor attached to a 2″ rubber wheel. The motor is capable of 70RPM, so the glass ultimately rides around at 10RPM. Orders are entered on a push-button menu. As this is a school project that should adhere to IEEE standards, all libations are non-alcoholic.
The software uses an overarching state machine, so the system polls for input from the menu at idle. When it receives an order, the lazy Susan rotates the glass to the right spout or series of spouts and then returns it to the starting point. [Justin] and [Austin] controlled the position of the glass with an IR emitter and phototransistor. This pair detects the black strips of tape around the edge which are spaced 60° apart. A comparator digitizes the signal and triggers an interrupt in the software, which counts the number of 60° slices. A full demonstration is waiting for you after the jump. Before you jump: drink responsibly, kids. If you aren’t up to that particular challenge, make yourself an alcohol-aware LED ice cube. If you need more LEDs in your life, whip up the Inebriator.

Continue reading “Automated Drink Mixer Is The Life Of The Party”

Touching Conversations: Email Snippets Scroll By On Electro-Embroidery Piece

electroembroidery

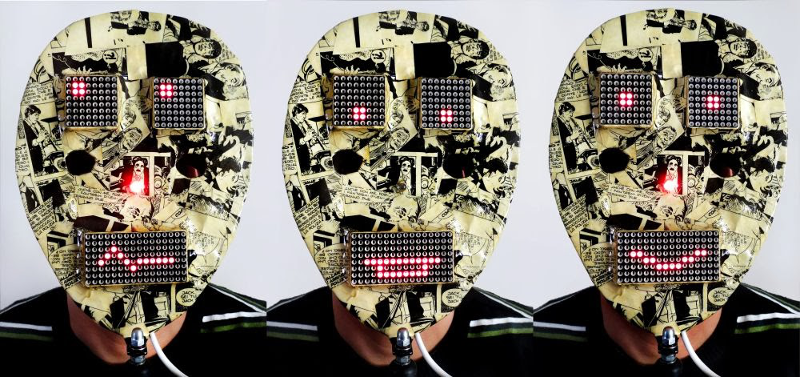
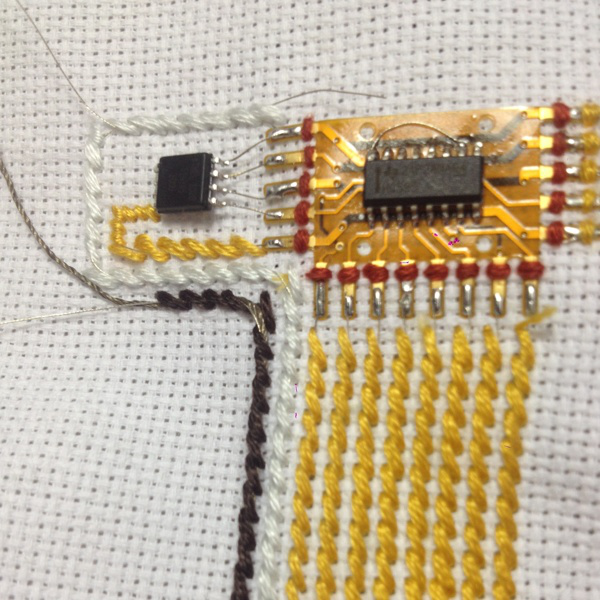
[Wei Chieh Shih] really moves the needle when it comes to wearable technology. His textile design project entitled I Am Very Happy I Hope You Are Too is a striking marriage of masterful hand embroidery, delicate circuitry, and careful programming.

[Wei] is using an Arduino micro to drive a matrix of surface-mount LEDs in the Hello, World video, which is a ramp-up to the scrolling text version that’s in progress now finished. That full version is part of his residency project at Arquetopia in Oaxaca, Mexico and displays snippets of emails from his past relationships. It’s huge, with multiple matrices as large as 8×25 pixels!

No build notes could be found for this or any of [Wei]’s similar projects, like this awesomely dangerous 200 laser diode jacket or this eerily beautiful light installation on Taiwan’s north beach. Based on the pictures, our speculation is that he is using ordinary 6-strand embroidery floss to make stem or half cross-stitches on all the paths. He then runs very thin, flexible conductor underneath the channel of stitches and solders the wires to the component pads.

If [Wei] wants another way to wear his heart on his sleeve, he could investigate these dynamic LED clothing hacks.

Update: [Wei] has completed this project, and has more information available at his Behance site.

Continue reading “Touching Conversations: Email Snippets Scroll By On Electro-Embroidery Piece”

Snowden Immortalized As Bond Villain In Edge-Lit Acrylic Poster

snowfall_smaller

[Wilywyrm] needed to come up with a final project for art class that commented on a social issue. Healthcare, schmealthcare, he said, and busted out this movie poster about the NSA spying scandal instead.

The circuit uses three extended-duty astable 555 timers to control the brightness of the 5050 RGB common-anode LED strips that run up the sides of the 24″ x 12″ x 1/4″ acrylic panels. Each of the three panels was laser-engraved at 600 DPI on an Epilog laser engraver and features a different aspect of the poster. There’s one for Snowden, one for Daniel Craig, and one for the text.

[Wilywyrm] tied the color channels together in the first panel to output white light. He used red for the second panel and blue for the third. A complete list of parts with build notes is available on his Google Drive. [Wilywyrm]’s notes include improvement ideas, like making all the RGB strips color-adjustable with more 555s or a microcontroller and timers.

Perhaps [Wilywyrm] could get into the clear whiteboard business after college.

Tricked-out Arduino-controlled Time-Lapse Is More Than Just A Timer

arduinoPhotoRig

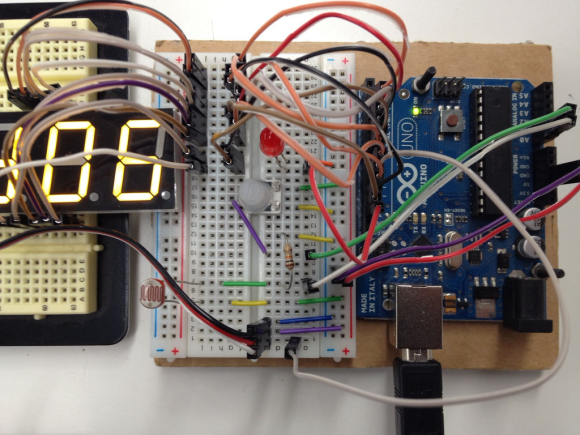
[Hlesliebole] wanted a finer degree of remote control over his time-lapse shots, so he decided to build an Arduino-driven infrared shutter. He ended up creating this killer Arduino-controlled photography rig that does a whole lot more.

This hack was built for [Hlesliebole]’s Nikon D3100, but he says it should work with any DSLR and remote shutter. This initial build uses an LED as a stand-in for the remote shutter that he ordered.  He intends to update the post once it arrives and he integrates it.

[Hlesliebole] wired a 7-segment display to show the current time delay between photos. This can be set on the fly with a potentiometer, so there’s no need to stop and reprogram the Arduino. And while you’re grabbing a beer and watching the sun slowly sink, the rig can better capture that sunset because of a photoresistor. It detects the ambient light level and minimizes the number of throwaway dark shots.

If that weren’t enough, he’s built servo functionality into the code to support remote control over the camera’s physical position, allowing for panning or rotation over a scene. [Hlesliebole] doesn’t go into detail, but he assures us that there are many tutorials out there.  If you think you’re man enough, you could always work in this outstanding versatile motion dolly hack.

Continue reading “Tricked-out Arduino-controlled Time-Lapse Is More Than Just A Timer”

Cast A Shadow, Play A Note

Looking for a way to entertain friends and family this holiday season? Look no further than the Arduino-powered Photocell Piano. [Asahillis] has posted this Instructable for building a 6-note musical command center.

The piano uses photoresistors to turn each note on when the player runs their hand over it. Notes can be tuned independently using potentiometers on the front of the box. The hack uses two circuits: one to generate the tones, and a second to mix them. [Asahillis] adapted [Forest Mims III]’s timeless schematics for the 555 Tone Maker and the 741 Audio Mixer to create his Photocell Piano.

When the instrument is powered on, the code takes a 5-second reading of the ambient light, and sets a threshold based on its findings. Afterward, the first note will sound, indicating the piano is ready to be played. Each note has its own if-else statement that tells it to sound when its corresponding  photoresistor reaches a value below the set threshold (when the player casts a shadow). There’s a demo video included in the guide but we couldn’t embed it here.  Check out the demo video after the break.

If you prefer to rock out with your lights out, there’s always this impressive laser harp.

Continue reading “Cast A Shadow, Play A Note”