Bottle Organ Breakdown

A keen-eyed commenter pointed us to a homemade bottle organ that plays like a piano. The complexity gets turned up with foot-powered bellows and custom keys, but the magic of [Mike] and [Simon Haisell]’s garage-built instrument is not lost in the slightest. We also have the video below the break and there is a bottle organ performance by [Coyote Merlot].

The working concepts are explained well in the video, and that starts with the bellows. In the first few seconds of the video, we see an organist swaying as he plays, and it would be accurate to say the music moves him. The wobbling is to pedal a couple of levers that squeeze a pair of air sacs and slide under wheels that look like a hardware store purchase. The spring-return mechanism is a repurposed bungee cord and you know we dig that kind of resourcefulness. Each bellow valve is made with traditional leather flaps of the type that predate bungee cords and camera phones. These air pumps inflate a big reservoir in the back that provides continuous pressure to a manifold where each of the thirty-six keys control a valve responsible for one bottle. The pair built every wooden part we mentioned with the explicit purpose of creating this organ.

Continue reading “Bottle Organ Breakdown”

In Case You Cannot Make It To An Escape Room

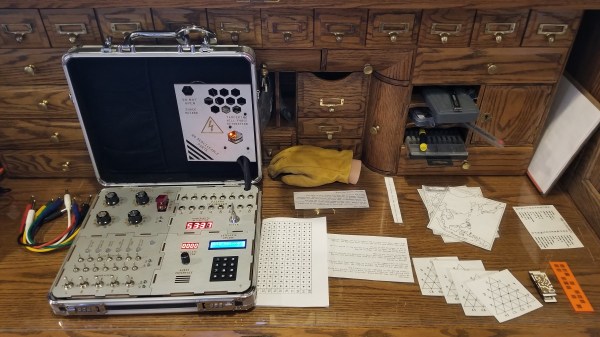
Escape rooms are awesome for people who like to solve puzzles, see how things work, or enjoy a mystery. Everyone reading this falls into at least one of those categories. We enjoy puzzles and mysteries, but we have a fondness for seeing how things work. To this end, we direct your attention to [doktorinjh]’s “Bomb Disarming Puzzle in a Suitcase” Game, which is a mysterious puzzle box he built himself. I guess the mystery is mostly in the gameplay, which you can watch below because he shows us his build photos and describes the hardware inside.

At its heart is an Arduino Mega, a wise choice since our back-of-the-napkin estimation puts his I/O count over forty-five and the Mega can handle them all with a few pins to spare. Working inside the confines of a briefcase came with its own challenges, but we adore the way he used the hexagon theme in the top panel to allow for knob clearance. It was so subtle that we almost missed it.

The escape room theme is delightful, and we appreciate the mix of games, aesthetics, and techno-trickery in many forms.

Continue reading “In Case You Cannot Make It To An Escape Room”

Everything Makes Sound If You Try Hard Enough

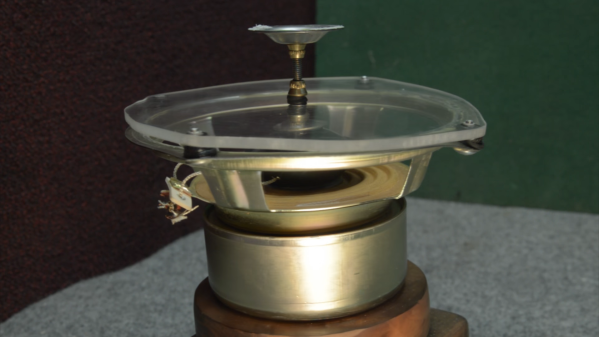
Speaker cone materials can be a deep rabbit hole ranging from inexpensive paper to kevlar. We’ve all cut apart, or blown out, the cheapies to see their inner workings, but the exotic material list does not stop at audiophile-quality models. It can include mirrors, microwave ovens, and a European hacker’s forehead. Video also after the break. In addition to the speakers with expensive elements, there are sound-generating transducers with no cones. These are sometimes called surface speakers, and they vibrate something, anything, to make a sound. At their cores, they have many of the same parts, and making a surface speaker from a traditional speaker is not difficult.

The first step is to find a raw speaker, one with no crossover components, possibly from a garage sale or from a set your spouse insists are outdated, ugly, and better off as firewood. Power specifications should not change since we will be using the same solenoid, and that means your amplifier can follow the speakers back from the dead. The video provides step-by-step instructions, and the goal is to create a module with a moving shaft, but the range must be limited so it cannot be pushed back into the speaker or pulled away, both could destroy it. Once you have that, go around and make everything noisy. Don’t use this on pets or children, but spouses are fair game.

We would love to see a chip bender experiment with different speaker mediums to add an extra layer of complexity, but for the rest of us, bone conduction is already a real thing, and if you enjoy impractical speakers, you are not the only one with your head in the clouds.

Continue reading “Everything Makes Sound If You Try Hard Enough”

Entombed Secrets Partially Unearthed As Researchers Dissect Clever Maze-Generating Algorithm

If you look at enough of another developer’s code, you will eventually say, “What were you thinking, you gosh-darn lunatic?” Now, this exchange can precede the moment where you quit a company and check into a padded room, or it can be akin to calling someone a mad genius and offering them a beer. In the case of [Steven Sidley]’s 1982 game Entombed, [John Aycock] and [Tara Copplestone] found a mysterious table for generating pseudo-random mazes and wrote a whitepaper on how it all works (PDF). The table only generates solvable mazes, but if any bits are changed, the puzzles become inescapable.

The software archaeologists are currently in a labyrinth of their own, in which the exit is an explanation of the table, but the path is overgrown with decade-old vines. The programmer did not make the table himself, and its creator’s name is buried somewhere in the maze. Game cart storage was desperately limited so mazes had to be generated on-the-fly rather than crafted and stored. Entombed‘s ad-hoc method worked by assessing the previous row and generating the next based on particular criteria, with some PRNG in places to keep it fresh. To save more space, the screen was mirrored down the center which doubles the workload of the table. Someday this mysterious table’s origins may be explained but for now, it is a work of art in its own right.

Aside from a table pulled directly from the aether, this maze game leaned on pseudo-random numbers but there is room for improvement in that regard too.

Via BBC Future.

Pegleg: Raspberry Pi Implanted Below The Skin (Not Coming To A Store Near You)

Earlier this month, a group of biohackers installed two Rasberry Pis in their legs. While that sounds like the bleeding edge, those computers were already v2 of a project called PegLeg. I was fortunate enough to see both versions in the flesh, so to speak. The first version was scarily large — a mainboard donated by a wifi router roughly the size of an Altoids tin. It’s a reminder that the line between technology’s cutting edge and bleeding edge is moving ever onward and this one was firmly on the bleeding edge.

How does that line end up moving? Sometimes it’s just a matter of what intelligent people can accomplish in a long week. Back in May, during a three-day biohacker convention called Grindfest, someone said something along the lines of, “Wouldn’t it be cool if…” Anyone who has spent an hour in a maker space or hacker convention knows how those conversations go. Rather than ending with a laugh, things progressed at a fever pitch.
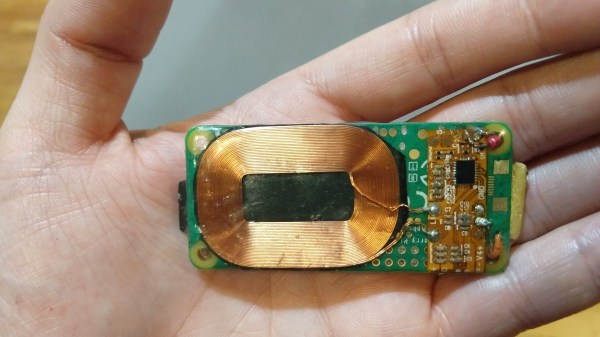
The router shed all non-vital components. USB ports: ground off. Plastic case: recycled. Battery: repurposed. Amazon’s fastest delivery brought a Qi wireless coil to power the implant from outside the body and the smallest USB stick with 64 GB on the silicon. The only recipient of PegLeg version 1.0 was [Lepht Anonym], who uses the pronoun ‘it’. [Lepht] has a well-earned reputation among biohackers who focus on technological implants who often use the term “grinder,” not to be confused with the dating app or power tool.

Continue reading “Pegleg: Raspberry Pi Implanted Below The Skin (Not Coming To A Store Near You)”

Spin Me Right Round, Baby: Generator Building Experiments For Mere Mortals

How many of you plan to build a wind-powered generator in the next year? Okay, both of you can put your hands down. Even if you don’t want to wind your coils manually, learning about the principles in an electric generator might spark your interest. There is a lot of math to engineering a commercial model, but if we approach a simple version by looking at the components one at a time, it’s much easier to understand.

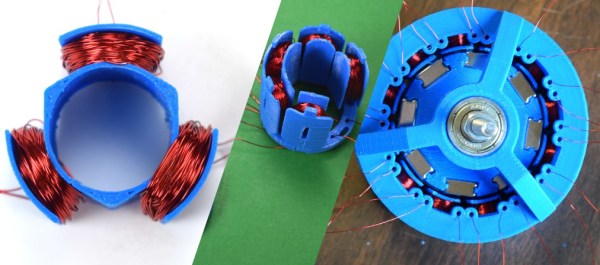
For this adventure, [K&J Magnetics] start by dissect a commercial generator. They picked a simple version that might serve a campsite well, so there is no transmission or blade angle apparatus to complicate things. It’s the parts you’d expect, a rotor and a stator, one with permanent magnets and the other with coils of wire.

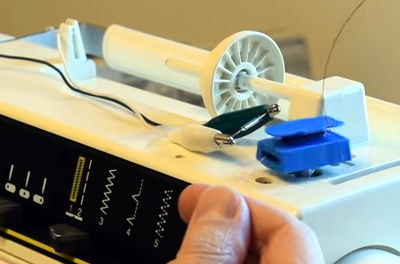
The fun of this project is copying the components found in the commercial hardware and varying the windings and coil count to see how it affects performance. If you have ever wound magnet wire around a nail to make an electromagnet, you know it is tedious work so check out their 3D printed coil holder with an embedded magnet to trigger a winding count and a socket to fit on a sewing machine bobbin winder. If you are going to make a bunch of coils, this is going to save headaches and wrist tendons.

They use an iterative process to demonstrate the effect of multiple coils on a generator. The first test run uses just three coils but doesn’t generate much power at all, even when spun by an electric drill. Six windings do better, but a dozen finally does the trick, even when turning the generator by hand. We don’t know about their use of cheap silicone diodes though, that seems like unintentional hobbling, but we digress.

Making turbine blades doesn’t have to be a sore chore either, and PVC may be the ticket there, you may also consider the vertical axis wind turbine which is safer at patio level. Now, you folks building generators, remember to tip us off!

Continue reading “Spin Me Right Round, Baby: Generator Building Experiments For Mere Mortals”

Latex Bellows From Scratch

You would be forgiven for thinking that the semi-spherical bulb [Len], from the Bellowphone channel, is holding is a toilet bowl float. It is a bellows of his design that is similar to the squeezable part of a bike horn but is more substantial and less irritating at six in the morning. These rubber squeeze balls are old-school in the best way, and craftsmanship rolls out from every second of his videos. The backdrops to [Len’s] videos are alive with tools, materials, examples, and instruments the same way our offices and maker spaces erupt with soldering irons, LEDs, and passives.

His video walks through all the steps to make latex bellows starting with a rigid stemmed bulb and painting it with latex. This takes a bunch of coats with the associated drying time, so if you need a lot of bellows, you will want multiple bulbs. After coating of latex, we move to the contraption known as the Snout Master 5000. The SM5K looks like a wooden jig held in a table vise, but it is a purpose-built over-engineered chuck with four ball bearings held in a vise. When the latex is thick enough, the form is removed, and the bulb is repaired, then, more coats. Each ball has roughly twenty layers, and with three hours between coats, this is a weekend job at a minimum. Good things come to those who coat. The final steps are boiling the bulbs and adding a silicone preservative. They can last up to a decade with proper maintenance.

We see lots of electronic and automated instruments here, and spherical balls are definitely on the human interface spectrum, but the techniques we see from [Len] would allow anyone to design their own bellows more conducive to mechanization. [Len] says one of his inspiration is [Harry Partch] and his Blo-Boy, an organ powered by fireplace bellows. We think these squeeze balls are even better.

Continue reading “Latex Bellows From Scratch”