Passing The Time By Reading The Time

Binary clocks are a great way to confuse your non-technical peers when they ask the time from you — not that knowing about the binary system would magically give you quick reading skills of one yourself. In that case, they’re quite a nice little puzzle, and even a good alternative to the quarantine clocks we’ve come across a lot recently, since you can simply choose not to bother trying to figure out the exact time. But with enough training, you’ll eventually get the hang of it, and you might be in need for a new temporal challenge. Well, time to level up then, and the Cryptic Wall Clock built by [tomatoskins] will definitely keep you busy with that.

Example of the clock showing 08:44:47
Diagram of the clock showing 08:44:47

If you happen to be familiar with the Mengenlehreuhr in Berlin, this one here uses the same concept, but is built in a circular shape, giving it more of a natural clock look. And if you’re not familiar with the Mengenlehreuhr (a word so nice, we had to write it twice), the way [tomatoskins]’ clock works is to construct the time in 24-hour format by lighting up several sections in the five LED rings surrounding a center dot.

Starting from the innermost ring, each section of the rings represent intervals of 5h, 1h, 5m, 1m, and 2s, with 4, 4, 11, 4, and 29 sections per ring respectively. The center dot simply adds an additional second. The idea is to multiply each lit up section by the interval it represents, and add the time together that way. So if each ring has exactly one section lit up, the time is 06:06:02 without the dot, and 06:06:03 with the dot — but you will find some more elaborate examples in his detailed write-up.

This straightforward and yet delightfully unintuitive concept will definitely keep you scratching your head a bit, though you can always go weirder with the Roman numerals palm tree clock for example. But don’t worry, [tomatoskins] has also a more classic, nonetheless fascinating approach in his repertoire.

512 Bytes Ought To Be Enough For Dinosaurs

It’s said that slow internet is worse than no internet at all, which is mainly a matter of continuously crushing all hope and sanity vs. finding peace in accepting a fate out of your control. Plus, you can easily pass the time of being catapulted back to the prehistoric ages by navigating a jumpy little creature from that same age through a field of cacti — at least if you’re using Chrome or Chromium. But neither a browser nor actually an operating system are really necessary for that, as [franeklubi] shows with a boot sector implementation of the same game.

Sure, the graphics aren’t quite on par, but compared to the original’s 3000+ lines of JavaScript, [franeklubi] managed to implement it in a few hundred lines of assembly, and was of course constrained by the 512 bytes of the boot sector itself (well, 510 plus the signature). This constraint causes a few limitations, like a slight lack of randomness in the obstacle arrangements, and a constant running speed, but it also makes it the perfect playground and starting point to delve into the world of nifty knacks and hacks, trying to squeeze every last byte.

If you want to give it a try for yourself, all you need is NASM and QEMU — and while you’re at it, why not have some Tetris along the way? We could also see this nicely combined with the real-world jumping version from a few weeks back, and turn it into a standalone arcade game. Bounce Crouch Revolution anyone?

21st Century Cheating: WiFi In A Calculator

Obviously, we would never endorse cheating on an exam, but sometimes a device is just too tempting to be left untouched. For [Neutrino], it was an old Casio calculator that happened to have a perfectly sized solar panel to fit a 128×32 OLED as replacement. But since the display won’t do much on its own, he decided to connect it to an ESP8266 and mount it all inside the calculator’s housing, turning it into a spy-worthy, internet-connected cheating device, including a stealthy user interface controlled by magnets instead of physical buttons. (Video, embedded below.)

Editor’s Update: Please read our follow-up coverage to the copyright claims made against this project. The video linked above and embedded below are unavailable due to these claims, despite widespread belief that this project does not violate copyright. For now, the original video is available via the Internet Archive.

To achieve the latter, [Neutrino] added two Hall effect sensors and a reed switch inside each end of the calculator. Placing a magnet — possibly hidden in a pen cap — near the reed switch will turn the display on, and placing another magnet near the Hall-effect sensors will navigate through the display’s interface, supporting two inputs with long, short, and multi-tap gestures each. To obtain information through WiFi, the ESP8266 connects to Firebase as backend, allowing to set up predefined content to fetch, as well as a possibility to communicate with your partner(s) in crime through a simple chat program.

As the main idea was to keep visible modifications to a minimum, one shortcoming is that charging the additional battery that powers the whole system would require an additional, external charging circuit. But [Neutrino] had a solution for that as well, and simply exposed two wires to the back, which could easily be mistaken for random solder splatters. And well, of course, requiring WiFi might also be tricky in some situations, so maybe you might want to consider a mobile network upgrade for yourself.

Continue reading “21st Century Cheating: WiFi In A Calculator”

Some Strings Attached: Electric Tenor Guitar Built From Scratch

It’s no secret that we have a soft spot for musical instruments here at Hackaday, especially for the weird and unusual ones. An instrument that definitely fits the unusual category is the four-string tenor guitar, which — as legend has it — originated back in the 1920s by frankensteining a banjo neck and a guitar body together. Despite being around for almost a century, they’re still rarely found outside some niche genres, which makes them an excellent choice when pursuing a unique sound experience. As someone looking for exactly that, [Ham-made] decided to build an electric tenor guitar entirely from scratch, and documented every step of it at great length.

Built from two random chunks of wood, a dissected single coil pickup, and a leftover piece of elk antlers, the result is even more unique than the sound experience itself. While the rather unorthodox, faceted body shape leaves no doubt that this is a handmade instrument, the real eye-catcher has to be the neck and its oddly spaced frets. Counting the frets, the math doesn’t seem to add up either, as the twelfth fret usually creates the octave, and as such should be at half the scale length (i.e. half the string’s length from the bridge at the body’s end to the nut at the neck’s end). Turns out that [Ham-made] went for a diatonic scale instead of the usual chromatic one, essentially leaving out the notes you anyway wouldn’t play in a standard Pop or Rock setup. Using an all-fifths tuning akin to cellos and mandolins, this will work nicely over all four strings.

Aesthetics are certainly a subjective matter, and [Ham-Made] is fully aware that people might feel downright offended by his creation, but as he also wants to “embrace mistakes and promote experimentation”, he encourages everyone with similar aspiration to simply go for it — and he’s certainly no stranger to unconventional instruments and recording equipment. But before the never-tiring tonewood debate sparks up, check out this scrap metal guitar.

Continue reading “Some Strings Attached: Electric Tenor Guitar Built From Scratch”

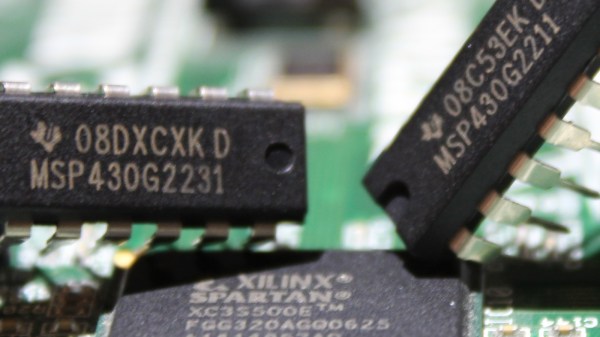
NEO430 Puts A Custom MSP430 Core In Your FPGA

We are certainly spoiled by all the microcontroller options nowadays — which is a great problem to have. But between the good old 8-bit controllers and an increasing number of 32-bit varieties, it almost seems as if the 16-bit ones are slowly falling into oblivion. [stnolting] particularly saw an issue with the lack of 16-bit open source soft cores, and as a result created the NEO430, an MSP430 compatible soft processor written in VHDL that adds a custom microcontroller to your next FPGA project.

With high customization as main principle in mind, [stnolting] included a wide selection of peripherals and system features that can be synthesized as needed. Not limiting himself to the ones you would find in an off-the-shelf MSP430 controller, he demonstrates the true strength of open source soft cores. Do you need a random number generator, CRC calculation, and an SPI master with six dedicated chip select lines? No problem! He even includes a Custom Functions Unit that lets you add your own peripheral feature or processor extension.

However, what impresses most is all the work and care [stnolting] put into everything beyond the core implementation. From the C library and the collection of examples for each of the controller’s features, so you can get started out of the box with GCC’s MSP430 port, to writing a full-blown data sheet, and even setting up continuous integration for the entire repository. Each topic on its own is worth looking at, and the NEO430 offers a great introduction or reference for it.

Of course, there are some shortcomings as well, and the biggest downer is probably the lack of analog components, but that’s understandable considering your average FPGA’s building blocks. And well, it’s hard to compete with the MSP430’s ultra low-power design using an FPGA, so if you’re thinking of replicating this watch, you might be better off with a regular MSP430 from a battery lifetime point of view.

Breadboard Computer Plays Snake On Character Display; Also In A Browser!

If building a homebrew computer on a breadboard is your thing, you’re most certainly familiar with [Ben Eater], whose design of using nothing but logic gates has served as inspiration for many replicas over the years. [visrealm] took the concept and expanded upon it, even adding a 16×2 LCD that let’s you play Snake by moving a single pixel on the character display!

Making the most of tiny resolution is impressive — it’s a difficult constraint for the game field. But there are other tricks at work as well. [visrealm] uses different intensities to distinguish between the snake and its food which is kind of a dark pixel in the demo shown after the break. But what stands out most is that the breadboard build is really only half of the story. In addition, [visrealm] built an entire emulator that resembles his actual breadboard design, which can be programmed and used via browser, giving WebAssembly a whole new meaning. While that’s convenient for anyone interested to play around with these breadboard computers, but lacks the patience to build one themselves, it also functions as the real one’s programming environment. In addition, an ESP8266 is used to load a new program directly via WiFi.

All the code and some build notes are available on GitHub, and if you’re looking for a nifty LCD emulator for your web site, there’s a standalone repository for that as well. But in case you need a better display option for your own breadboard computer, how about adding a VGA connector? And if you don’t build your own yet, it’s never too late to start.

Continue reading “Breadboard Computer Plays Snake On Character Display; Also In A Browser!”

Snakes And Ladders: Game Boy Emulator In Python

If a Game Boy was a part of your childhood, you were probably more than once dreaming of spending your entire school day with it. Well, they had to wait a few more years for that, but eventually in 2015, [Asger], [baekalfen], and [troelsy] made that dream reality when they created a Game Boy emulator in Python for a university project. However, it didn’t stop there, and the emulator has since grown into a full-blown open source project, PyBoy, which just reached the version 1.0 release.

Since it started out as an academic project, the three of them had to do their research accordingly, so the background and theory about the Game Boy’s internal functionality and the emulator they wrote is summarized in a report published along with the source code. There is still some work to be done, and sadly there is no sound support implemented yet, but for the most part it’s fully functional and let’s you successfully play your own extracted cartridges, or any ROM file you happen to have in your possession.

Being an emulator, you can also inspect its inner life when run in debug mode, and watch the sprites, tiles, and data as you play, plus do cool things like play the emulation in reverse as shown in the clip below. Even more so, you can just load the instance in your own Python scripts, and start writing your own bots for your games — something’s we’ve seen in action for the NES before. And if you want to dive really deep into the world of the Game Boy, you should definitely watch the 33c3 talk about it.

Continue reading “Snakes And Ladders: Game Boy Emulator In Python”