Using The Steam Controller With LEGO Motors

While Valve’s Steam Controller was ultimately a commercial failure, there’s no denying it’s an interesting piece of hardware. With dual trackpads, a wealth of buttons, and Bluetooth capability, it could be the ideal way to control your next build. Thanks to a recent project by [geggo], now you’ve even got an example you can follow.

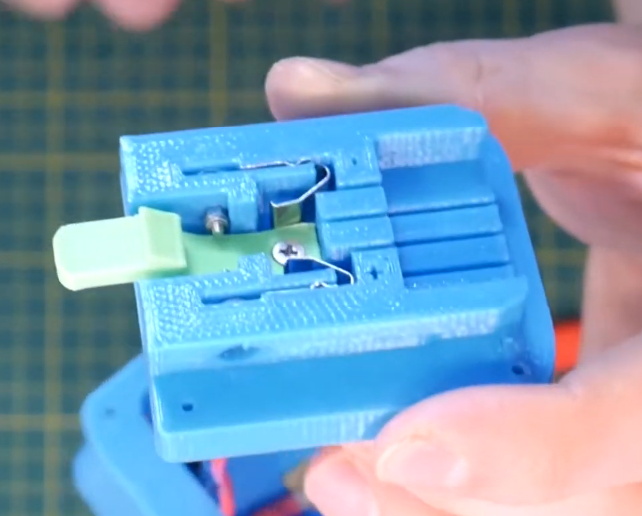
A custom PCB holding an ESP32 and DRV8833 dual H-bridge motor controller is used to interface with standard LEGO motors using their stock block-like connectors. That means the board is a drop-in upgrade for whatever motorized creation you’ve already built.

Since the ESP32 obviously has WiFi in addition to Bluetooth, that also means this little board could be used to control LEGO projects over the local network or even Internet with some changes to the firmware.

Interestingly, while Valve officially enabled Bluetooth on the Steam Controller back in 2018, it sounds like some undocumented poking and reverse engineering was necessary to get it working here. That’s great for those of us who like a good hack, but if you’re more interested in just getting things working, [geggo] has been good enough to release the source code to get you started.

If you’re not interested in Bluetooth but want to get your creation up and moving, we’ve recently covered how one hacker used the ESP8266 to bring his LEGO train to life by integrating it into his smart home.

Continue reading “Using The Steam Controller With LEGO Motors”

Using A Vending Machine Bill Acceptor With Arduino

We’ve all seen, and occasionally wrestled with, bill acceptors like the one [Another Maker] recently liberated from an arcade machine. But have you ever had one apart to see how it works? If not, the video after the break is an interesting peak into how this ubiquitous piece of hardware tells the difference between a real bill and a piece of paper.

But [Another Maker] goes a bit farther than just showing the internals of the device. He also went through the trouble of figuring out how to talk to it with an Arduino, which makes all sorts of money-grabbing projects possible. Even if collecting paper money isn’t your kind of thing, it’s still interesting to see how this gadget works on a hardware and software level.

As explained in the video, a set of belts are used to pull the bill past an array of IR LEDs. The hardware uses these to scan the bill and perform some dark magic to determine if it’s a genuine piece of currency. [Another Maker] notes that these readers actually need to receive occasional firmware updates to take into account new bill designs. In fact, the particular unit he has is so out of date that it won’t accept modern $5 bills; which may explain how he got it for free in the first place.

Years ago we saw one of these bill acceptors used to make a DIY Bitcoin ATM. Of course back then, a few bucks would get you a semi-reasonable amount of BTC. These days you would skip the paper currency and do it all digitally.

Continue reading “Using A Vending Machine Bill Acceptor With Arduino”

Printed Door Handle Turns Key With A Servo

[Madalin Valceleanu] had a somewhat unique problem. He wanted to make his front door a bit “smarter”, but none of the IoT door locks he found were compatible with the style of reinforced door he had. So he set out to design and 3D print his own Internet-controlled door handle.

Now we say handle and not lock because the internal mechanisms haven’t actually been replaced. Those aren’t exactly the kind of parts that lend themselves to being recreated in PLA, after all. The printed components simply replace the original plate and handle on the interior of the door.

In that case, you might be wondering what the point of all this was. If he’s still using the same internal mechanism, how does a new handle help? On his new handle, [Madalin] has integrated a servo that’s capable of turning the original key in the door. With the servo wired up to a Raspberry Pi, this allows him to lock and unlock the door through his home automation system.

[Madalin] has made the STLs for his printed handles available on Thingiverse, but like most of these “bolt on” style door modifications, we imagine the design is bespoke enough that it won’t be much practical use to anyone else. Still, it’s an excellent example of solving a real-world problem with some outside of the box thinking. Continue reading “Printed Door Handle Turns Key With A Servo”

Designing Printed Adapters For Power Tool Batteries

Unless you’re particularly fond of having multiple types of batteries and chargers, you’d do well to make sure all your portable power tools are made by the same company. But what do you do if there’s a tool you really need, but your brand of choice doesn’t offer their own version of it? Rather than having to buy into a whole new tool ecosystem, you might be able to design your own battery adapter.

Note the locking tab that’s been printed separately.

As [Chris Chimienti] explains in the video after the break, the first thing you’ve got to do (beyond making sure the voltages match) is take some careful measurements of the connectors on your batteries and tools. His goal was to adapt a Milwaukee M12 battery to Makita CXT tool, so if you happen to have that same combination of hardware you can just use his STLs. Otherwise, you’ll be spending some quality time with a pair of calipers and a notepad.

Once the interfaces have been designed and printed, they are wired together and mounted to opposite ends of the center support column. In theory you’d be done at this point, but as [Chris] points out, there’s a bit more to it than just wiring up the positive and negative terminals. Many tools use thermistors in the batteries for thermal protection purposes, and when the tool doesn’t get a reading from the sensor, it will likely refuse to work.

His solution to the problem is to “hotwire” the thermistor lead on the battery connector with a standard resistor of the appropriate value. This will get the tool spinning, but obviously there’s no more thermal protection. For most homeowner DIY projects this probably won’t cause a problem, but if you’re a pro who’s really pushing their tools to the limit, this project might not be for you.

Of course, this isn’t the first time we’ve seen somebody adapt batteries from different brands to work on their tools. It’s a common enough problem once you start building up a workshop, although you could always avoid it by building all your own tools.

Continue reading “Designing Printed Adapters For Power Tool Batteries”

An Open Source Shipboard Computer System

We’re not sure how many of you out there own a boat large enough to get its own integrated computer network, but it doesn’t really matter. Even if you can’t use this project personally, it’s impossible not to be impressed with the work [mgrouch] has put into the “Bareboat Necessities” project. From the construction of the hardware to the phenomenal documentation, there’s plenty that even landlubbers can learn from this project.

In its fully realized form, the onboard computer system includes several components that work together to provide a wealth of valuable information to the operator.

Inside the Boat Computer module

What [mgrouch] calls the “Boat Computer” contains a Raspberry Pi 4, a dAISy AIS receiver, an RTL-SDR, a GPS receiver, serial adapters, and the myriad of wires required to get them all talking to each other inside a weatherproof enclosure. As you might expect, this involves running all the connections through watertight panel mounts.

Combined with a suite of open source software tools, the “Boat Computer” is capable of interfacing with NMEA sensors and hardware, receive weather information directly from NOAA satellites, track ships, and of course plot your current position on a digital chart. The computer itself is designed to stay safely below deck, while the operator interacts with it through an Argonaut M7 waterproofed HDMI touch screen located in the cockpit.

For some people, that might be enough. But for those who want to do big, [mgrouch] further details the “Boat Gateway” device. This unit contains an LTE-equipped WiFi router running OpenWrt and all the external antennas required to turn the boat into a floating hotspot. Of course it also has RJ45 jacks to connect up to the other components of the onboard system, and it even includes an M5Stack Core with LAN module so it can display a select subset of sensor readings and navigational data.

If you’d like to do something similar on a slightly smaller scale, we’ve seen sailing computers that pushed all the data to a wearable display or even a repurposed eReader.

Poor Maintenance Could Have Led To Fatal B-17 Crash

In October the Nine-O-Nine, a fully restored Boeing B-17G bomber owned and operated by the Collings Foundation, crashed with thirteen people on board. After landing hard and skidding into the de-icing tanks at the Bradley International Airport, all but the tail and port wing of the 74 year old WWII aircraft was destroyed. Seven lives were lost in the accident, including that of Pilot Ernest “Mac” McCauley, who was regarded as one of the most experienced B-17 pilots in the world.

While the National Transportation Safety Board (NTSB) investigation is still ongoing and hasn’t made a final determination as to what ultimately brought down the Nine-O-Nine, enough serious maintenance issues were uncovered while examining the wreckage that the Federal Aviation Administration (FAA) has decided to rescind the Collings Foundation’s license to conduct any more paid flights on their remaining WWII aircraft. While many have spoken out in support of these “living history” flights, the FAA says they must be conducted in such a way that they don’t hinder the safety of other air traffic.

With the vast majority of the B-17’s airframe gone, the NTSB investigation has focused on the four 1,200 horsepower Wright R-1820 “Cyclone” engines recovered from the crash site. Investigators found that hastily attempted repairs to engine number 4, which is believed to have failed in-flight, were actually hindering normal operation:

Regarding engine 4, to prevent the magneto “P” leads from separating from the
magnetos, someone had attempted to rig the magneto leads in place with safety wire.

Inspection and testing of engine 4 left magneto revealed the movement of the safety-wired lead caused grounding to the case, which rendered the magneto lead inoperative.

Further, all of the spark plugs in the number 3 and 4 engines were found to be fouled and had electrode gaps that were out of tolerance. From an examination of the aircraft’s maintenance records, it was also learned that an arcing and burned wire had been replaced without any investigative steps taken to find what caused the failure to begin with.

With basic maintenance tasks either not being performed or at least done incorrectly, the FAA has called into question the culture of safety at the Collings Foundation. The paper is careful not to directly accuse the Foundation or any of its staff with outright negligence, but the implication seems clear.

The loss of Nine-O-Nine hit especially close to home for Hackaday. Just a month prior to the crash we had the opportunity to tour the aircraft, and came away with a newfound respect for not only those who designed and built the iconic bomber but the brave young men who flew it. Losing such a rare and historically significant aircraft and its crew was already a tragedy, but to find that negligence may be to blame is truly inexcusable.

Trimmed PCB Makes The Ultimate Portable N64

One of the most impressive innovations we’ve seen in the world of custom handhelds is the use of “trimmed” PCBs. These are motherboards of popular video game consoles such as the Nintendo Wii and Sega Dreamcast that have literally been cut down to a smaller size. As you can imagine, finding the precise shape that can be cut out before the system stops functioning requires extensive research and testing. But if you can pull it off, some truly incredible builds are possible.

Take for example this absolutely incredible clamshell N64 built by [GMan]. After cutting the motherboard down to palm-sized dimensions, he’s been able to create a handheld system that’s only a bit larger than the console’s original cartridges.

Incidentally those original cartridges are still supported, and fit into a slot in the rear of the system Game Boy style. It’s still a bit too chunky for tossing in your pocket, but we doubt you could build a portable N64 any smaller without resorting to emulation.

In the video after the break, [Gman] explains that the real breakthrough for trimmed N64s came when it was found that the system’s Peripheral Interface (PIF) chip could be successfully relocated. As this chip was on the outer edge of the PCB, being able to move it meant the board could get cut down smaller than ever before.

But there’s more than just a hacked N64 motherboard living inside the 3D printed enclosure. [Gman] also designed a custom PCB that’s handling USB-C power delivery, charging the handheld’s 4250 mAh battery, and providing digital audio over I2S. It’s a fantastically professional setup, and you’d be forgiven for thinking the board was part of the original console.

Considering how well designed and built this N64 SP is, it probably will come as no surprise to find this isn’t the first time [Gman] has put something like this together. He used many of the same tricks to build his equally impressive portable Dreamcast last year.

Continue reading “Trimmed PCB Makes The Ultimate Portable N64”