A Water Cooled Gaming PC You Can Take With You

Have you ever been stuck in a hotel room wishing you brought your VR-capable gaming PC along with you? Well [thegarbz] certainly has, which was the inspiration for this absolutely gorgeous mobile rig affectionately known as “The Nuclear Football” that brings console-level portability to those who count themselves among the PC Master Race.

OK, fine. We’ll admit that the existence of gaming laptops means you don’t actually need to carry around such an elaborate contraption just to play Steam games on the go. But if you’re going to do it, shouldn’t you do it in style? More practically speaking, [thegarbz] says the cost of this project was less than what a gaming laptop of similar specs would have cost.

The Nuclear Football features a Ryzen 5 2600 processor, a NVIDIA 2070 Super graphics card, and 16 GB of DDR4 RAM. The water cooling gear is from Alphacool, and includes a custom controller that links to the computer and allows [thegarbz] to monitor temperatures and fan speeds via a widget on the desktop.

While not nearly as mobile, this machine does remind us of the water cooled “Big O” that packed all the current-gen consoles and a gaming PC into one glorious machine.

A SpaceX Falcon 9 Will Blow Up Very Soon, And That’s OK

They say you can’t make an omelette without breaking a few eggs, and there are few fields where this idiom is better exemplified than rocketry. It’s a forgone conclusion that when you develop a new booster, at least a few test articles are going to be destroyed in the process. In fact, some argue that a program that doesn’t push the hardware to the breaking point is a program that’s not testing aggressively enough.

Which is why, assuming everything goes according to plan, SpaceX will be obliterating one of their Falcon 9 boosters a little after 8:00 AM EST on Saturday morning. The event will be broadcast live via the Internet, and thanks to the roughly 70% propellant load it will be carrying at the moment of its destruction, it should prove to be quite a show.

This might seem like an odd way to spend $62 million, but for SpaceX, it’s worth it to know that the Crew Dragon Launch Abort System (LES) will work under actual flight conditions. The LES has already been successfully tested once, but that was on the ground and from a standstill. It allowed engineers to see how the system would behave should an abort occur while the rocket was still on the pad, but as the loss of the Soyuz MS-10 dramatically demonstrated, astronauts may need to make a timely exit from a rocket that’s already well on the way to space.

In an actual emergency, the crewed spacecraft will very likely be speeding away from a violent explosion and rapidly expanding cloud of shrapnel. The complete destruction of the Falcon 9 that will be carrying the Crew Dragon during Saturday’s test will serve to create the same sort of conditions the spacecraft will need to survive if the LES has any hope of bringing the crew home safely. So even if there was some way to prevent the booster from breaking up during the test, it’s more useful from an engineering standpoint to destroy it.

Of course, that only explains why the Falcon 9 will be destroyed during this test. But exactly how this properly functioning booster will find itself being ripped to pieces high over the Atlantic Ocean in a matter of seconds is an equally interesting question.

Continue reading “A SpaceX Falcon 9 Will Blow Up Very Soon, And That’s OK”

A Behind The Scenes Look At Small Scale Production

Back in 2013, [Karl Lautman] successfully got his kinetic sculpture Primer funded on Kickstarter. As the name implies, you press the big red button on the front of the device, and the mechanical counter at the top will click over to a new prime number for your viewing pleasure. Not exactly a practical gadget, but it does look pretty slick.

These days you can still by your very own Primer from [Karl], but he tells us that the sales aren’t exactly putting food on the table. At this point, he considers it more of a self-financing hobby. To illustrate just what goes into the creation of one of these beauties, he’s put together a time-lapse video of how one gets built from start to finish, which you can see after the break.

Even if you’re not interested in adding a mathematics appliance to your home, we think you’ll agree that the video is a fascinating look at the effort that goes into manufacturing a product that’s only slightly north of a one-off creation.

The biggest takeaway is that you really need to be a jack of all trades to pull something like this off. From milling and polishing the metal components to hand-placing the SMD parts and reflowing the board, [Karl] demonstrates the sort of multi-disciplinary mastery you need to have when there’s only one person on the assembly line.

Small scale manufacturing isn’t cheap, and is rarely easy. But stories like this one prove it’s certainly possible if you’re willing to put in the effort.

Continue reading “A Behind The Scenes Look At Small Scale Production”

New Part Day: Arduino Goes Pro With The Portenta H7

The Consumer Electronics Show in Las Vegas is traditionally where the big names in tech show off their upcoming products, and the 2020 show was no different. There were new smartphones, TVs, and home automation devices from all the usual suspects. Even a few electric vehicles snuck in there. But mixed in among flashy presentations from the electronics giants was a considerably more restrained announcement from a company near and dear to the readers of Hackaday: Arduino is going pro.

While Arduino has been focused on the DIY and educational market since their inception, the newly unveiled Portenta H7 is designed for professional users who want to rapidly develop robust hardware suitable for industrial applications. With built-in wireless hardware and the ability to run Python and JavaScript out of the box, the powerful dual-core board comes with a similarly professional price tag; currently for preorder at $99 USD a pop, the Portenta is priced well outside of the company’s traditional DIY and educational markets. With increased competition from other low-cost microcontrollers, it seems that Arduino is looking to expand out of its comfort zone and find new revenue streams.

Continue reading “New Part Day: Arduino Goes Pro With The Portenta H7”

A Slightly Bent ESP8266 Sensor Platform

The ability to get professionally manufactured PCBs, at least small ones, for dirt cheap has had a huge impact on the sort of projects we see around these parts. It’s getting to the point where experimenting with PCB enclosures is not only a way to make your next project stand out, but an economical choice.

Which is how this ESP8266 sensor gadget from [Josef Adamčík] got its unique “folded over” look. The top panel is where the microcontroller and headers for various sensors live, the bottom panel is home to the TP4056 USB charging module, and the center panel provides mechanical support as well as holds the single 18650 cell. Rather than close the whole thing up with a fourth panel, he decided to leave it open so the battery can easily be removed. Plus, of course, it looks cooler this way.

Could [Josef] have fit all his electronics on a single 100 x 100 PCB and then put the whole thing into a 3D printed enclosure? Well, sure. But that’s been done to death at this point, and besides, he was looking for an excuse to get more comfortable doing PCB design. We think it also makes for a considerably more visual appealing final product than simply taking the “normal” way out.

Currently [Josef] has an SHT21 humidity/temperature sensor and a BH1750 light sensor slotted into the headers on the top side of the device, but they could just as easily be swapped out with something else if you wanted to do something a bit more exciting. We notice that homebrew air quality monitors are becoming increasingly popular.

Building bespoke enclosures from PCBs is a fantastic trick that frankly we’d love to see more of. It’s somewhat of an artform in itself, but if you’re willing to put the effort in to do it right the results can be truly phenomenal.

A Replica From WarGames, But Not The One You Think

Remember the WOPR from WarGames? The fictional supercomputer that went toe-to-toe with Matthew Broderick and his acoustic coupler was like a love letter to the blinkenlight mainframes of yesteryear, and every hacker of a certain age has secretly yearned for their own scaled down model of it. Well…that’s not what this project is.

The [Unexpected Maker] is as much a WarGames fan as any of us, but he was more interested in recreating the red alphanumeric displays that ticked along as the WOPR was trying to brute force missile launch codes. These displays, complete with their thoroughly 1980s “computer” sound effects, were used to ratchet up the tension by showing how close the supercomputer was to kicking off World War III.

The display as it appeared in the film.

Of course, most us don’t have a missile silo to install his recreated display in. So when it’s not running through one of the randomized launch code decoding sequences, the display doubles as an NTP synchronized clock. With the retro fourteen segment LEDs glowing behind the smoked acrylic front panel, we think the clock itself is pretty slick even without the movie references.

Beyond the aforementioned LEDs, [Unexpected Maker] is using a ESP32 development board of his own design called the TinyPICO. An associated audio “Shield” with an integrated buzzer provides the appropriate bleeps and bloops as the display goes through the motions. Everything is held inside of an understated 3D printed enclosure that would look great on the wall or a desk.

Once you’ve got your launch code busting LED clock going in the corner, and your illuimated DEFCON display mounted on the wall, you’ll be well on the way to completing the WarGames playset we’ve been dreaming of since 1983. The only way to lose is to not play the game! (Or something like that…)

Continue reading “A Replica From WarGames, But Not The One You Think”

Retro PowerBook Gets A Mac Mini Transplant

Around these parts, seeing a classic laptop or desktop computer get revived with the Raspberry Pi is fairly common. While we’re not ones to turn down a well-executed Pi infusion, we know they can be controversial at times. There’s an impression that such projects are low-effort, and that the combination of old and new tech gains little in the way of usability due to the usability quirks of the Pi itself.

But we think even the most critical in the audience will agree that this build by [Tylinol], which sees the internals of a circa 1993 PowerBook 165c get replaced with that of a 2014 Mac Mini, is something else entirely. For one thing, there’s no question that packing a modern (relatively) desktop computer motherboard into a laptop’s body takes a lot more planning and effort than hot gluing the comparatively tiny Pi into the same space. Plus as an added bonus, anyone who counts themselves among the Cult of Mac will be happy to see the vintage machine retain its Cupertino pedigree.

So how do you get a Mac Mini inside of a PowerBook? Very carefully. As explained by [Tylinol], the inside of the PowerBook’s case was coated in graphite and conductive enough to be a problem. So after the original hardware was removed, a layer of tape was added to insulate it; though we imagine a suitably thick spray-on coating could be used as well if you don’t have that kind of patience.

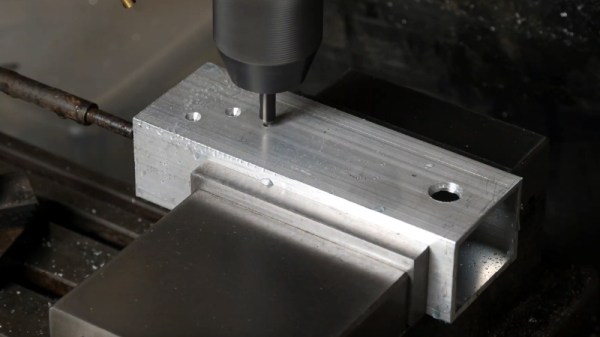
Once the case was gutted and insulated, [Tylinol] added new stand-offs to mount the Mac Mini motherboard and hard drive. For anyone wondering, the 2014 model was used because the shape of the board almost perfectly fits around the trackball PCB. A board from a newer Mac could be used, but it would likely mean using an external mouse.

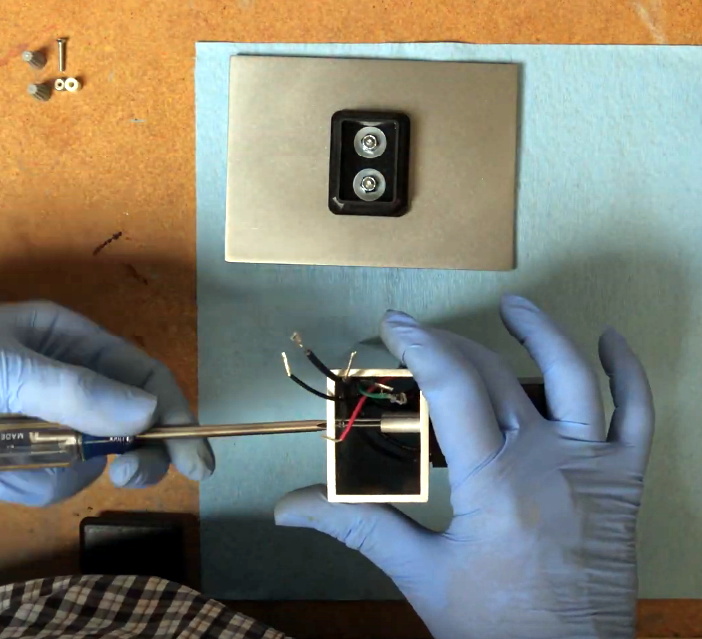
Which would have been a problem for [Tylinol], because one of the main goals of this build was to get the original input working. That meant adapting the Apple Desktop Bus (ADB) devices to USB, which turns out to be something of a Dark Art. But with the help of some contemporary information about the long-forgotten protocol and a Teensy 3.5, both devices are now picked up as standard USB HID.

But of course, that’s just scratching the surface. [Tylinol] also had to figure out how to swap the original display out for a modern panel, and then get the whole thing running on internal battery power. Even if you’re not particularly interested in retro Apple hardware, this is really a phenomenal build that deserves a thorough read-through.

For those of you who don’t mind getting a Pi in a PowerBook, we recently saw a recreation of Lord Nikon’s laptop from Hackers that went that route.
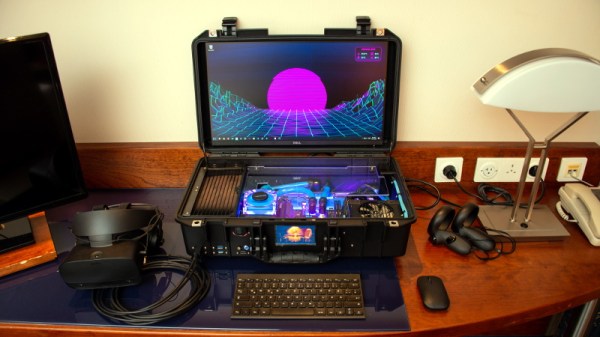
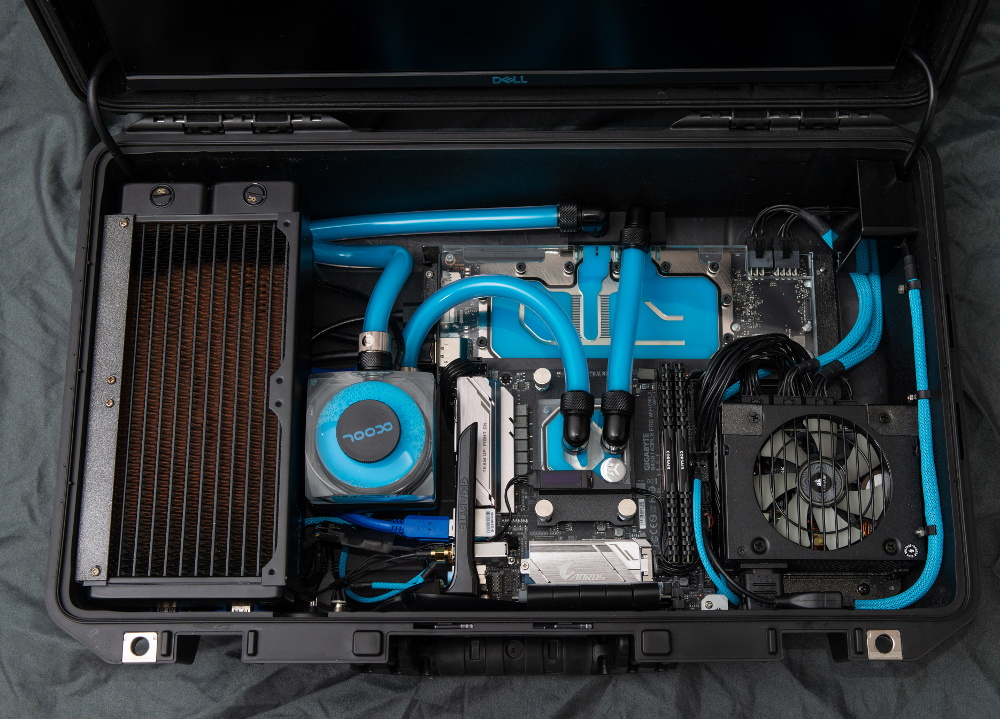