Chromebook Trades Camera For WiFi Freedom

There are a number of companies now providing turn-key computers that meet the Free Software Foundation’s criteria for their “Respects Your Freedom” certification. This means, in a general sense, that the computer is guaranteed not to spy on you or otherwise do anything else you didn’t explicitly ask it to. Unfortunately these machines often have a hefty premium tacked on, making it an unpleasant decision between privacy and performance.

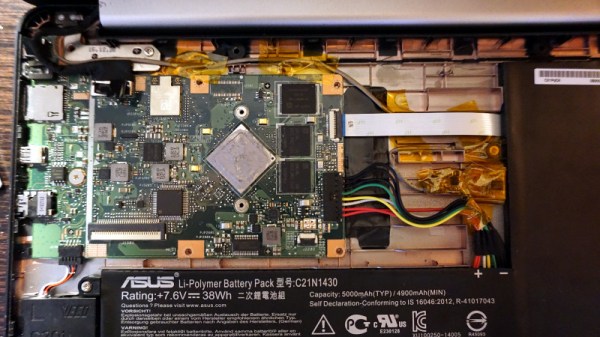
Freedom-loving hacker [SolidHal] writes in to tell us about his quest to create a FSF-compliant laptop without breaking the bank. Based on a cheap Asus C201 Chromebook, his custom machine checks off all the appropriate boxes. The operating system was easy enough with an install of Debian, and the bootloader was rid of any Intel Management Engine shenanigans with a healthy dose of Libreboot. But there was one problem: the permanently installed WiFi hardware that required proprietary firmware. To remedy the issue, he decided to install an internal USB Wi-Fi adapter that has the FSF seal of approval.

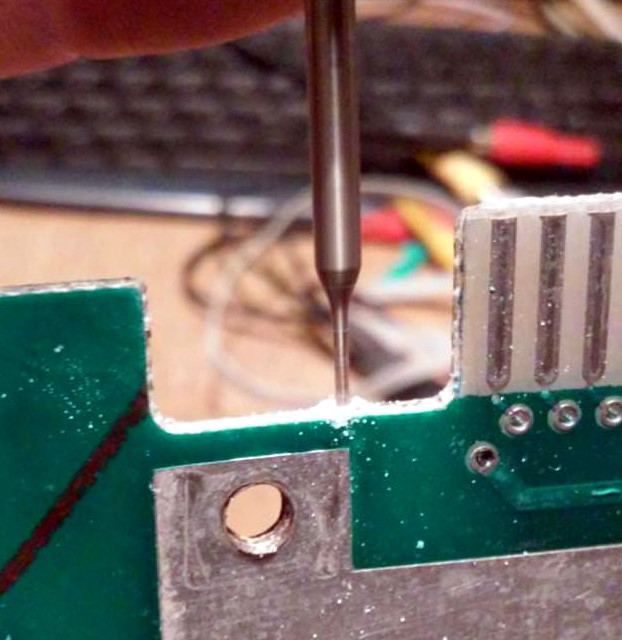
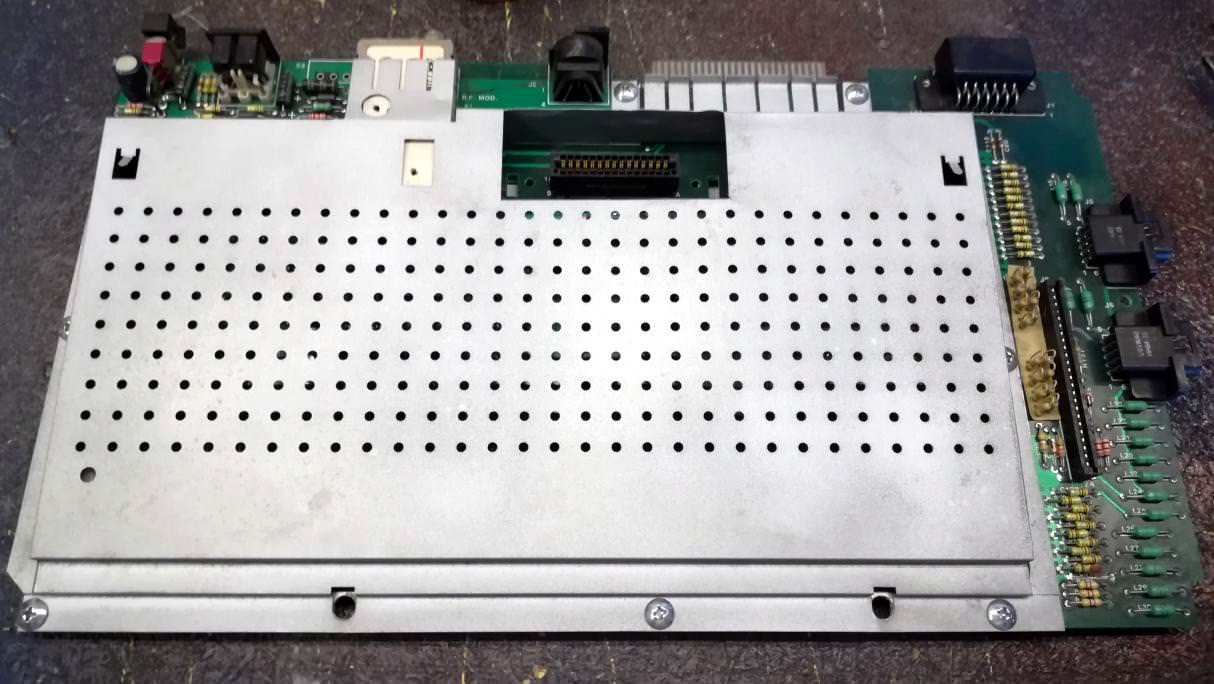
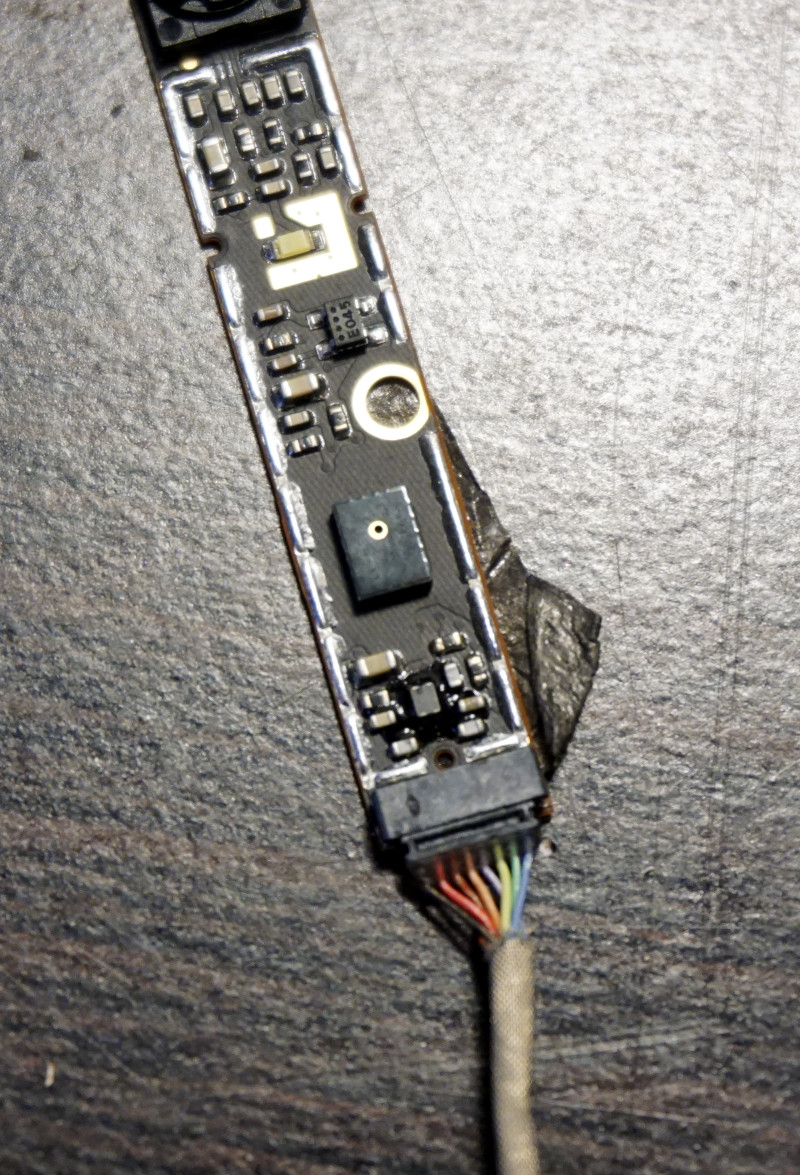
As the Chromebook obviously doesn’t have an internal USB port, this was easier said than done. But as [SolidHal] is not the kind of guy who would want his laptop taking pictures of him in the first place, he had the idea to take the internal USB connection used by the integrated webcam and use that. He pulled the webcam out, studied the wiring, and determined which wires corresponded to the normal USB pinout.

The FSF approved ThinkPenguin Wi-Fi adapter he chose is exceptionally small, so it was easy enough to tuck it inside some empty space inside of the Chromebook. [SolidHal] just needed to solder it to the old webcam connection, and wrap it up in Kapton tape to prevent any possible shorts. The signal probably isn’t great considering the antenna is stuck inside the machine with all the noisy components, but it’s a trade-off for having a fully free and open source driver. But as already established, sometimes these are the kind of tough choices you have to make when walking in the righteous footsteps of Saint Ignucius.

Internal laptop modifications like this one remind us of the Ye Olden Days of Hackaday, when Eee PC modifications were all the rage and we still ran black and white pictures “taped” to the screen. Ah, the memories.

Framed Raspberry Pi Keeps Tabs On Spotify

Perhaps you’ve noticed, but we here at Hackaday have a slight obsession with the over-engineered. One could fairly say there’s a linear relationship between how likely we are to feature a project and how needlessly complex it is. That said, it isn’t as if we are unable to appreciate a minimalist approach. Taking the scenic route can be a lot of fun, but sometimes it’s nice to just get where you’re going before you run out of gas.

This very slick Spotify “Now Playing” display created by [Jon Ashcroft] is a perfect example of that principle. The hardware is so straightforward that it’s barely worth mentioning: a Raspberry Pi with a small HDMI display, tucked neatly into a photo frame. Nothing to get too excited about there. The real hook with this particular project is the software.

[Jon] is a web developer by trade, so it’s natural he would approach his personal projects with that same mentality. Rather than one of the “usual suspects” for a Pi project like Python, he wrote his software in ES6; which the Pi is running through Chromium in kiosk mode (full screen web content, no top bar). For those of you who aren’t keeping up on web languages, ES6 is short for EcmaScript 6: a new version of the standard on which JavaScript is based. It’s a bit heavier on resources than is strictly necessary, but it works well enough in the end.

Using Spotify’s excellent API, his software pulls down the current track information and stores it locally. It does this every ~4 seconds, checking to see if the track has changed. [Jon] isn’t thrilled with this brute force method, but it works for now. It displays the current playing song and artist, and uses a library called node-vibrant to extract a dominant color from the album art and use that to create a complementary background color. Very slick.

[Jon] provides all of his source code and made it easy to connect to your own Spotify account, so don’t be surprised if you see this running on a “Magic Mirror” near you soon.

Restoring An Atari 800 XL That’s Beyond Restoring

Sometimes the best way to get a hacker to do something is to tell them that they shouldn’t, or even better can’t, do it. Nothing inspires the inquisitive mind quite like the idea that they are heading down the road less traveled, if for nothing else to say that they did it. A thrown gauntlet and caffeine is often all that stands between the possible and the impossible.

Preparing the PCB for epoxy injection

So when [Drygol] heard a friend comment he had an old Atari 800 XL that was such poor shape it couldn’t be repaired, he took on the challenge of restoring the machine sight unseen. Luckily for us, his pride kept him from backing down when he saw the twisted and dirty mess of a computer in person. He’s started documenting the process on his blog, and while this is only the first phase of the restoration, the work he’s done already is impressive enough that we think you’ll want to follow him along on his quest.

There’s no word on what happened to this miserable looking Atari, but we wouldn’t be surprised if it was run over by a truck. The board was cracked and twisted, with some components missing entirely. The first step in this impossible restoration was straightening the PCB, which [Drygol] did by clamping it to some aluminum bar stock and heating the whole board up to 40C (104F) for a few days. Once the got most of the bend out, he used a small drill bit to put holes in the PCB laminate and inject epoxy to add some strength. It’s an interesting technique, and the results seem to speak for themselves.

Once the board was straight, he went through replacing blown passive components and broken chip sockets. All the ICs were pulled and treated to an isopropyl alcohol and acetone bath in an ultrasonic cleaner to get them looking like new again. The CPU was cooked and needed to get swapped out, but otherwise it was smooth sailing, and before long he had the machine booted up. While most would have been satisfied to just get this far, [Drygol] considers this to be the easy part.

He next straightened out the metal shielding with a mallet, sanded it down, and sprayed it with a new zinc coating. The plastic around the keyboard and the metal trim pieces were also removed, cleaned, and refinished where necessary. Rather than going for perfection, [Drygol] intentionally left some issues so the machine didn’t look 100% pristine. It’s supposed to be a functional computer, not a museum piece behind glass.

We’ll have to wait until the next entry in this series to see how he repairs the absolutely devastated case. Any rational person would just use a case from a donor machine, but we’ve got a feeling [Drygol] might have something a little more impressive in mind.

In the meantime we’ve got plenty of incredible restorations to keep you occupied, from this sunken VIC-20 to a Pi-packing Osborne.

A Fully Open Source Raspberry Pi Synthesizer

Have you ever seen something and instantly knew it was something you wanted, even though you weren’t aware it existed a few seconds ago? That’s how we felt when we received a tip about Zynthian, a fully open source (hardware and software) synthesizer. You can buy the kit online directly from the developers, or build your own from scratch using their documentation and source code. With a multitude of filters, effects, engines, and essentially unlimited upgrade potential, they’re calling it a “Swiss Army Knife of Synthesis”. We’re inclined to agree.

At the most basic level, the Zynthian is a Raspberry Pi 3 with a touch screen, a few rotary encoders, a dedicated sound card, and MIDI support. Software wise the biggest feature is arguably the real-time Linux kernel for the lowest latency possible. There’s also a custom web interface so you can control the Zynthian from another machine on the network if you want. As a matter of course, it also includes a wide array of pre-installed audio packages to experiment and create with.

Kits are offered at various prices from $420 USD for the top of the line model down to unpopulated PCBs for a few bucks. We like that they broke things down this way; allowing users of various skill (and or patience) to pay what they want. If you just want to buy the custom boards and roll your own case and Pi solution, you can do that.

If you want to go all in, you can build one entirely from scratch as well. Everything from the CAD files for the case to their custom rotary encoder library is completely open (most licensed under GPL v3) for anyone to use however they see fit. There’s even a page in the wiki for listing hardware which isn’t officially supported by the project, but remain as options for those looking to cut their own path.

Synthesizers are a fairly popular hacker project, from Google’s AI-powered version to single chip exercises in frugality. If you want to learn even more about the fine line between digital noise and music, check out this fantastic series by our very own [Elliot Williams].

[Thanks to Mynasru for the tip.]

Continue reading “A Fully Open Source Raspberry Pi Synthesizer”

VCF East 2018: SDR On The Altair 8800

You’d be forgiven if you thought software defined radio (SDR) was a relatively recent discovery. After all, few outside of the hardcore amateur radio circles were even familiar with the concept until it was discovered that cheap USB TV tuners could be used as fairly decent receivers from a few hundred MHz all the way up into the GHz range. The advent of the RTL-SDR project in 2012 brought the cost of entry level SDR hardware from hundreds of dollars to tens of dollars effectively overnight. Today there’s more hackers cruising the airwaves via software trickery than there’s ever been before.

Continue reading “VCF East 2018: SDR On The Altair 8800”

Ambient Lighting For Baby With The ESP8266

There are plenty of great reasons to have a child. Perhaps you find the idea of being harshly criticized by a tiny person very appealing, or maybe you enjoy somebody screaming nonsense at you while you’re trying to work on something. But for us, we think the best reason for procreation is getting another excuse to build stuff. It’ll be what, at least two years before a baby can solder or program a microcontroller? Somebody’s going to have to do it for them until then.

To try to help his baby daughter get on a better sleep schedule, [Amir Avni] decided to outfit her room with some “smart” lighting to establish when it’s time for her to wake up. Not only can he and his wife control the time the lights come on to “day” mode, but they can also change the colors. For example, they can switch over to a red glow at night. Despite some learning experience setbacks, the both the parents and the baby are very happy with the final product.

An ESP8266 controls a WS2812 LED strip to provide the adjustable lighting, and a DHT22 sensor was added to the mix to detect the temperature and humidity in the baby’s room. [Amir] used Blynk to quickly throw together a slick mobile application that allows for complete control of the brightness and color of light in the room, as well as provides a readout of the environmental data pulled from the DHT22.

But not everything went according to plan. [Amir] thought he could power the LED strip from the ESP8266 development board by soldering to the 5 V side of its AMS1117 voltage regulator. Which worked fine, until he turned on too many LEDs. Then it pulled too much current through a resistor connected to the regulator, and let all the magic smoke out. An important reminder of what can happen when we ask more of a circuit than what it was designed for.

We’ve covered many awesome projects that were born of a parental need, from feature packed baby monitors to devices seemingly designed to program nostalgia in the little one’s subconscious.

Building A Knife By Hand Is Just As Hard As You Think

Carl Sagan once said: “If you wish to make an apple pie from scratch, you must first invent the universe.” In other words, the term “scratch” is really a relative sort of thing. Did you grow the apples? Did you plant the wheat to make the flour? Where do you keep your windmill, incidentally? With Carl’s words in mind, we suppose we can’t say that [Flannagill] truly built this incredible knife from scratch, after all, he ordered the sheet steel on Amazon. But we think it’s close enough.

He was kind enough to document the epic build in fantastic detail, including (crucially), the missteps he made along the way. While none of the mistakes were big enough to derail the project, he mentions a few instances where he wasted time and money trying to take shortcuts. Even if making your own knives at home isn’t on your short list of summer projects, we’d wager there’s something in this build log you can learn from regardless.

So how does one build a knife? Slowly and methodically, if what [Flannagill] has written up is any indication. It started with a sketch of the knife on a piece of paper, the outline of which was then transferred to a piece of tool steel with nothing more exotic than a permanent marker. An angle grinder was then used to follow the outline and create the rough shape of the final knife.

From there, the process is done almost entirely with hand files. Here [Flannagill] gives one of his most important pieces of advice: don’t cheap out on the tools. He bought the cheapest set of files he could, and paid the price: he says it took up to 14 hours to complete just one side of the knife. Once he switched over to higher quality files, the rest of the work went much faster.

After filing and sanding the knife blank, it went into a charcoal fire to be hardened, followed by a total of 4 hours in a 200 C (~400 F) oven to heat temper it. Finally the handle pieces (which are officially known as “scales”) were attached, and finished with considerably less labor intensive woodworking methods. The final result is a gorgeous one of a kind specimen that [Flannagill] is rightly very proud of.

If you’re worried this process looks a bit too quick and easy for you, don’t worry. You can always go the [Bil Herd] route and make a forge out of your old sink if you’d rather start your apple pie a bit closer to the tree.