Battery Backup Conceals A Pentesting Pi

Over the last few years one thing has become abundantly clear: hackers love cramming the Raspberry Pi into stuff. From classic game systems to mirrors, there’s few places that haven’t been invaded by everyone’s favorite Linux SBC. From the inspired to the bizarre, we’ve brought such projects to your attention with minimal editorialization. As we’ve said before: it’s not the job of Hackaday to ask why, we’re here to examine how.

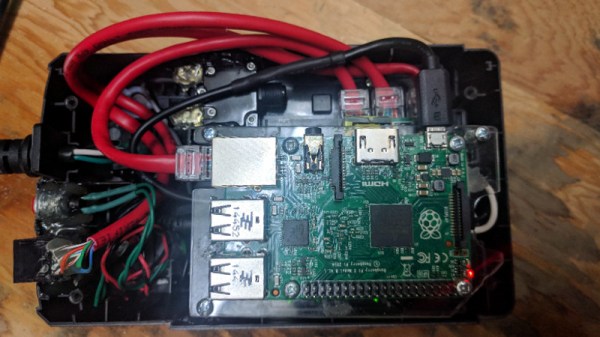
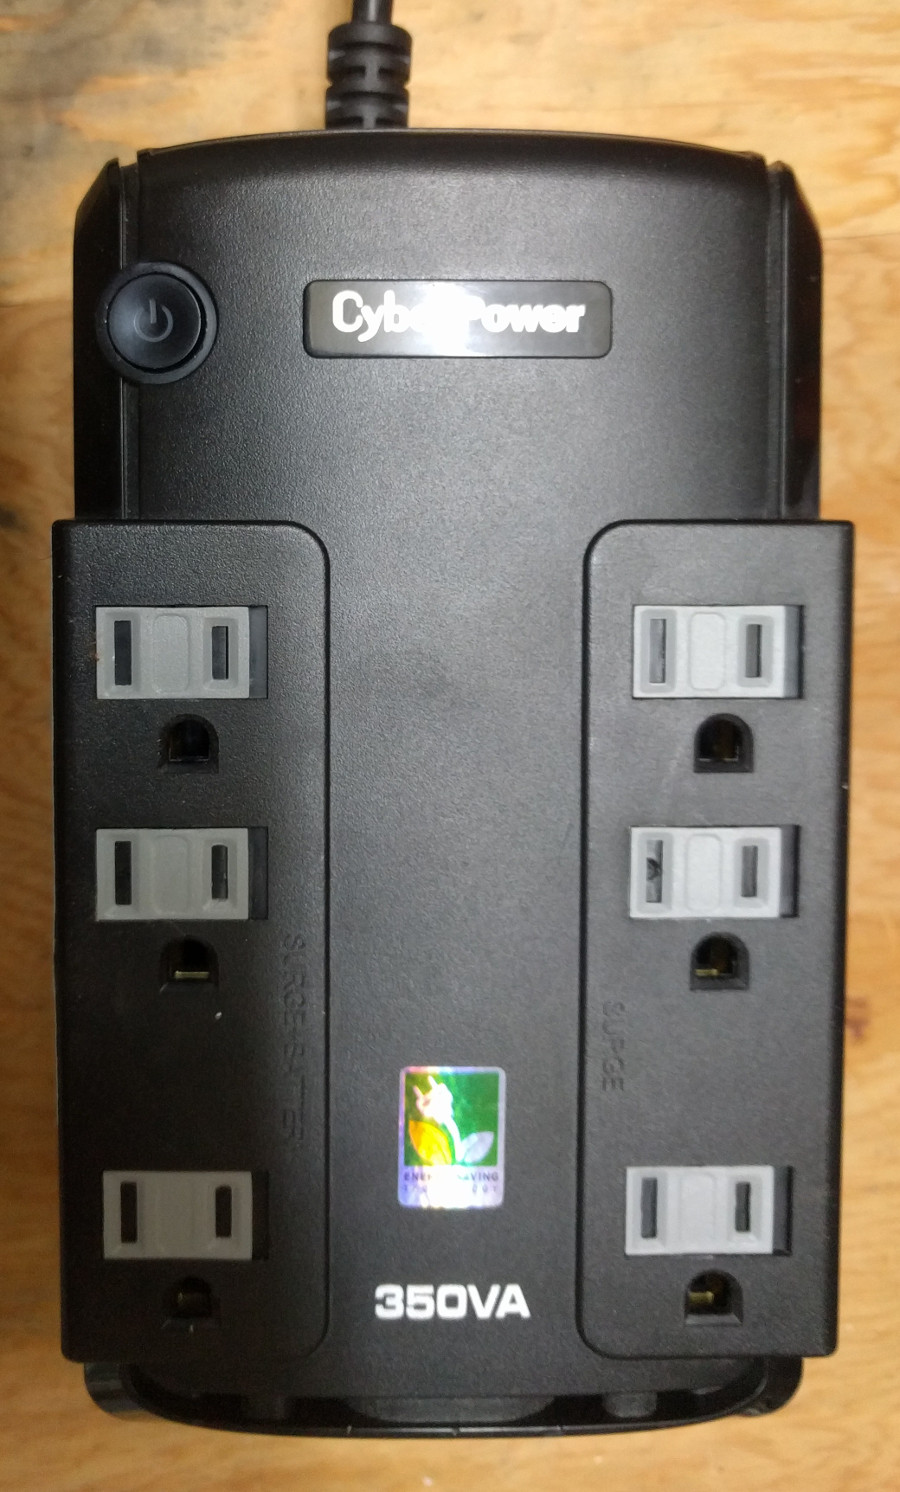
That said, some builds do stand out from the crowd. One such project is the “Pentesting BBU Dropbox” which [b1tbang3r] has recently posted to Hackaday.io. Noticing the battery bay in a cheap Cyberpower 350VA battery backup was just about the same size as the Raspberry Pi, he decided to convert it into a covert penetration testing device. Of course the illusion isn’t perfect as the battery backup function itself doesn’t work anymore. But if you hid this thing in an office or server room, there’s very little chance anyone would ever suspect it didn’t belong.

The key to the final device’s plausibility is that from stock it had dual RJ-11 jacks for analog modem surge protection. Swapping those jacks out for RJ-45 network connectors gives the BBU Dropbox an excuse to be plugged into the network. At a cursory glance, at least. Internally there is a TRENDnet Ethernet switch which allows the Pi to get on the network when an Ethernet cable is plugged into the battery backup.

We especially like the little details [b1tbang3r] put in to make the final device look as real as possible. The “Reset” button and “Wiring Fault” LED have been connected to the GPIO pins of the Pi, allowing for an exceptionally discrete user interface. For instance the LED could be setup to blink when a scan is complete, or the button could be used to wipe the device in an emergency.

This build reminds us of the Power Pwn released back in 2012 by Pwnie Express. That device was based around a relatively bulky power strip, and the only “feature” it looks like this DIY build is missing from the professional version is the $1,300 price.

Training The Squirrel Terminator

Depending on which hemisphere of the Earth you’re currently reading this from, summer is finally starting to fight its way to the surface. For the more “green” of our readers, that can mean it’s time to start making plans for summer gardening. But as anyone who’s ever planted something edible can tell you, garden pests such as squirrels are fantastically effective at turning all your hard work into a wasteland. Finding ways to keep them away from your crops can be a full-time job, but luckily it’s a job nobody will mind if automation steals from humans.

Kitty gets a pass

[Peter Quinn] writes in to tell us about the elaborate lengths he is going to keep bushy-tailed marauders away from his tomatoes this year. Long term he plans on setting up a non-lethal sentry gun to scare them away, but before he can get to that point he needs to perfect the science of automatically targeting his prey. At the same time, he wants to train the system well enough that it won’t fire on humans or other animals such as cats and birds which might visit his garden.

A Raspberry Pi 3 with a cheap webcam is used to surveil the garden and detect motion. When frames containing motion are detected, they are forwarded to a laptop which has enough horsepower to handle the squirrel detection through Darknet YOLO. [Peter] recognizes this isn’t an ideal architecture for real-time targeting of a sentry turret, but it’s good enough for training the system.

Which incidentally is what [Peter] spends the most time explaining on the project’s Hackaday.io page. From the saga of getting the software environment up and running to determining how many pictures of squirrels in his yard he should provide the software for training, it’s an excellent case study in rolling your own image recognition system. After approximately 18 hours of training, he now has a system which is able to pick squirrels out from the foliage. The next step is hooking up the turret.

We’ve covered other automated turrets here on Hackaday, and we’ve seen automated devices for terrifying squirrels before, but this is the first time we’ve seen the concepts mixed.

Milspec Teardown: AH-64A Apache Data Entry Panel

It’s time once again to see how those tax dollars are spent, this time in the form of a “Data Entry Keyboard” manufactured by Hughes Helicopters. This device was built circa 1986 or so, and was used in the AH-64A Apache. Specifically, this panel would have been located by the gunner’s left knee, and served as a general purpose input device for the Apache’s Fire Control System. Eventually the Apache was upgraded with a so-called “glass cockpit”; consolidating various vehicle functions into a handful of multi-purpose digital displays. As such, this particular device became obsolete and was pulled from the active Apache fleet.

The military vehicle aficionados out there may know that while the Apache is currently a product of Boeing, it was originally designed by Hughes Helicopter. In 1984, McDonnell Douglas purchased Hughes Helicopter and took over production of the Apache, and then McDonnell Douglas themselves were merged with Boeing in 1997.

So it’s somewhat interesting that this device bears the name of Hughes Helicopter, as of the time it was manufactured, they would have been known as McDonnell Douglas Helicopter Systems. Presumably they had to work through existing stock of components that already had Hughes branding on them, leaving some transitional examples such as this one.

But you didn’t come here for a history lesson on the American military-industrial complex, you want to know about the hardware itself. So let’s crack it open to see what we can learn about this piece of aviation history.

Continue reading “Milspec Teardown: AH-64A Apache Data Entry Panel”

Beat This Mario Block Like It Owes You Money

People trying to replicate their favorite items and gadgets from video games is nothing new, and with desktop 3D printing now at affordable prices, we’re seeing more of these types of projects than ever. At the risk of painting with too broad a stroke, most of these projects seem to revolve around weaponry; be it a mystic sword or a cobbled together plasma rifle, it seems most gamers want to hold the same piece of gear in the physical world that they do in the digital one.

But [Jonathan Whalen] walks a different path. When provided with the power to manifest physical objects, he decided to recreate the iconic “Question Block” from the Mario franchise. But not content to just have a big yellow cube sitting idly on his desk, he decided to make it functional. While you probably shouldn’t smash your head into the thing, if you give it a good knock it will launch gold coins into the air. Unfortunately you have to provide the gold coins yourself, at least until we get that whole alchemy thing figured out.

Printing the block itself is straightforward enough. It’s simply a 145 mm yellow cube, with indents on the side to accept the question mark printed in white and glued in. A neat enough piece of decoration perhaps, but not exactly a hack.

The real magic is on the inside. An Arduino Nano and a vibration sensor are used to detect when things start to get rough, which then sets the stepper motor into motion. Through an ingenious printed rack and pinion arrangement, a rubber band is pulled back and then released. When loaded with $1 US gold coins, all you need to do is jostle the cube around to cause a coin to shoot out of the top.

If this project has got you interested in the world of 3D printed props from the world of entertainment, don’t worry, we’ve got you covered.

Continue reading “Beat This Mario Block Like It Owes You Money”

Teardown: LED Bulb Yields Tiny UPS

Occasionally you run across a product that you just know is simply too good to be true. You might not know why, but you’ve got a hunch that what the bombastic phrasing on the package is telling you just doesn’t quite align with reality. That’s the feeling I got recently when I spotted the “LED intellibulb Battery Backup” bulb by Feit Electric. For around $12 USD at Home Depot, the box promises the purchaser will “Never be in the dark again”, and that the bulb will continue to work normally for up to 3.5 hours when the power is out. If I could repurpose that to make a tiny UPS for a microcontroller project of my own, it could be even more useful.

Now an LED light bulb with a battery in the base isn’t exactly rocket science, we can understand the product conceptually at a glance. But as they say, the devil is in the details. The box claims the bulb consumes 8.5 watts, but a battery with enough capacity to run such a load for 3.5 hours would be far too large to fit inside of a light bulb. Obviously there’s more to the story.

On the side of the box, in the smallest font used on the whole package, we get our clue. The bulb drops down to 200 lumens when in battery backup mode, or roughly as bright as a cheap LED flashlight. Now things are starting to come together. Without even opening the device, we can be fairly sure it will contain two separate arrays of LEDs: one low set for battery, and a brighter set to run when the bulb has AC power.

Still, I tend to be of the opinion that anything less than $20 or so is worth cracking open to see what makes it tick. Even if the product itself is underwhelming, there’s a chance the internal components could be useful or interesting. With that in mind, let’s see what’s inside a battery backup light bulb, and what we might be able to do with it.

Continue reading “Teardown: LED Bulb Yields Tiny UPS”

Spoofing Cell Networks With A USB To VGA Adapter

RTL-SDR brought cheap and ubiquitous Software Defined Radio (SDR) to the masses, opening up whole swaths of the RF spectrum which were simply unavailable to the average hacker previously. Because the RTL-SDR supported devices were designed as TV tuners, they had no capability to transmit. For the price they are still an absolutely fantastic deal, and deserve to be in any modern hacker’s toolkit, but sometimes you want to reach out and touch someone.

GSM network broadcast from a VGA adapter

Now you can. At OsmoDevCon [Steve Markgraf] released osmo-fl2k, a tool which allows transmit-only SDR through cheap USB 3.0 to VGA adapters based on the Fresco Logic FL2000 chip. Available through the usual overseas suppliers for as little has $5 USD, these devices can be used unmodified to transmit low-power FM, DAB, DVB-T, GSM, UMTS and GPS signals.

In a demonstration on the project page, one of these USB VGA adapters is used to broadcast a GSM cellular network which is picked up by the adjacent cell phones. Another example shows how it can be used to broadcast FM radio. A GitHub repository has been set up which includes more examples. The signals transmitted from the FL2000 chip are obviously quite weak, but the next step will logically be the hardware modifications necessary to boost transmission to more useful levels.

To say this is a big deal is something of an understatement. For a few bucks, you’ll be able to get a device to spoof cellular networks and GPS signals. This was possible before, of course, but took SDR hardware that was generally outside the budget of the casual experimenter. If you bought a HackRF or an Ettus Research rig, you were probably responsible enough not to get into trouble with it, but that’s not necessarily the case anymore. As exciting as this technology is, we would be wise to approach it with caution. In an increasingly automated world, GPS spoofing can have some pretty bad results.

Real-Time Polarimetric Imager From 1980s Tech

It’s easy to dismiss decades old electronics as effectively e-waste. With the rapid advancements and plummeting prices of modern technology, most old hardware is little more than a historical curiosity at this point. For example, why would anyone purchase something as esoteric as 1980-era video production equipment in 2018? A cheap burner phone could take better images, and if you’re looking to get video in your projects you’d be better off getting a webcam or a Raspberry Pi camera module.

But occasionally the old ways of doing things offer possibilities that modern methods don’t. This fascinating white paper from [David Prutchi] describes in intricate detail how a 1982 JVC KY-1900 professional video camera purchased for $50 on eBay was turned into a polarimetric imager. The end result isn’t perfect, but considering such a device would normally carry a ~$20,000 price tag, it’s good enough that anyone looking to explore the concept of polarized video should probably get ready to open eBay in a new tab.

Likely many readers are not familiar with polarimetric imagers, it’s not exactly the kind of thing they carry at Best Buy. Put simply, it’s a device that allows the user to visualize the polarization of light in a given scene. [David] is interested in the technology as, among other things, it can be used to detect man-made materials against a natural backdrop; offering a potential method for detecting mines and other hidden explosives. He presented a fascinating talk on the subject at the 2015 Hackaday SuperConference, and DOLpi, his attempt at building a low-cost polarimetric imager with the Raspberry Pi, got him a fifth place win in that year’s Hackaday Prize.

While he got good results with his Raspberry Pi solution, it took several seconds to generate a single frame of the image. To be practical, it needed to be much faster. [David] found his solution in an unlikely place, the design of 1980’s portable video cameras. These cameras made use of a dichroic beamsplitter to separate incoming light into red, blue, and green images; and in turn, each color image was fed into a dedicated sensor by way of mirrors. By replacing the beamsplitter assembly with a new 3D printed version that integrates polarization filters, each sensor now receives an image that corresponds to 0, 45, and 90 degrees polarization.

With the modification complete, the camera now generates real-time video that shows the angle of polarization as false color. [David] notes that the color reproduction and resolution is quite poor due to the nature of 30+ year old video technology, but that overall it’s a fair trade-off for running at 30 frames per second.

In another recent project, [David] found a way to hack optics onto a consumer-level thermal imaging camera. It’s becoming abundantly clear that he’s not a big fan of leaving hardware in an unmodified state.