Custom Built Vacuum Tube Cassette Player

As we’ve said many times here on Hackaday, it’s not our place to question why people make the things they make. There’s a legitimate need or utility for many of the projects we cover, no doubt about it. But there’s also a large number of them which are so convoluted that they border on absurd. Not that we love the crazy ones any less, in fact, we usually like those the best.

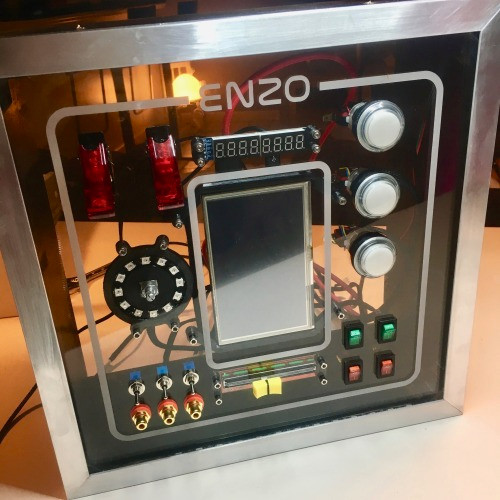
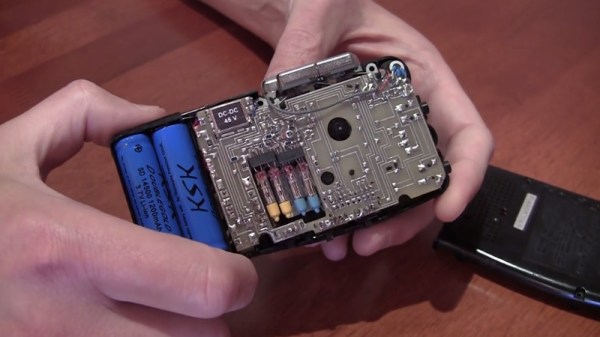
So when we saw this incredible modification to a Panasonic RN-404 microcassette recorder which replaces the audio hardware with a custom built vacuum tube amplifier, we didn’t bother asking what the point was. Perhaps it’s an attempt to make the most impractical method for recording and playing back audio, or maybe it was just to see if it was possible. No matter why it was done, it’s here now and it’s absolutely glorious.

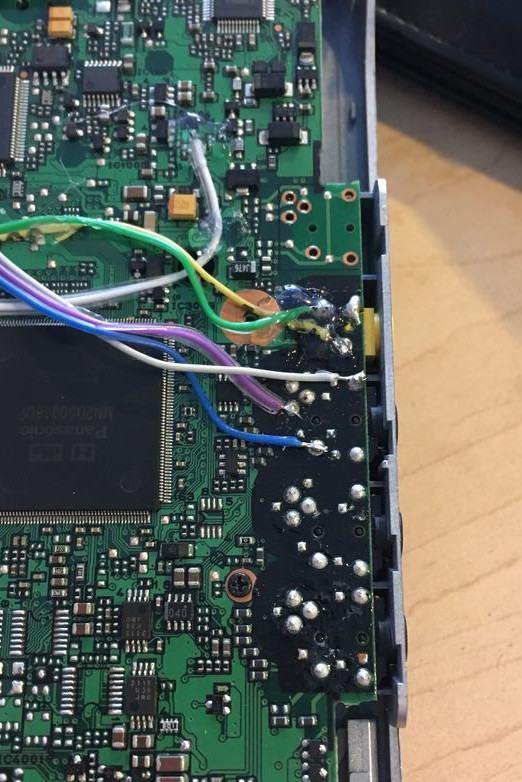
If the look of the hardware didn’t tip you off that this project makes use of old Soviet-era components, the video after the break certainly will. Specifically, it’s using 1ZH25R and 1S38A tubes which were originally intended for military use. Just like all cool old Soviet tech was. Say what you will about the Cold War, it certainly got the engineering juices flowing.

There’s quite a bit of information about how these ancient tubes were brought back to life by way of this gorgeous home-etched PCB. Suffice to say, working with tubes is an art to begin with, but working with such small and unique ones is on a whole new level.

This isn’t the first time we’ve seen some tiny tubes make their way into a piece of consumer audio equipment, but this one certainly takes the top spot in terms of professional final results.

Continue reading “Custom Built Vacuum Tube Cassette Player”

Visualizing Blocked Ads With The Pi Sense Hat

Pi-hole is an open source project to turn that Raspberry Pi collecting dust in your drawer into a whole-network ad blocking appliance. Not only does it stop ads from showing up on all your computers and mobile devices, it also keeps track of how many ads have been blocked and where they came from. Just in case you wanted to know how many thousands of ads you missed out on for a given time period.

While the graphs generated in the web interface of Pi-hole are slick and all, what if you just wanted a quick way of visualizing how effective your ad blocking system is? You’re not so much worried about the exact figures, you just want something to blink away on your desk and let you know all those ads are going to /dev/null. Enter the aptly named pi-hole-visualizer by [simianAstronaut].

With the addition of a Sense HAT to the Pi running the ad blocking, this Python script will generate an animated visualization that can be easily interpreted even from a distance. The primary display is a bar graph of DNS traffic, where the height and color of each column indicate relative activity within a specific time interval. A second screen shows a spiral graph which gives you an idea of what percentage of ads were blocked before they hit your devices.

An array of options can be given to the script from the command line; controlling both physical aspects of the display like orientation and LED brightness, as well the configurable parameters for the different available visualizations. As an added bonus, there’s also support for using the Sense HAT joystick to switch between modes interactively.

Turning the Raspberry Pi into an ad blocking appliance goes back to the olden days of the original Raspberry Pi, but it’s interesting to see how advanced the concept has become. Just remember, not all ads are bad.

Portable DVD Player Gets Raspberry Pi Zero Upgrade

You might remember a time when people thought portable DVD players were a pretty neat idea. In the days before netbooks, cheap tablets, and arguably even the widespread adoption of smartphones, it seemed perfectly reasonable to lug around a device that did nothing but play movies. Today we look back at them as we would flip phones: a quaint precursor to the technology overload we find ourselves in currently. But the fact remains that millions of these comical little devices were pumped into the greedy maw of the consumer electronics market. They’re ripe for the hacking, all you need is some inspiration.

So if this grafting of a portable DVD player and the Raspberry Pi Zero W created by [nutsacrilege] doesn’t get you sniffing around your local second-hand store for a donor device, nothing will. By integrating a Pi running Kodi, the player gets a multi-media kick in the pants that arguably makes up for the rather archaic form factor. Not only can it play a wide array of local and online content, but it could even be used as portable game system if you were so inclined.

Rest assured, this isn’t some lazy five-minute mod. All of the original physical controls have been made functional by way of a MCP3008 ADC connected to the Pi’s GPIO and some clever Python scripting. Even the headphone jack was made functional by wiring it up to a USB sound card, and by integrating a tiny stripped down hub he was also able to add an external USB port. Who needs discs when you can plug in a flash drive full of content?

Speaking of which, [nutsacrilege] reports that the original functions of the device are still intact after all his modifications. So if you can get the museum to loan you one, you can even play a DVD on the thing as its creators intended.

With luck, this project will help spur on some more portable DVD player hacking, which we’ve seen precious little of so far. Frankly, it would be nice to see people cramming Raspberry Pi’s into something other than Game Boys for once.

[via /r/raspberry_pi]

A Hacker’s Epic Quest To Keep His Son Entertained

Little humans have a knack for throwing a wrench in the priorities of their parents. As anyone who’s ever had children will tell you, there’s nothing you wouldn’t do for them. If you ever needed evidence to this effect, just take a gander at the nearly year-long saga that chronicles the construction of an activity board [Michael Teeuw] built for his son, Enzo.

Whether you start at the beginning or skip to the end to see the final product, the documentation [Michael] has done for this project is really something to behold. From the early days of the project where he was still deciding on the overall look and feel, to the final programming of the Raspberry Pi powered user interface, every step of the process has been meticulously detailed and photographed.

The construction methods utilized in this project run the gamut from basic woodworking tools for the outside wooden frame, to a laser cutter to create the graphical overlay on the device’s clear acrylic face. [Michael] even went as far as having a custom PCB made to connect up all the LEDs, switches, and buttons to the Arduino Nano by way of an MCP23017 I2C I/O expander.

Even if you aren’t looking to build an elaborate child’s toy that would make some adults jealous, there’s a wealth of first-hand information about turning an idea into a final physical device. It isn’t always easy, and things don’t necessarily go as planned, but as [Michael] clearly demonstrates: the final product is absolutely worth putting the effort in.

Seeing how many hackers are building mock spacecraft control panels for their children, we can’t help but wonder if any of them will adopt us.

Continue reading “A Hacker’s Epic Quest To Keep His Son Entertained”

Dumping Arcade ROMs The Hard Way

Nostalgia is a funny thing. That desire we all get to relive past memories can make you do things that in any other scenario would be out of the question. The effect seems even stronger when it comes to old video games. How else can you explain buying the same games over and over every time they get “remastered” for the next generation of consoles? But what if those remasters aren’t good enough?

If you have a burning desire to play a 100% accurate version of certain old arcade games, you might have your work cut out for you. Getting precise ROMs from some of these machines is exceptionally difficult, and as explained on the [CAPS0ff] blog, sometimes requires nearly superhuman feats of engineering.

As explained in the blog post, less invasive methods of getting inside the Taito C-Chip had already been examined and come up lacking. Despite best efforts, sending the unlock command to the chip didn’t yield the desired effect. If you can’t read the ROM the usual way, you need to get a little creative.

The process starts by milling down the case of the chip until the integrated circuit is just starting to become visible. Then acid is used to fully expose the traces. The traces are then tinned, and some very fine soldering is done to get the chip wired up to the reader. All told it takes about three hours from start to finish to pull a ROM using this method. But it’s all worth it in the end when you can play that 100% accurate version of Rainbow Islands. Or so we’ve been told.

If you couldn’t tell, this isn’t the first time a chip has been flayed open like this on the [CAPS0ff] blog.

Building The Perfect Home Router

When a favorite piece of hardware dies, it’s fairly common to experience a bit of dread. The thought that now you’ll have to go through the process of getting a replacement for the device can be very troubling, and is fraught with difficult questions. Is the hardware still available? Has it been made obsolete by something else in the time you’ve had it? But while it can be a hassle, there’s no question you can come out the other side better than you went in. Sometimes it takes the passing of an old piece of gear for you to really embrace what’s possible with the latest and greatest.

That’s exactly what happened to [Tyler Langlois]. When his trusty home router finally gave up the ghost, he was left with a couple of options. He could get another consumer router, upgrade to a enterprise-level model, or take the road less traveled and build his own router to his exacting specifications. Since you’re reading about it on Hackday, we’ll give you one guess as to which door he went through.

The blog post [Tyler] has written up about the saga of building his own router is an incredible resource for anyone who might be thinking of taking the plunge into DIY networking. From selecting the proper hardware to the nuances of getting all of the software packages installed, this is an absolute treasure trove. At the beginning of the post he mentions that the post shouldn’t be considered a comprehensive guide, but considering we’ve seen commercial hardware that wasn’t documented this well, we’d have to respectfully disagree on that point.

Some elements of his homespun may come as something of a surprise. For one, [Tyler] bucked the hive mentality and determined the Raspberry Pi simply wasn’t up to the task due (at least in part) to the single 100 Mbps network interface. He ended up going with an ESPRESSObin, a relatively niche Linux SBC that features an onboard gigabit switch in addition to a fairly hefty spec sheet. He also decided to forgo WiFi entirely, and leave the intricacies of wireless networking to a standalone access point from Ubiquity.

A router is often overlooked as just another piece of consumer kit sitting around the house, but it’s actually an excellent place to flex your creative and technical muscle. From adding a remote display to converting it into a mobile battle tank, there’s a lot more you can do with your router than stare at the blinkenlights.

Emulating OBD-II On The ESP32

It used to be that you could pop the hood and with nothing more than flat head screwdriver, some baling wire, and tongue held at the optimal angle, you could fix anything that ailed your car. But today, for better or for worse, the average automobile is a rolling computer that runs on gasoline and hope (if it even still has a gasoline engine, that is). DIY repairs and maintenance on a modern car is still possible of course, but the home mechanic’s toolbox has needed to evolve with the times. If you want to do anything more advanced than changing a tire, you’ll really want to have the gear to interface with the vehicle’s computer via the OBD-II port.

But for some, even that isn’t enough. [limiter121] recently wrote in to tell us of an interesting project which doesn’t read the OBD-II port in a vehicle, but actually emulates one. Like so many others this hack was born out of necessity, as a way to test an OBD-II project without having to sit out in the driveway all day. It allows you to create fictitious speed and engine RPM values for the OBD-II device or software under test to read, complete with a slick web interface to control the “car”.

So what makes it tick? Surprisingly little, actually. At the most basic level, an ESP32-WROOM-32 is connected up to a SN65HVD230 CAN transceiver chip. You’ll also need a 3.3V power supply, as well as a USB to serial adapter to do the initial programming on the ESP32. From there it’s just a matter of compiling and flashing the code [limiter121] has made available in the GitHub repo.

If you’re wondering if such products don’t already exist on the commercial market, they do. But like so many other niche projects, the price is a bit hard to swallow for the home hacker. Compared to the nearly $300 USD list price of commercial offerings such as the Freematics OBD-II Emulator, building one of these ESP32 based emulators should only cost you around $20.

Unless you’re developing an OBD-II reader, you probably don’t have much use for an OBD-II emulator. But this project could still be useful for anyone who wants to learn more about OBD from the comfort of their couch.