Coin Cell Challenge: Jump Starting A Car

Clearly a believer in the old adage, “Go Big or Go Home”, [Ted Yapo] has decided to do something that seems impossible at first glance: starting his car with a CR2477 battery. He’s done the math and it looks promising, though it’s yet to be seen if the real world will be as accommodating. At the very least, [Ted] found a video by [ElectroBOOM] claiming to have started a car with a super capacitor, so it isn’t completely without precedent.

Doing some research, [Ted] found it takes approximately 2,000 W to 3,000 W at 14 V to start the average car engine. This is obviously far in excess of what a coin cell can put out instantaneously, but the key is in the surprising amount of potential energy stored in one of these batteries. If the cell is rated for 1000 mAh at 3 V, [Ted] shows the math to find the stored energy in Joules:
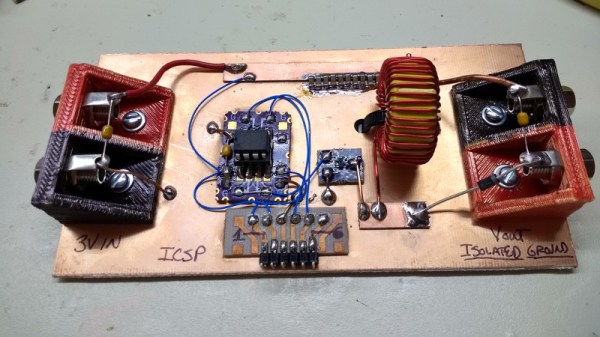
According to the video by [ElectroBOOM], he was able to start his car with only 6,527 J, and [Ted] calculates it should only take about 9,000 J on the high side from his research. So as long as he can come up with a boost converter that can charge a capacitor with high enough efficiency, this one should be in the bag.

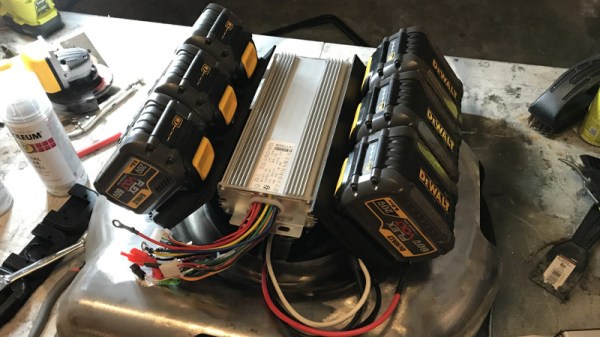
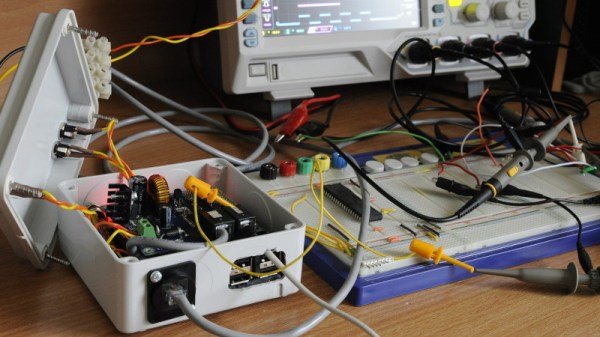
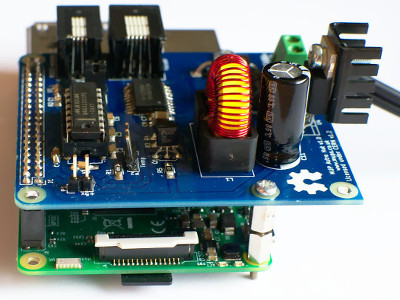
[Ted] has started putting together some early hardware, and has even posted the source code he’s using on a PIC12LF1571 to drive the converter. He notes the current charge efficiency is around half of what’s needed according to his calculations, but he does mention it was an early test and improvements can be made. Will it start? If it does, this is some awesome Heavy Lifting.

Curbside Mower Gets Electric Transplant

There’s few things more exciting to a hacker or maker than seeing a piece of hardware on the curb. An old computer, an appliance, maybe if you’re really lucky some power tools. So we can only imagine the rush that known lawn equipment aficionado [AmpEater] had when he saw a seemingly intact push mower in the trash. The pull start was broken on the gas engine, but where this mower was going, it wouldn’t need a gas engine.

When he got the mower back to his garage, he started on the process of converting it over to electric. Of course this means basically everything but the wheels, handle, and deck would get tossed. But starting with a trashed gas mower still sounds a lot easier compared to trying to figure out how to make or source a wheeled mower deck.

Step one in this conversion was stripping all the paint off the deck and welding a plate over where the original gas engine was. [AmpEater] then 3D printed some mounts to hold the DeWalt tool batteries he would be using as a power source, taking the extra time to align everything so it would have the look of an old flathead gasoline engine. A tongue-in-cheek reference to the mower’s old gasoline gulping days, and an awesome little detail that gives the final product a great look.

The controller is a commercial model intended for electric bikes, and the heart of this new mower is a brushless direct-drive motor capable of 3,000 RPM at 40 A. [AmpEater] reports a respectable one hour run time with the six DeWalt batteries, and more power than his store-bought Ryobi electric mower.

If the name [AmpEater] looks familiar, it’s because this isn’t the first time he’s graced us with a mower conversion: back in 2013 he impressed us with his solar-electric Cub Cadet zero-turn. This build isn’t quite as slick as the Cub Cadet, but the much lower cost and difficulty level means that you may be able to follow in his footsteps even if you don’t have his Zeus-level mastery of the electric motor.

As electric mowers have gotten more popular, we’ve seen an increasing flow of hacks and mods for them. Everything from replacing the batteries to turning them into something else completely.

Biometric Authentication With A Cheap USB Hub

It’s fair to say that fingerprints aren’t necessarily the best idea for device authentication, after all, they’re kind of everywhere. But in some cases, such as a device that never leaves your home, fingerprints are an appealing way to speed up repetitive logins. Unfortunately, fingerprint scanners aren’t exactly ubiquitous pieces of hardware yet. We wouldn’t hold out much hope for seeing a future Raspberry Pi with a fingerprint scanner sitting on top, for example.

Looking for a cheap way to add fingerprint scanning capabilities to his devices, [Nicholas] came up with a clever solution that is not only inexpensive, but multi-functional. By combining a cheap USB hub with a fingerprint scanner that was intended as a replacement part of a Thinkpad laptop, he was able to put together a biometric USB hub for around $5 USD.

After buying the Thinkpad fingerprint scanner, he wanted to make sure it would be detected by his computer as a standard USB device. The connector and pinout on the scanner aren’t standard, so he had to scrape off the plastic coating of the ribbon cable and do some probing with his multimeter to figure out what went where. Luckily, once he found the ground wire, the order of the rest of the connections were unchanged from normal USB.

When connected to up his Ubuntu machine, the Thinkpad scanner came up as a “STMicroelectronics Fingerprint Reader”, and could be configured with libpam-fprintd.

With the pintout and software configuration now known, all that was left was getting it integrated into the USB hub. One of the hub’s ports was removed and filled in with hot glue, and the fingerprint scanner connected in its place. A hole was then cut in the case of the hub for the scanner to peak out of. [Nicholas] mentions his Dremel is on loan to somebody else at the moment, and says he’ll probably try to clean the case and opening up a bit when he gets it back.

[Nicholas] was actually inspired to tackle this project based on a Hackaday post he read awhile back, so this one has truly come full circle. If you’d like to learn more about fingerprint scanning and the techniques being developed to improve it, we’ve got some excellent articles to get you started.

My Kingdom For A Capacitor

While working on a project recently, I required a capacitor of around 1000 μF and went rummaging through my collection of parts. No luck there. At that point I’d usually go through my collection of junk electronics and computer motherboards, but I had recently gone through and tossed the stuff that had been laying around for as long as I could remember. No matter, I thought. I’ll just head over to RadioShack and…

Now, I have been accused of many things over the years, but “deep” is certainly not one of them. Yet, at this moment I had what could only be described as an existential crisis. There is no RadioShack, not in my state at least. I don’t live in an area that’s blessed with a maker “scene”, so no independent shop or even a hackerspace within reasonable driving distance of me either. I could order it online of course, but everyone’s trying to sell them in bulk and shipping will take a few days at least. A few days? Who knows where my interests will be in a few days. How can I get anything done under these conditions?

Desperate times call for desperate measures, so I got in the car and took a ride to the only place I knew where I could by electronic components for cheap: Goodwill. Continue reading “My Kingdom For A Capacitor”

Junkyard RC Conversion Looks Like Mad Max Extra

Over the years we’ve noticed that there is a subset of hackers out there who like to turn real life vehicles into remote controlled cars. These vehicles are generally destroyed in short order, either by taking ridiculous jumps, or just smashing them into stuff until there’s nothing left. In truth that’s probably what most of us would do if we had access to a full size RC car, so no complaints there.

As a rule, the donor vehicles for these conversions are usually older and cheap. That only makes sense, why spend a lot of money on a vehicle you intend on destroying? But even still, the RC conversion [William Foster] has recently completed may take the cake. We don’t know how much of the “antiquing” of his donor vehicle was intentionally done, but on the whole, the thing looks like it got dragged from the bottom of a lake somewhere. Presumably, he got a great deal on it.

The video posted to YouTube is primarily about [William] driving his creation around (sometimes from the back seat, no less), but towards the second half of the video there’s a quick rundown on the hardware used to make this pile of rust move.

A standard RC transmitter and receiver combination are used to control a pair of Arduinos mounted in the center console, which are in turn hooked up to external stepper drivers. The wheel is turned via a chain and sprocket arrangement, and the pedals are pushed with homebrew contraptions that look like they are made from lead screws intended for 3D printers.

All in all, it appears [William] has cooked up a fairly responsive control system with commodity hardware you could get on Amazon or eBay. Not sure we’d be backseat driving this thing personally, but to each their own.

We recently covered a Jeep that got a similar remote control upgrade, but these super-sized remote controlled vehicle builds are not just limited to the ground either.

Continue reading “Junkyard RC Conversion Looks Like Mad Max Extra”

Astro Cat: Raspberry Pi Telescope Controller

When somebody tackles an engineering problem, there are two possible paths: they can throw together a quick and dirty fix that fits their needs (the classic “hack”, as it were), or they can go the extra mile to develop a well documented solution that helps the community as a whole. We cover it all here at Hackaday, but we’ve certainly got a soft spot for the latter approach, even if some may feel it falls into the dreaded territory of “Not A Hack”.

When [Gary Preston] wanted to control his telescope and astrophotography hardware, he took the second path in a big way. Over the course of several posts on his blog, [Gary] walks us though the creation of his open source Raspberry Pi add-on board that controls a laundry list of sensors and optical gear. Just don’t call it a HAT, while it may look the part, [Gary] is very specific that it does not officially meet the HAT specifications put out by the Raspberry Pi Foundation.

Even if you aren’t terribly interested in peering into the infinite void above, the extremely detailed write-up [Gary] has done contains tons of multidisciplinary information that you may find useful. From showing how to modify the Pi’s boot configuration to enable true hardware UART (by default, the Pi 3 ties it up with Bluetooth) and level shifting it with a ST3232 to a breakdown of the mistakes he made in his PCB layout, there’s plenty to learn.

Astro CAT is a completely open source project, with the hardware side released under the CERN Open Hardware License v1.2, and the INDI driver component is available under the GPL v3.

If this looks a bit daunting for your first stab at astrophotography with the Raspberry Pi, fear not. We’ve covered builds which can get you up and running no matter what your budget or experience level is.

Slinky Walks Down Stairs And Picks Up 80m Band

Originally intended as a way to stabilize sensitive instruments on ships during World War II, the Slinky is quite simply a helical spring with an unusually good sales pitch. But as millions of children have found out since the 1940’s, once you roll your Slinky down the stairs a few times, you’ve basically hit the wall in terms of entertainment value. So what if we told you there was yet another use for this classic toy that was also fun for a girl and a boy?

As it turns out, a cheap expandable metal coil just so happens to make for a pretty good antenna if you hook it up right. [Blake Hughes] recently took on this project and provided some detailed pictures and information for anyone else looking to hook a couple of Slinkies to their radio. [Blake] reports excellent results when paired to his RTL-SDR setup, but of course this will work with whatever kind of gear you might be using at these frequencies.

Before anyone gets out the pitchforks, admittedly this isn’t exactly a new idea. There are a few other write-ups online about people using a Slinky as a cheap antenna, such as this detailed analysis from a few years ago by [Frank Dörenberg]. There’s even rumors that soldiers used a Slinky from back home as a makeshift antenna during the Vietnam War. So this is something of an old school ham trick revived for the new generation of SDR enthusiasts.

Anyway, the setup is pretty simple. You simply solder the RF jack of your choice to two stretched out Slinkies: one to the center of the jack and one to outside. Then run a rope through them and stretch them out in opposite directions. The rope is required because the Slinky isn’t going to be strong enough when expanded to keep from laying on the ground.

One thing to keep in mind with a Slinky antenna is that these things are not exactly rated for outside use. Without some kind of treatment (like a spray on acrylic lacquer) , they’ll quickly corrode and fail. Though a better idea might simply to be to think of this as a temporary antenna that you put away when you’re done with. Thanks to the fact that the Slinky doesn’t get deformed even when stretching it out to maximum length, that’s relatively easy to accomplish.

If you’re looking for a good RTL-SDR to go along with your new Slinky antenna, check out this roundup of some of the options that are on the market as of 2017. You’ll probably need an upconverter to get down to the 80m band, so you might as well build that while you’re at it.