Arguably the biggest advantage of the Arduino platform is its ease of use, especially when compared to what microcontroller development looked like before the introduction of the open source board and its associated software development environment. All you need to do is download the IDE for your platform, plug in your Arduino, and you can have code running on the hardware with just a few clicks.
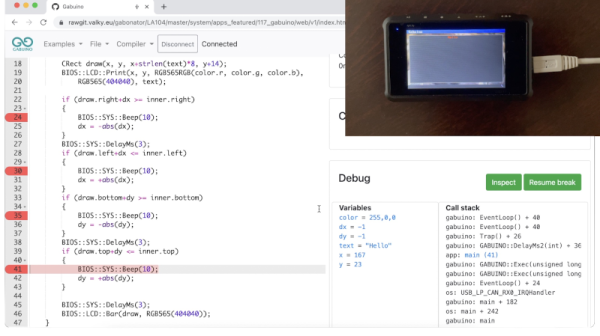
But can it get even easier? [Gabriel Valky] certainly thinks so, which is why he’s developed the cloud-based Gabuino platform. As of right now it only supports the DS213 pocket oscilloscope and LA104 logic analyzer, but he says the code is lightweight enough that it should work with any STM32 board that has the appropriate bootloader. Using Gabuino requires no software to be installed on the computer, just plug in the board, and you’re already half way there.
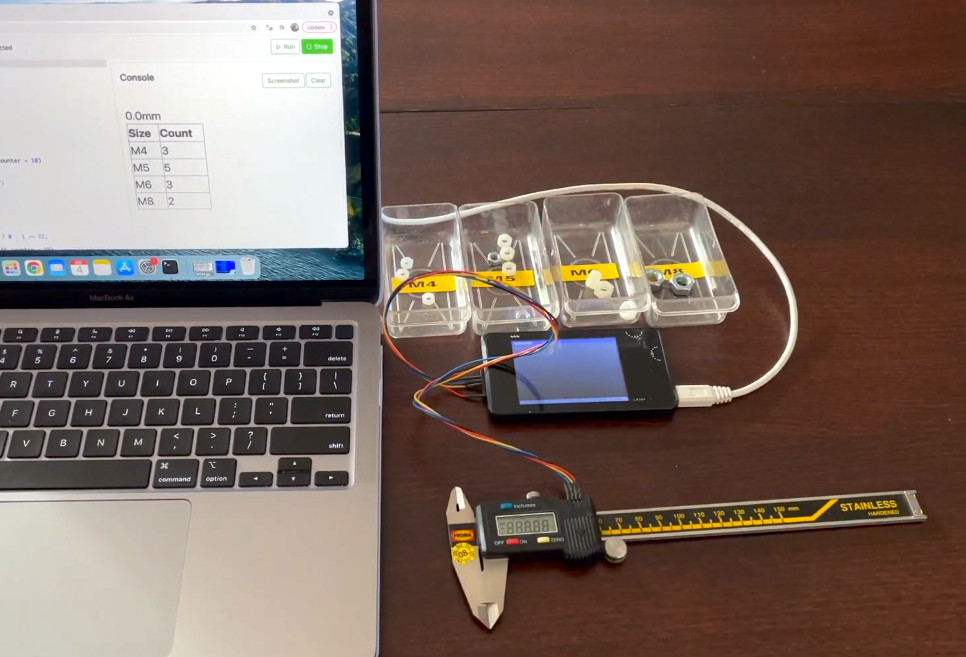
The trick is that the code editor and compiler have been moved into the cloud, and are accessed through the host computer’s web browser. The web interface also integrates an impressive “Console”, which [Gabriel] likens to the Serial Monitor and Plotter functions of the Arduino IDE, but is actually far more capable. The Gabuino Console is not only bi-directional, but through the use of libraries such as Three.js and WebGL, it’s able to render video output from code running on the microcontroller.
[Gabriel] takes us through some of the capabilities of Gabuino in the video below, and we have to say, it looks pretty impressive. We especially liked the built-in debugging capabilities that let you set breakpoints and examine variables. This plug-and-play approach certainly holds promise for students or beginners, though we think the hardware compatibility will need some work before the project really takes off.
Incidentally, this isn’t the first time [Gabriel] has written some code for the LA104. Last year we covered his very impressive custom firmware for the ~$100 USD gadget, which should sweeten the deal considerably if you end up getting one to experiment with Gabuino on.
Continue reading “Web-Centric Gabuino Has Compiler, Will Travel”