Love Inspires CD Player Hack

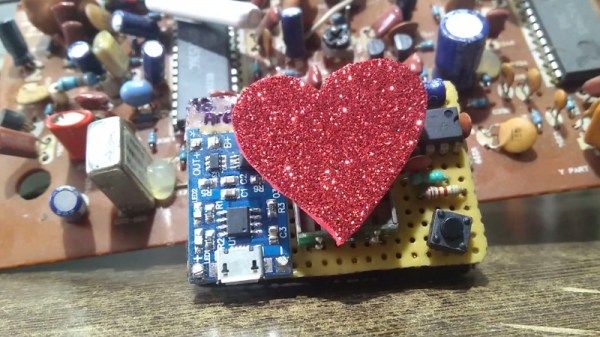
The heart is an impressive piece of hardware. It’s a rare pump that runs continuously for over 80 years in some cases. It’s also, for some reason or other, become a common human symbol of love and affection. In this vein, [Deepak Khatri] has built a beating electronic heart out of basic, readily available components.

The heart of the build (pun intended) is a lens assembly salvaged from a CD player, which uses a coil and permanent magnet to move the lens in order to read across a disc. In this case, the coil is instead fed pulses from an astable multivibrator circuit built with a hacker favourite, the 555 timer IC. It’s all assembled on a breadboard, which is a great way to build such projects that rely on experimentation through the swapping of component values.

The end result is rather satisfying. [Deepak] has also experimented with an Arduino driven version with a slightly different rhythm.

We haven’t seen too many projects using optical drive lens assemblies, but we’re sure there must be other applications. If you end up using one to agitate biological samples or build an awesome laser projector, be sure to hit up the tips line. Video after the break.

Continue reading “Love Inspires CD Player Hack” →

Custom Firmware For Cheap Fitness Trackers

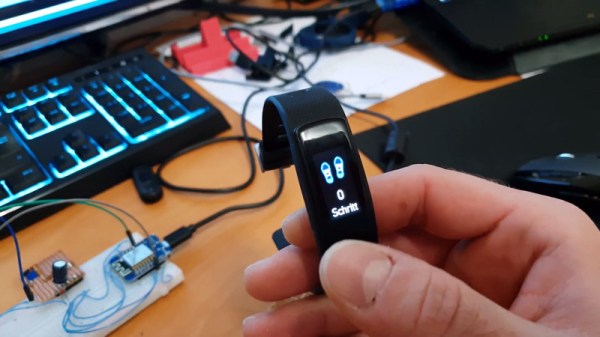
The concept of wearable hardware is an enticing one, but it can be difficult to tackle for the first-time maker. While many of us are experienced at designing PCBs and soldering up arcane gadgets, interfacing with the soft and fleshy human form can present unforeseen difficulties. There’s a way around that, of course – leveraging an existing platform where someone else has already done the work. That’s precisely what [Aaron Christophel] has done, by reverse engineering and developing custom firmware for cheap fitness trackers (Google Translate).

The first part of [Aaron]’s work consisted of research and disassembly. After purchasing a wide variety of fitness trackers online, he eventually came across his favored unit, the Tracker I6HRC by IWOWNFIT. This features an NRF52832 microcontroller, as well as an IPS display, some Flash storage, and a vibration motor. Connectivity is handled over Bluetooth Low Energy. [Aaron] particularly rates it for the well-made case that can be disassembled without damage, and the spare USB 2.0 pads on the board which can be used to program the device over the SWD interface.

[Aaron] has developed an Arduino-compatible firmware which is discussed further in a forum post.  Most of the peripherals on board have been explored, and reducing power consumption is a current area of active development.

Firmware hacks are always fun – have you considered giving your TV a custom boot screen? Have a FitBit original instead of the clone? There’s a hack for that too.

[Thanks to Jim for the tip!]

Building A 1.4W Laser Pointer In A Tiny Housing

Laser pointers were cool for about 30 seconds when they first came out, before becoming immediately passé and doing absolutely nothing to improve the boss’s quarterly reports presentation. However, just as with boom boxes and sports cars, more power can always make things better. [Styropyro] was unimpressed with the weak and unreliable laser pointers he’d sourced from eBay, so gutted one and began a fresh build.

After fiddling with some basic 1mW eBay green lasers, [styropyro] had some fun turning up the wick by fiddling with the internal trimpots. This led to the quick and untimely death of the cheap laser diodes, leaving a compact laser pointer shell ripe for the hacking.

To replace the underwhelming stock components, [styropyro] chose a Nichia NDG7475 high-powered laser diode, fitting it into a small heatsink for thermal management. Current draw was far too high to use the original switch, so the stock housing’s button is instead used to switch a MOSFET which delivers the full current to the laser driver. To reach the higher output power of 1.4W, the laser diode is being run over specification at 2.3 amps. All this current draw would quickly overwhelm standard AAA batteries, so a pair of lithium polymer 10440 batteries are substituted in to do the job.

The build shows that with clever parts selection and some easy hand soldering, you too can build an incredibly dangerous laser pointer at home, that fits neatly in your shirt pocket. Alternatively, you might prefer something on the larger scale. Video after the break.

Continue reading “Building A 1.4W Laser Pointer In A Tiny Housing” →

3D Printed Alarm Clock Looks Just Like Store Bought

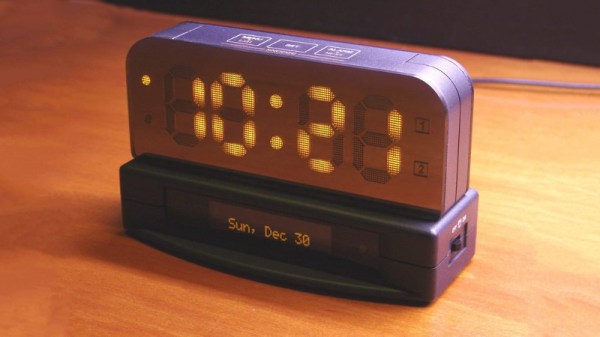
Clocks are a popular project on Hackaday. They’re a great way to showcase a whole range of creative build techniques, and can make an excellent showpiece as well. We’ve seen everything from the blinkiest binary build to the noisiest alarms, but [Benoit] has delivered something different — a stylish build that looks like it came right off the store shelf.

The clock features a large 7-segment display built with IN-PI554FCH LEDs, which are similiar to the popular WS2812Bs but with lower power consumption. There’s also an OLED display for reading the date and going through menus, capacitive touch buttons for control and an Arduino Mega to tie everything together.

The real party piece is the enclosure, however. [Benoit] spent significant time honing a process to get a nice surface finish on Shapeways SLS parts. The 3D printed components are first cleaned with a toothbrush to free any loose powder, before several stages of primer, sanding, and paint. The final product is then finished with decals that lend the device that perfect factory look. If you’re eager to replicate the build, the parts are available at Github.

[Benoit]’s clock is a great example of what can be achieved by the home builder who is willing to wait a couple weeks for high quality 3D printed parts and decals to ship. It’s not [Benoit]’s first build to grace these hallowed pages, either – his transparent clock runs Linux!

The Rotary Joystick Can Take A Beating

It’s a well-known fact amongst the older set that games used to be harder. Back in the 1980s, most home computers had awful keyboards, barely adequate joysticks, and the games had to be difficult to have any longevity, because there’s only so much you can fit into a single sided disk. Some of these games became known as joystick killers, due to the repetitive thrashing movements required to win. [Jan] was tired of letting Decathlon and its ilk get the better of him and his controllers, so built a joystick that was up to the task.

The basic concept of [Jan]’s rotary joystick is that many games required a fast and repetitive left-right motion to be executed by the player, but weren’t too concerned if a few up or down movements were in the mix. Thus, instead of a traditional shaft-based joystick, instead a rotary mechanism was employed. The player rotates the joystick’s wheel, which has a magnet fitted. This triggers a series of four reed switches, for up, down, left and right. By rotating the wheel quickly, it simulates the rapid left-right motion well enough to beat most of the vintage C64 games that were giving [Jan] trouble, and it makes an ideal controller for the 2018 release, Crank Crank Revolution.

We like the spirit behind any build that uses hardware to overcome intractable gaming problems. We’ve seen similar approaches used to beat Guitar Hero. Remember Guitar Hero? That was a thing. Video after the break.

Continue reading “The Rotary Joystick Can Take A Beating” →

A Lightweight AVR IDE

It’s entirely possible to do your coding in vim or emacs, hammering out hotkeys to drive the interface and bring your code to life. While working in such a way has its charms, it can be confronting to new coders, and that’s before even considering trying to understand command line compiler settings. The greenhorn coder may find themselves more at home in the warm embrace of an IDE, and [morrows_end] has now built one for those working with AVR assembly code.

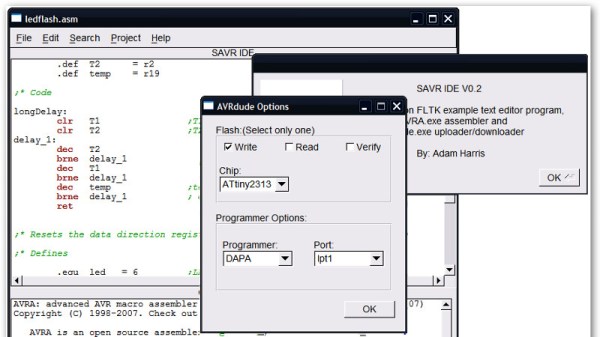
The IDE goes by the name of Simple AVR IDE, or savr_ide for short. Programmed in C++ with the FLTK widget library, [morrows_end] has tested it on Windows XP, but notes that it should successfully compile for Linux, Unix, and even MacOS too.

All the basic features are there – there’s syntax highlighting, as well as integration with the AVRA assembler and AVRDUDE for programming chips. It’s a tool that could make taking the leap into assembly code just that little bit easier.  For another taste of bare metal coding, check out [Ben Jojo]’s discussion of x86 bootloaders.

Infinity Icosahedron Is Difficult To Contemplate Even Looking Right At It

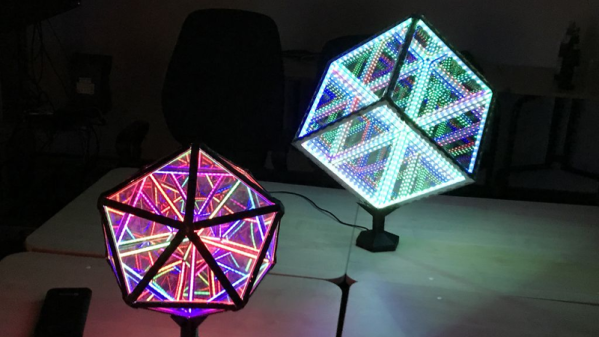
Cubes and pyramids are wonderful primitive three-dimensional objects, but everyone knows that the real mystical power is in icosahedrons. Yes, the twenty-sided polyhedron does more than just ruin your saving throws in tabletop RPGs – it can also glow and look shiny in your loungeroom at home.

[janth]’s build relies on semitransparent acrylic mirrors for the infinity effect, lasercut into triangles to form the faces of the icosahedron. The frame is built out of 3D printed rails which slot on to the acrylic mirrors, and also hold the LED strips. [janth] chose high-density strips with 144 LEDs per meter for a more consistent effect, and added frosted acrylic diffusers to all the strips for a clean look with less hotspots from the individual LEDs.

An ESP32 runs the show, and the whole assembly is epoxied together for strength. The final effect is very future disco, and it’s probably against medical advice to stare at it for more than 5 minutes at a time.

The infinity effect is a popular one, and we’ve seen a beautiful cube build by [Heliox] in recent times. Of course, if you do manage to build an actual portal through time and space, and not just a lamp that looks like one, be sure to send us a tip. Video after the break.

Continue reading “Infinity Icosahedron Is Difficult To Contemplate Even Looking Right At It” →