Simon Says With An RP2040

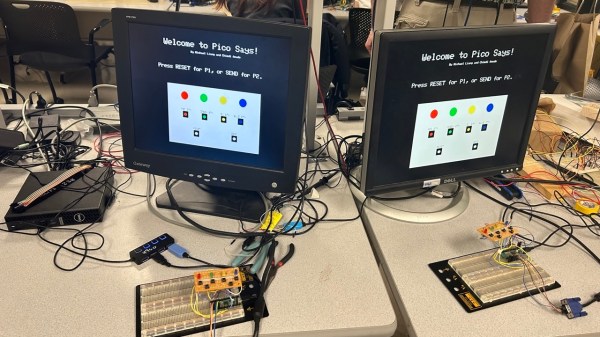
The team of [Michael] and [Chimdi] from Cornell’s Designing with Microcontrollers (ECE 4760) Fall 2023 session designed a version of Simon Says on an RP2040 which they call Pico Says. It uses UDP packets over WiFi to communicate between the players, and supports VGA graphics for output. Each player’s hardware consists of a Pico W module plus a control panel containing the four LEDs and buttons ( red, green, yellow, and blue ) plus send and reset buttons.

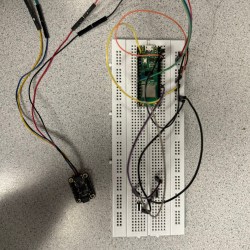
For purposes of this lab, the modules were build on a solderless breadboard and used perfboard for the control panels. They weren’t entirely happy with their choice of UDP because they experienced frequent datagram dropouts in the noisy environment of the microcontroller lab. They also planned to implement sound effects, but ran out of time after spending too much time on the WiFi implementation, and had to drop that feature. In the end, however, they wrapped up their project and demonstrated a working game. We can only speculate whether this bonus lesson in resource management was intended by [Dr. Hunter Adams] or not.

Two ECE 4760 course references are highlighted in the write-up that helped them jump-start the project: the UDP and VGA examples for the Pico. These are good links to put in your RP2020 toolbox for future projects, in addition to the ECE 4760 course home page itself. We’ve covered several of these projects recently, as well as the curriculum switch from the Microchip PIC32MX-based Microstick II to the RP2040 last Spring.

Continue reading “Simon Says With An RP2040”

Building A Loop Station With An RP2040

Loop stations are neat things, able to replay one or more loops of audio over and over again while you perform over the top of them. Musicians like [Marc Rebillet], [Reinhardt Buhr], and [Dub FX] have made careers out of this style of performance. [Yaqi Gao], [Xiaoyu Liang] and [Alina Wang] decided to build a loop station of their own, using the popular RP2040 chip.

At its simplest, a loop station must take in audio, record it, and then play it back. Generally, it can do this with several tracks and mix them together, while also mixing in the incoming audio as well. The group achieved this by inputting a guitar signal to the chip via an amplifier and the onboard analog-to-digital converter. The audio can be recorded as desired, and then played back via an external digital-to-analog converter. Live audio from the guitar is also passed through to allow performing over the recorded sound. The group also used an external half-megabyte FRAM chip to allow storing additional audio sample data, which can be trucked out over serial and saved.

It’s not the cleanest loop station in the world, with a relatively low sample rate causing some artifacts. Regardless, it definitely works, and taught the group plenty about working with digital audio in the process. For that reason alone, we’d call it a success.

Continue reading “Building A Loop Station With An RP2040”

Gyro-Controlled Labyrinth Game Outputs To VGA

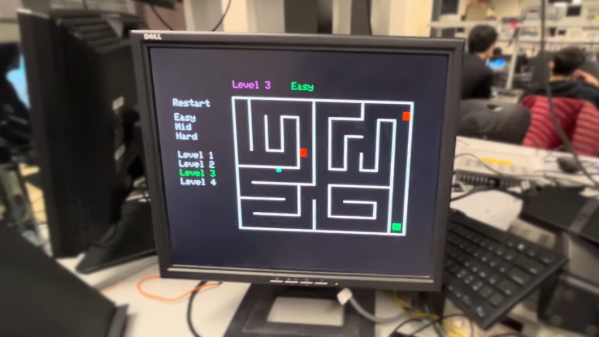
This gesture-controlled labyrinth game using two Raspberry Pi Pico units does a great job of demonstrating how it can sometimes take a lot of work to make something look simple.

To play, one tilts an MPU6050 inertial measurement unit (IMU) attached to one Pico to guide a square through a 2D maze, with the player working through multiple levels of difficulty. A second Pico takes care of displaying the game state on a VGA monitor, and together they work wirelessly to deliver a coherent experience with the right “feel”. This includes low latency, simulating friction appropriately, and more.

Taking a stream of raw sensor readings and turning them into control instructions over UDP in a way that feels intuitive while at the same time generating a VGA display signal has a lot of moving parts, software-wise. The project write-up has a considerable amount of detail on the architecture of the system, and the source code is available on GitHub for those who want a closer look.

We’ve seen gesture controls interfaced to physical marble mazes before, but two Raspberry Pi Picos doing it wirelessly with a VGA monitor for feedback is pretty neat. Watch it in action in the video, embedded just under the page break.

Continue reading “Gyro-Controlled Labyrinth Game Outputs To VGA”

Impressively Responsive Air Drums Built Using The Raspberry Pi Pico

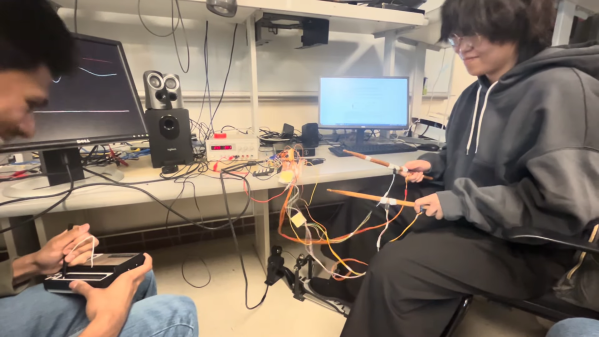
Drum kits are excellent fun and a terrific way to learn a sense of rhythm. They’re also huge and unwieldy. In contrast, air drums can be altogether more compact, if lacking the same impact as the real thing. In any case, students [Ang], [Devin] and [Kaiyuan] decided to build a set of air drums themselves for their ECE 4760 microcontroller class at Cornell.

As per the current crop of ECE4760 projects, the build relies on the Raspberry Pi Pico microcontroller as the brains of the operation. The Pico is charged with reading the output of MPU6050 inertial measurement units mounted to a pair of drum sticks. The kick pedal itself simply uses a button instead.

Where the project gets really interesting, though, is in the sound synthesis. The build doesn’t simply play different pre-recorded samples for different drums. Instead, it uses the Karplus-Strong Drum Synthesis function combined with a wavetable to generate different sounds.

In the demo video, we get to hear the air drums in action, complete with a Stylophone playing melody. Unlike some toy versions that trigger seemingly at random with no rhythm, these air drums are remarkably responsive and sound great. They could be a great performance instrument if designed for the purpose.

We’ve seen similar builds before, too.

Continue reading “Impressively Responsive Air Drums Built Using The Raspberry Pi Pico”

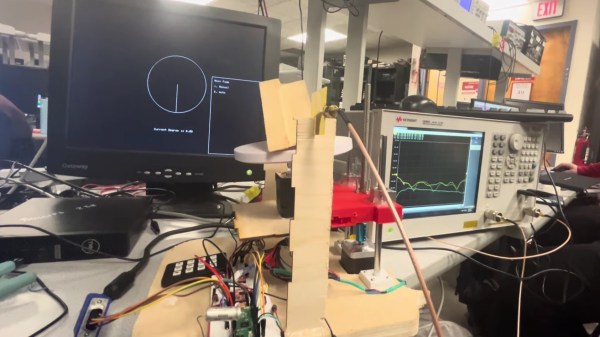
A microwave imaging setup. On the left is a monitor displaying a monochrome GUI. In the center is the RP2040-based positioning and measurement system, and on the right is a vector network analyzer.

Precise Positioning With The RP2040

Microwave imaging is similar to CT imaging, but instead of X-rays, the microwaves are used to probe the structure and composition of an object. To facilitate experimentation with microwave imaging, [Zehao Li] and [Kapil Gangwar] developed a system based on the RP2040 to control the height and rotation of a test object.

Their control system has a refreshingly physical user interface—a keypad. The keypad is used to configure the object’s position and the scanning step size, while user menus and the sample position are displayed in a clean and uncluttered interface over VGA. The RP2040 runs a multi-threaded program to handle user input, VGA display, and precise driving of two stepper motors for sample positioning.

The microwave imaging was performed by measuring the RF transmission over 2.5-8 GHz between two Vivaldi antennas on either side of the sample at a variety of angles. 2D cross-sections of the test object were reconstructed in Matlab using filtered back-projection. In this proof-of-concept demonstration, a commercial vector network analyzer was used to collect the data, but one could imagine migrating to a software defined radio (SDR) in the future.

A video demonstrating the system is embedded below the break. If you’re interested in DIY radio imaging, you might be interested in this guide to building your own synthetic aperture radar setup, or this analysis of an automotive radar chip.

Continue reading “Precise Positioning With The RP2040”

A Deep Dive Into Quadcopter Controls

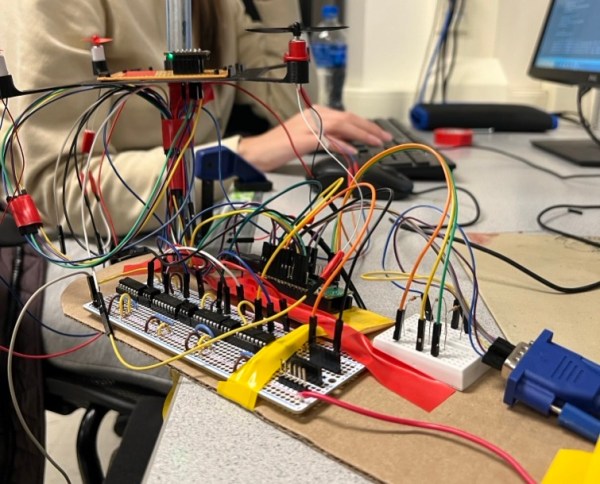
In the old days, building a quadcopter or drone required a lot of hacking together of various components from the motors to the batteries and even the control software. Not so much anymore, with quadcopters of all sizes ready to go literally out-of-the-box. While this has resulted in a number of knock-on effects such as FAA regulations for drone pilots, it’s also let us disconnect a little bit from the more interesting control systems these unique aircraft have. A group at Cornell wanted to take a closer look into the control systems for drones and built this one-dimensional quadcopter to experiment with.

The drone is only capable of flying in one dimension to allow the project to more easily fit into the four-week schedule of the class, so it’s restricted to travel along a vertical rod (which also improves the safety of the lab).  The drone knows its current position using an on-board IMU and can be commanded to move to a different position, but it first has to calculate the movements it needs to make as well as making use of a PID control system to make its movements as smooth as possible. The movements are translated into commands to the individual propellers which get their power from a circuit designed from scratch for this build.

All of the components of the project were built specifically for this drone, including the drone platform itself which was 3D printed to hold the microcontroller, motors, and accommodate the rod that allows it to travel up and down. There were some challenges such as having to move the microcontroller off of the platform and boosting the current-handling capacity of the power supply to the motors. Controlling quadcopters, even in just one dimension, is a complex topic when building everything from the ground up, but this guide goes some more of the details of PID controllers and how they help quadcopters maintain their position.

Continue reading “A Deep Dive Into Quadcopter Controls”

Wii-Inspired Controller Built Using Raspberry Pi Pico

We all thought Nintendo was going to change the world of gaming when it released the Wii all those years ago. In the end, it was interesting but not really fundamentally life-changing for most of us. In any case, [Sebastian] and [Gabriel] decided to build a Wii-like controller for their microcontroller class at Cornell.

The build uses a pair of Raspberry Pi Pico microcontrollers, communicating over HC-05 Bluetooth modules. One Pico acts as a controller akin to a Wiimote, while the other runs a basic game and displays it on a screen via VGA output. The controller senses motion thanks to a MPU6050 inertial measurement unit, combining both gyros and accelerometers in all three axes.

The duo demonstrate the hardware by using it as a pointer to play a simple Tic-Tac-Toe game. It’s in no way going to light up the Steam charts, but the project page does go into plenty of useful detail on how everything was implemented. If you want to create your own motion gaming controller, you could do worse than reading up on their work.

We’ve seen some other great examples of motion controls put to good use, like this VR bowling game. Video after the break.

Continue reading “Wii-Inspired Controller Built Using Raspberry Pi Pico”