Like the incandescent bulb before it, the compact fluorescent (CFL) bulb is rapidly fading into obscurity as there are fewer and fewer reasons to use them over their LED successors. But there are plenty of things to do with some of the more interesting circuitry that made these relatively efficient light bulbs work, and [mircemk] is here to show us some of them.
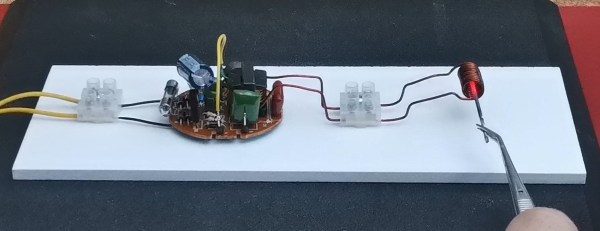
Fluorescent bulbs require a high voltage to work properly, and while this was easy enough for large ceiling installations, it was a while until this hardware could be placed inside a bulb-sized package. When removed, the high voltage driver from the CFL is used in this case to drive a small inductive heating coil circuit, which can then be used to rapidly heat metals and other objects. After some testing, [mircemk] found that the electronics on the CFL circuit board were able to easily handle the electrical load of its new task.
When old technology fades away, there are often a lot of interesting use cases just waiting to be found. [mircemk] reports that he was able to find these light bulbs at an extremely low price due to low demand caused by LEDs, so anyone needing a high voltage driver board for something like a small Tesla coil might want to look at a CFL first.
There are plenty of reasons to devote oneself to the care of houseplants — after all, a room full of bright, glossy-leaved plants can be a joy to behold, and that’s not even one of the more tangible benefits they bring. But as any green thumb knows, there’s a fine line between a healthy, vibrant plant and one that’s soon to give up the ghost.
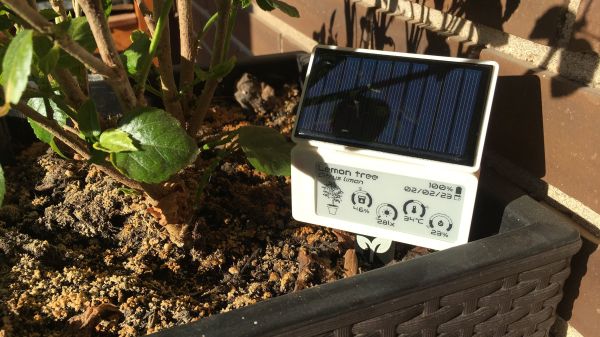
If your thumb tends less toward green and more toward the brown and crusty side of things, something like [Jon]’s Smart Plant system might be just the thing for you. These low-power plant tags are built around increasingly ubiquitous e-Paper displays, like the kind you might find in a retail shelf price tag system. The current version of [Jon]’s tags uses a Waveshare 2.9″ tricolor display and a PCB with capacitive probes that stick into the plant’s soil. An ESP32-S lives on the top section of the PCB, along with a 1,000 mAh LiPo pack that’s charged off USB-C. The design includes an optional solar panel for keeping the battery topped off, which may or may not help depending on the plant’s place in your personal jungle.
In addition to the soil moisture sensor, the Smart Tag has an ambient temperature and humidity sensor and a light sensor — everything to keep your plant happy. The power-hungry sensors are only powered on when the Smart Tag pops out of deep sleep; this gives and estimated five to six weeks runtime between charges, without solar charging of course. The e-Paper display shows custom graphics of the plant’s current environmental state, and the same data is also available via Home Assistant thanks to the ESPHome firmware.
These are nice-looking plant tags that can really pull a lot of weight in keeping plants healthy. Check out the other offerings in our Low Power Challenge Contest, and maybe get an entry together yourself.
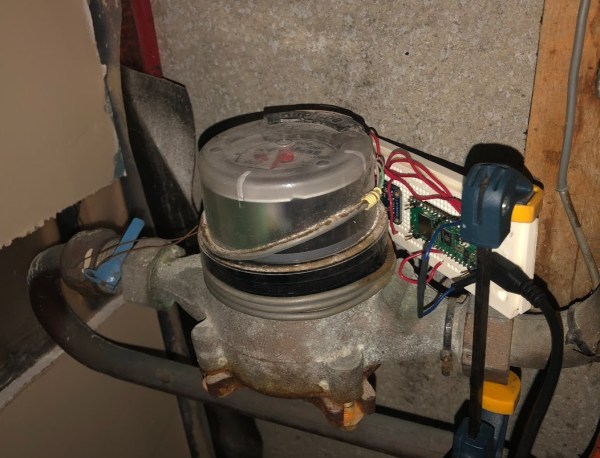
Modern WiFi-enabled microcontrollers have made it affordable and easy to monitor everything from local weather information to electricity usage with typically no more than a few dollars worth of hardware and a little bit of programming knowledge. Monitoring one’s own utility data can be a little bit more difficult without interfering with the metering equipment, but we have seen some clever ways of doing this over the years. The latest is this water meter monitoring device based on a Raspberry Pi Pico.
The clever thing here isn’t so much that it’s based on the tiniest of Raspberry Pis, but how it keeps track of the somewhat obscured water flow information coming from the meter. Using a magnetometer placed close to the meter, the device can sense the magnetic field created as water flows through the meter’s internal sensors. The magnetic field changes in a non-obvious way as water flows through it, so the program has to watch for specific peaks in the magnetic field. Each of these specific waveforms the magnetometer detects counts to 0.0657 liters of water, which is accurate for most purposes.
As Tom quipped on the podcast this week, if you have an idea for a program you’d like to write, all you have to do is look around on GitHub and you’ll find it already coded up for you. (Or StackOverflow, or…) And that’s probably pretty close to true, at least for really trivial bits of code. But it hasn’t always been thus.
I was in college in the mid 90s, and we had a lab of networked workstations that the physics majors could use. That’s where I learned Unix, and where I had the idea for the simplest program ever. It took the background screen color, in the days before wallpapers, and slowly random-walked it around in RGB space. This was set to be slow enough that anyone watching it intently wouldn’t notice, but fast enough that others occasionally walking by my terminal would see a different color every time. I assure you, dear reader, this was the very height of wit at the time.
With the late 90s came the World Wide Web and the search engine, and the world got a lot smaller. For some reason, I was looking for how to set the X terminal background color again, this time searching the Internet instead of reading up in a reference book, and I stumbled on someone who wrote nearly exactly the same random-walk background color changer. My jaw dropped! I had found my long-lost identical twin brother! Of course, I e-mailed him to let him know. He was stoked, and we shot a couple funny e-mails back and forth riffing on the bizarre coincidence, and that was that.
Can you imagine this taking place today? It’s almost boringly obvious that if you search hard enough you’ll find another monkey on another typewriter writing exactly the same sentence as you. It doesn’t even bear mentioning. Heck, that’s the fundamental principle behind Codex / CoPilot – the code that you want to write has been already written so many times that it will emerge as the most statistically likely response from a giant pattern-matching, word-word completion neural net model.
Indeed, stop me if you’ve read this before.
This article is part of the Hackaday.com newsletter, delivered every seven days for each of the last 200+ weeks. It also includes our favorite articles from the last seven days that you can see on the web version of the newsletter.
Want this type of article to hit your inbox every Friday morning? You should sign up!
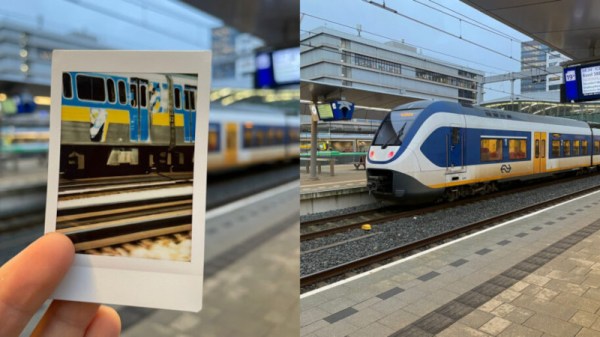
It’s the most basic of functions for a camera, that when you point it at a scene, it produces a photograph of what it sees. [Jasper van Loenen] has created a camera that does just that, but not perhaps in the way we might expect. Instead of committing pixels to memory it takes a picture, uses AI to generate a text description of what is in the picture, and then uses another AI to generate an image from that picture. It’s a curiously beautiful artwork as well as an ultimate expression of the current obsession with the technology, and we rather like it.
The camera itself is a black box with a simple twin-lens reflex viewfinder. Inside is a Raspberry Pi that takes the photo and sends it through the various AI services, and a Fuji Instax Mini printer. Of particular interest is the connection to the printer which we think may be of interest to quite a few others, he’s reverse engineered the Bluetooth protocols it uses and created Python code allowing easy printing. The images it produces are like so many such AI-generated pieces of content, pretty to look at but otherworldly, and weird parallels of the scenes they represent.
It’s inevitable that consumer cameras will before long offer AI augmentation features for less-competent photographers, meanwhile we’re pleased to see Jasper getting there first.
Before video games, there were pinball machines. Not that they don’t exist today, but a modern pinball machine will likely have microprocessors and other fancy things that traditional pinball machine designers could never dream of. [Eli] had one of these mechanical machines from 1974 as a kid and, later, encountered a more modern machine with a rudimentary microprocessor and other integrated circuits onboard. One thing this enabled is the ability to remember high scores. But you have to physically look at the machine, and you can only see the top four scores. [Eli] decided to adapt the machine to upload high score data to the Internet, and it is a fun project.
[Eli]’s design goals were to make it automatic and robust. That is, if the network is down or the machine loses power, you shouldn’t lose high score data. In addition, he didn’t want to change the appearance or damage the 40-year-old machine. You can see a video of how it all turned out below.
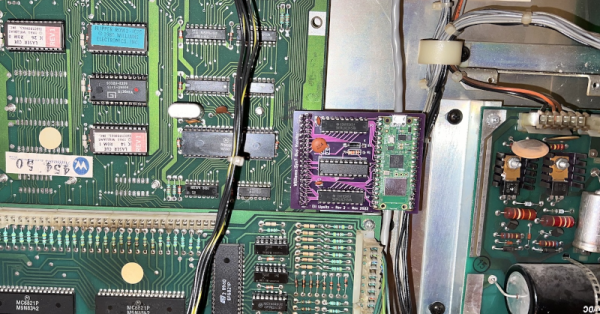
The Laser Cue machine is one of many built around the “Williams System 7” platform. A 6808 CPU, along with some I/O chips to manage all the lights, sensors, and bells. The game has only 1K of RAM, 12K or ROM, and 128 bytes (no prefix, just bytes) of RAM with battery backup. There was even a common “operating system” called Flipper ROM, and that’s actually documented over on GitHub.
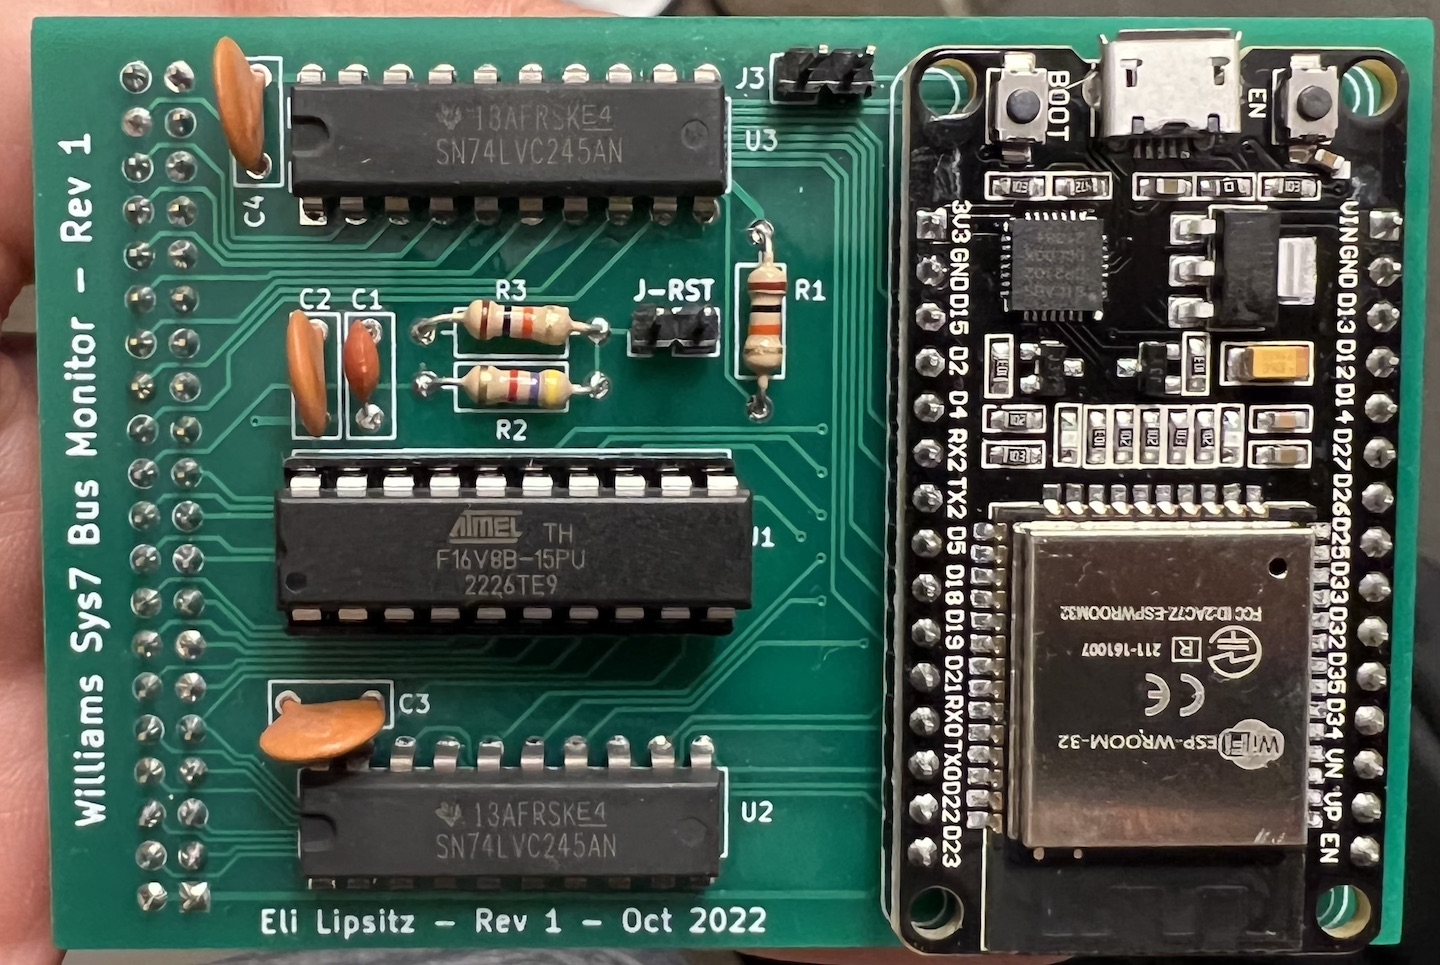
The ESP32 version of the WiFi interface board
Since the memory for the machine is all in external chips, it was a reasonable idea to replace the CPU with a board that monitored signals on the board. The CPU would plug into this new board, and then a newer microcontroller with an Internet connection could eavesdrop on bus traffic. However, removing the old CPU and jamming pins into the ancient socket was worrisome, so instead, [Eli] elected to tap into a test connector that was already on the board but not plugged into anything.
An ESP32 is more than capable of the speeds, although connecting to 5 V logic was a bit of a problem. The CPU has 5 V tolerant pins, but some of the 25 available pins on the development board either set items on boot or may briefly be outputs and were thus unusable. To reduce the necessary pins, [Eli] decided to do some of the decoding in separate logic. Instead of using TTL chips, he elected to use a programmable logic array.
After that, it seemed it would be straightforward, but there was something preventing the ESP32 from reading each bus cycle. [Eli] never got to the bottom of it but instead switched to the Raspberry Pi Pico W. Using the chip’s special I/O processors made the job easy, and it worked perfectly. The rest of the project was just fit and finish. Be sure to read to the end to find out the lessons learned which might help you on your next similar project.
A modern DIY machine might even have an FPGA inside. Don’t have room for a big full-sized pinball machine? No problem.
[Shelby] at Tech Tangents recently wrapped a project / obsession to obtain an old HP ScanJet 4C, get it running on a PC and put it through its paces. After after nearly five years, three scanners, and untold SCSI cards and drivers later, he finally succeeded. The first big problem was getting a working scanner. These don’t stand up well to shipping, and one arrived with broken mirrors. And when he finally got one that worked, sorting out SCSI controller and driver issues was surprisingly complicated, though ultimately successful.
The HP ScanJet 4C was introduced in 1995, and was notable for its scanning quality, its resolution ( 2400 DPI interpolated / 600 DPI optical ), and selling for under $1000. Except for replacement parts concerns, particularly the customized triphosphor fluorescent bulb assembly, it would still be a very competent scanner today. For this reason, [Shelby] will not be using it as his daily use scanner. Continue reading “Deep Dive Into The HP ScantJet 4C”→