Teardown: VTech Smart Start

Regular readers may be aware that I have a certain affinity for vintage VTech educational toys, especially ones that attempted to visually or even functionally tie in with contemporary computer design. In the late 1980s, when it became obvious the personal computer was here to stay, these devices were seen as an affordable way to give kids and even young teens hands-on time with something that at least somewhat resembled the far more expensive machines their parents were using.
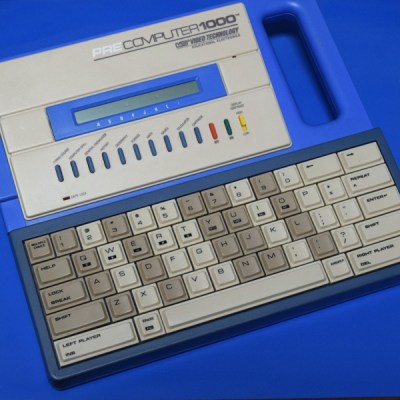
Much Smarter: VTech PreComputer 1000

A perfect example is the PreComputer 1000, released in 1988. Featuring a full QWERTY keyboard and the ability to run BASIC programs, it truly blurred the line between toy and computer. In fact from a technical standpoint it wasn’t far removed from early desktop computers, as it was powered by the same Zilog Z80 CPU found in the TRS-80 Model I.

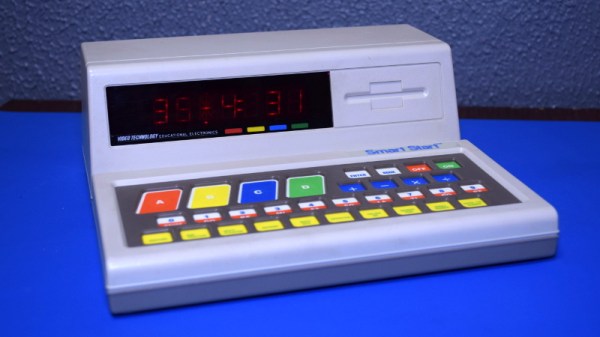
By comparison, the Smart Start has more in common with a desktop electronic calculator. Even though it was released just two years prior to the PreComputer 1000, you can tell at a glance that it’s a far more simplistic device. That’s due at least in part to the fact that it was aimed at a younger audience, but surely the rapid advancement of computer technology at the time also played a part. Somewhat ironically, VTech did still at least attempt to make the Smart Start look like a desktop computer, complete with the faux disk drive on the front panel.

Of course, looks can be deceiving. While the Smart Start looks decidedly juvenile on the outside, that doesn’t mean there aren’t a few surprising technical discoveries lurking under its beige plastic exterior. There’s only one way to find out.

Continue reading “Teardown: VTech Smart Start”

Custom Car Horn Makes Many Sounds

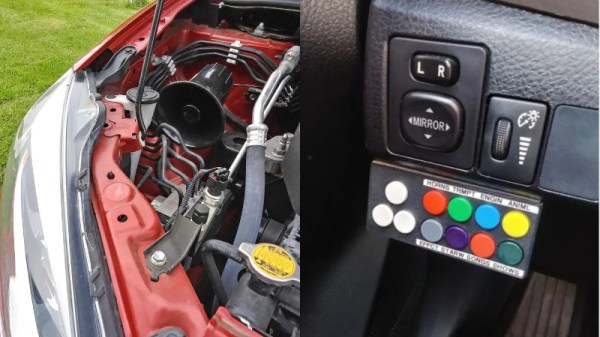
A regular car horn is fine, but lacks finesse for more subtle communication. For example, some car horns aren’t particularly adept at short indicatory honks, and can only blare loudly regardless of the situation. For a fancier solution, [Tom Hammond] whipped up a custom car horn capable of playing a wide variety of sounds.

The system uses the Adafruit Audio FX board. This is a unique part, which is designed to enable people to build sound-based projects without the need for a microcontroller or any other similar hardware. Instead, the device can be connected to a computer over USB in mass storage mode, and its 16MB in-built memory can be loaded with sound files. It then plays these when buttons are pressed, hooked up to its 11 trigger inputs.

The Audio FX board has its output hooked up to a 120W amplifier, which then feeds into a pair of 15W PA-style horns. These are incredibly loud devices, though lack bass, so they’re really only good for throwing low-quality sound out in a noisy environment. For a car horn, that’s perfect.

The result is that [Tom] can press a number of buttons on his dash to play different sounds, from courtesy honks to animal noises and obnoxious sound effects. The great thing is that the sounds in question can be easily customized to the user’s tastes. [Tom] also deserves a tip of the hat for explaining in great detail how to actually install the project in the average car.

We don’t often see car horns around these parts, though they do make for an awfully loud alarm clock. If you’ve got your own nifty car accessories that you’re cooking up, be sure to drop us a line!

Tech Hidden In Plain Sight: Cruise Control

The advent of the microcontroller changed just about everything. Modern gadgets often have a screen-based interface that may hide dozens or hundreds of functions that would have been impractical and confusing to do with separate buttons and controls. It also colors our thinking of what is possible. Imagine if cars didn’t have cruise control and someone asked you if it were possible. Of course. Monitor the speed and control the gas using a PID algorithm. Piece of cake, right? Except cruise control has been around since at least 1948. So how did pre-microcontroller cruise control work? Sure, in your modern car it might work just like you think. But how have we had seventy-plus years of driving automation?

A Little History

A flyball governor from a US Navy training film.

Controlling the speed of an engine is actually not a very new idea. In the early 1900s, flyball governors originally designed for steam engines could maintain a set speed. The idea was that faster rotation caused the balls would spread out, closing the fuel or air valve while slower speeds would let the balls get closer together and send more fuel or air into the engine.

The inventor of the modern cruise control was Ralph Teetor, a prolific inventor who lost his sight as a child. Legend has it that he was a passenger in a car with his lawyer driving and grew annoyed that the car would slow down when the driver was talking and speed up when he was listening. That was invented in 1948 and improved upon over the next few years.

Continue reading “Tech Hidden In Plain Sight: Cruise Control”

This Week In Security: Ransomware, WeLock, And Amazon Arbitration

Another week of ransomware, and this time it’s the beef market that’s been shut down, due to a crippling infrastructure attack out of Russia — but hold up, it’s not that simple. Let’s cover the facts. Some time on Sunday, May 30, JBS USA discovered a ransomware attack against their systems. It seems that their response team did exceptionally well, pulling the plug on affected machines, and starting recovery right away. By Wednesday, it was reported that most of their operations were back in action.
Continue reading “This Week In Security: Ransomware, WeLock, And Amazon Arbitration”

Make Android’s New Power Menu Work On Your Terms

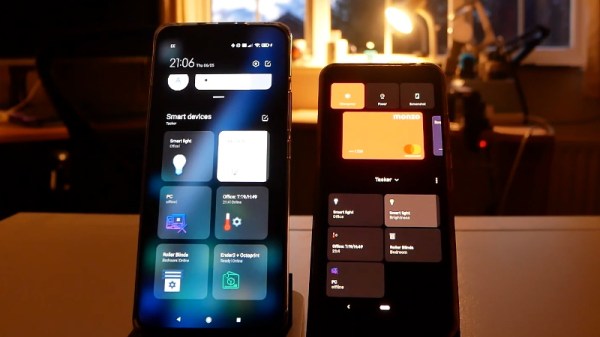
Introduced in Android 11, the power menu is a way to quickly interact with smart home gadgets without having to open their corresponding applications. Just hold the power button for a beat, and you’ll be presented with an array of interactive tiles for all the gadgets you own. Well that’s the idea, anyway.

[Mat] of “NotEnoughTech” wasn’t exactly thrilled with how this system worked out of the box, so he decided to figure out how he could create his own power menu tiles. His method naturally requires quite a bit more manual work than Google’s automatic solution, but it also offers some compelling advantages. For one thing, you can make tiles for your own DIY devices that wouldn’t be supported otherwise. It also allows you to sidestep the cloud infrastructure normally required by commercial home automation products. After all, does some server halfway across the planet really need to be consulted every time you want to turn on the kitchen light?

Adding tiles in Tasker.

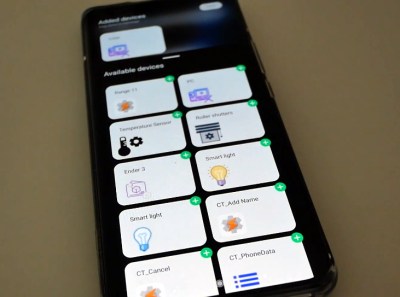
The first piece of the puzzle is Tasker, a popular automation framework for Android. It allows you to create custom tiles that will show up on Android’s power menu, complete with their own icons and brief descriptions. If you just wanted to perform tasks on the local device itself, this would be the end of the story. But assuming that you want to control devices on your network, Tasker can be configured to fire off a command to a Node-RED instance when you interact with the tiles.

In his post, [Mat] gives a few examples of how this combination can be used to control smart devices and retrieve sensor data, but the exact implementation will depend on what you’re trying to do. If you need a bit of help getting started, our own [Mike Szczys] put together a Node-RED primer last year that can help you put this flow-based visual programming tool to work for you.

Continue reading “Make Android’s New Power Menu Work On Your Terms”

Garage Door Controller Gets The IoT Treatment

[TheStaticTurtle] built a custom controller for automating his garage doors. He wanted to retain the original physical button and RF remote control interfaces while adding a more modern wireless control accessible from his internet connected devices. Upgrading an old system is often a convoluted process of trial and error, and he had to discard a couple of prototype versions which didn’t pan out as planned. But luckily, the third time was the charm.

The original door-closer logic was pretty straightforward. Press a button and the door moves. If it’s not going in the desired direction, press the button once again to stop the motor, and then press it a third time to reverse direction. With help from the user manual diagrams and a bit of reverse-engineering, he was able to get a handle on how to plan out his add-on controller to interface with the old system.

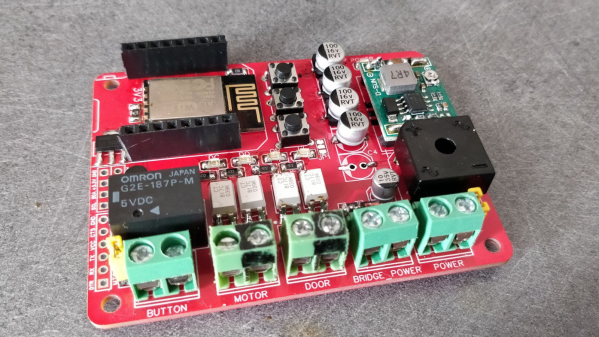
There are many micro-controller options available these days when you want to add IoT to a project, but [TheStaticTurtle] decided to use the old faithful ESP8266 as the brains of his new controller. For his add-on board to work, he needed to detect the direction in which the motor was turning, and detect the limit switches when the door reached end of travel in either direction. Finally, he needed a relay contact in parallel with the activation button to send commands remotely.

To sense if the motor was moving in the “open” or “close” direction, he used a pair of back-to-back opto-couplers in parallel with the motor terminals. He connected another pair of opto-couplers across the two end-limit switches which indicated when the door was fully open or closed, and shut off the motor supply. Finally, a GPIO from the ESP8266 actuates a relay to send the door open and close commands. The boards were designed in EasyEDA and with a quick turnaround from China, he was able to assemble, test and debug his boards pretty quickly.

The code was written using the Arduino IDE and connects the ESP8266 to the MQTT server running on his home automation computer. The end result is a nice dashboard with three icons for open, close and stop, accessible from all the devices connected to his home network. A 3D printed enclosure attaches outside the original control box to keep things tidy. Using hot melt glue as light pipes for the status LED’s is a pretty nifty hack. If you are interested in taking a deeper look at the project, [TheStaticTurtle] has posted all resources on his Github repository.

Rex Wasn’t Really A PDA, It Was The First Great Digital Rolodex

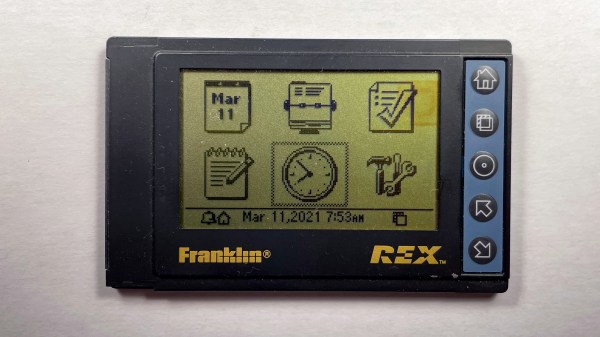
Back in the 1990s I was fascinated with small computers. I used the HP200LX palmtop computer for almost ten years, which I wrote about back in December. Naturally, the Franklin Rex 3 PCMCIA-sized organizer caught my attention when it was released in 1997. Here was a Personal Digital Assistant (PDA) the size of a credit card that could fit not just in your pocket, but in your shirt pocket.

Viewed today, it was an interesting paradigm. The screen takes up almost the entire front face of the device with a few buttons for navigation. But isn’t it a deal-breaker that you can’t enter or edit contact info on the device itself? This was long before cellphones were pervasive, and if you had the option to connect to the internet a telephone or Ethernet cable was involved. The ability to have a large data set in your pocket viewable without slapping a brick-like laptop on a table was pretty huge.

I think the killer feature was the PCMCIA interface. I challenged myself to reverse engineer the API so that I could sync data outside of the

Continue reading “Rex Wasn’t Really A PDA, It Was The First Great Digital Rolodex”