The Apple I is the stuff of legend. Designed and marketed in 1976 by Steve Wozniak and Steve Jobs, it was the very first product released by what would become today’s multi-trillion-dollar manufacturer of iPhones and iMacs. With about 60 original ones known to exist today, prices at auction are commonly in the $300,000 range, while confirmed working ones are even more valuable.
The Heinz Nixdorf Museumsforum (HNF), a computer museum in the German city of Paderborn, is fortunate enough to have an original Apple I in its collection. Although it has been there since 1996, it was always on static display and had never been powered on. In fact, it was unknown whether it would even work, and with it being the most valuable exhibit in the entire museum, simply firing it up would be a seriously risky project.
But computers are meant to be used, so museum director [Jochen Viehoff] decided to take the plunge and attempt to get the classic Apple to run again. In the four-part video series embedded below, [Jochen] explains the history of Apple’s first product and the steps he took to bring it back to life. This began with taking it out of its bullet-proof display case and bringing it upstairs to the museum’s workshop.
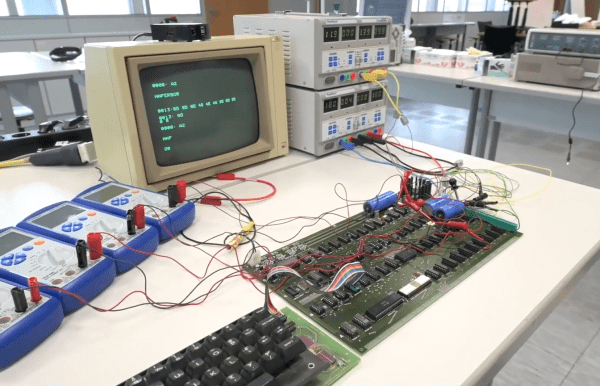
In order to make a complete system, HNF staff also dug up a period-correct keyboard as well as a slightly newer Apple monitor that could display the 60 Hz composite video output. Hooking up an original power supply would have been way too risky, because a single mistake or malfunction could send their top exhibit up in flames. Instead, they used a set of lab power supplies with a programmable current limit; this way, even a dead short on the PCB would not result in any serious damage.
Not that there were any shorts: after a bit of fiddling with the keyboard and adjusting the video output level, the 45-year-old computer came to life and began to respond to commands. With just 256 bytes of ROM, its default feature set is rather limited, but the computer duly executed a simple “Hello, World” program writen in 6502 machine code. It thereby joined the elite club of confirmed working Apple I’s, of which there are thought to be about twenty.
If you haven’t got $300,000 to spare but would still like to try your hand at programming the Apple I, you’ll be happy to hear that you can get a modern copy at a far more affordable price. And if all that classic hardware is too fiddly for you, you might want to try implementing the Apple I on an FPGA.
Continue reading “Powering Up An Original Apple I After Three Decades In A Museum”
 [Harry Gill] has you covered with