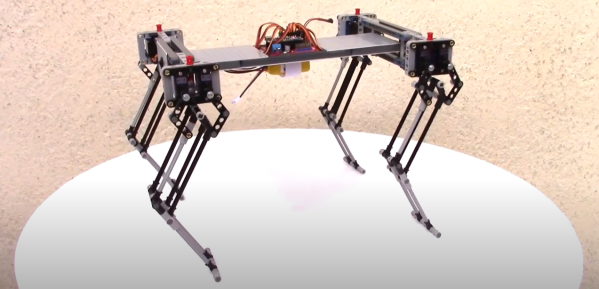
Hackaday Podcast 132: Laser Disco Ball, Moore’s Law In Your Garage, Cheap Cyborg Glasses, And A Mouse That Detects Elephants

Hackaday editors Elliot Williams and Mike Szczys debate the great mysteries of the hacking universe. On tap this week is news that Sam Zeloof has refined his home lab chip fabrication process and it’s incredible! We see a clever seismometer built from plastic pipe, a laser, and a computer mouse. There’s a 3D printed fabric that turns into a hard shell using the same principles as jamming grippers. And we love the idea of high-powered lasers being able to safely direct lighting to where you want it.

Take a look at the links below if you want to follow along, and as always, tell us what you think about this episode in the comments!

Direct download (60 MB or so.)

Continue reading “Hackaday Podcast 132: Laser Disco Ball, Moore’s Law In Your Garage, Cheap Cyborg Glasses, And A Mouse That Detects Elephants”

Dedicated box to play new videos from a handful of content creators.

Dedicated Box Makes YouTube More TV-Like

[Exposed Wire] is a huge fan of YouTube and consumes a lot of content. If that sounds familiar, maybe you should build a dedicated YouTube box, too. You get to push buttons, there’s LEDs, and you can take a break from other screens to look at this one for a while. [Exposed Wire] wanted to make it easier to watch the latest videos from their favorite creators, but we would argue that this is more fun, too.

The Rasberry Pi 4 inside checks every five minutes for new videos by keeping track of the creator’s total number of videos in a text file and doing a comparison. If one of the channels has a new video, then the corresponding LED lights up and the new video’s URL is linked to the button. Press the button and the Raspi opens the browser, goes the the URL, maximizes the video, turns off the LED, and updates the video count in the text file.

We like the construction job here. The 1/4″ MDF walls are connected by 3D-printed L-brackets in PETG. At first, [Exposed Wire] mounted the LEDs and buttons to a PCB, but that was really fiddly so they printed panels instead. Combined with the bracket around the screen, the finished build looks good. Check out the build montage after the break.

Regular old YouTube videos not doing it for you anymore? Try watching them at low resolution on an LED matrix.

Continue reading “Dedicated Box Makes YouTube More TV-Like”

This Week In Security: Breaking Apple ID, Political Hacktivism, And Airtag Tracking

Have you ever thought about all the complexities of a Single Sign On (SSO) implementation? A lot of engineering effort has gone into hardened against cross-site attacks — you wouldn’t want every site you visit to be able to hijack your Google or Facebook account. At the same time, SSO is the useful ability to use your authentication on one service to authenticate with an unrelated site. Does SSO ever compromise that hardening? If mistakes are made, absolutely, as [Zemnmez] discovered while looking at the Apple ID SSO system.

Continue reading “This Week In Security: Breaking Apple ID, Political Hacktivism, And Airtag Tracking”

Inkplate Comes Full Circle, Becomes True Open Reader

Regular readers will likely remember the Inkplate, an open hardware electronic paper development board that combines an ESP32 with a recycled Kindle screen. With meticulous documentation and full-featured support libraries for both the Arduino IDE and MicroPython, the Inkplate makes it exceptionally easy for hackers and makers to write their own code for the high-quality epaper display.

Now, thanks to the efforts of [Guy Turcotte], the Inkplate family of devices can now boast a feature-rich and fully open source ereader firmware. The project started in October of last year, and since then, the codebase has been steadily updated and refined. Nearing its 1.3 release, EPub-InkPlate has most of the functions you’d expect from a modern ereader, and several that might take you by surprise.

For one thing, [Guy] has taken full advantage of the ESP32 microcontroller at the heart of the Inkplate and implemented a web server that lets you manage the reader’s library from your browser. This allows books in EPUB v2 and v3 formats to be uploaded and saved on the Inkplate’s SD card without any special software. There’s currently support for JPG, PNG, BMP, and GIF images, as well as embedded TTF and OTF fonts.

As of this writing EPub-InkPlate supports both the six and ten inch Inkplate variants, and uses the touch pads on the side of the screen for navigation. While it’s on the wishlist for the final 1.3 release, the project currently doesn’t support the Inkplate 6PLUS; which uses the backlit and touch compatible displays pulled from Kindle Paperwhites. With shipments the new 6PLUS model reportedly going out in November, hopefully it won’t be long before its enhanced features are supported.

With the rising popularity of ebooks, it’s more important than ever that we have open hardware and software readers that work on our terms. While they may never compete with the Kindle in terms of units sold, we’re eager to see projects like EPub-InkPlate and the Open Book from [Joey Castillo] mature to the point that they’re a valid option for mainstream users who don’t want to live under Amazon’s thumb.

Continue reading “Inkplate Comes Full Circle, Becomes True Open Reader”

Arduino Caller ID Display Is Better Late Than Never

It’s no secret that the era of the landline telephone is slowly coming to a close. As of 2020, it was estimated that less than half the homes in America still subscribed to plain old telephone service (POTS). But of course, that still amounts to millions upon millions of subscribers that might get a kick out of this Arduino caller ID developed by [Dilshan Jayakody].

HT9032D caller ID decoder board
The completed HT9032D board.

Truth be told, until this point, we hadn’t really given a lot of thought to how the caller ID system works. But as [Dilshan] explains, you can actually pick up a dedicated IC that can decode incoming caller data that’s sent over the telephone line. In this case he’s using a Holtek HT9032D, which comes in a through-hole DIP-8 package and can be picked up for around $2 USD. The chip needs a handful of passives and a 3.58 MHz crystal to help it along on its quest, but beyond that, it’s really just a matter of reading the decoded data from its output pin.

To display the caller’s information, [Dilshan] is using an Arduino Uno and common 16×2 HD44780 LCD. As a nice touch, the code will even blink the Arduino’s onboard LED when you’ve missed a call. As a proof of concept there’s been no attempt to condense the hardware or ditch the breadboard, but it’s not hard to imagine that all the components could be packed into a nice 3D printed enclosure should you want something a bit more permanent.

We’ve seen caller ID data being collected in previous projects, but they used a USB modem combined with a software approach. We really like the idea of doing it with a cheap dedicated IC, though we’ll admit this demonstration would probably have been a bit more exciting a decade ago.

Continue reading “Arduino Caller ID Display Is Better Late Than Never”

two hands holding a wider version of a purple gameboy advance

The Stretch Limo Of Game Boys

Here at Hackaday, we see all sorts of projects, some born out of a deep necessity or itch that couldn’t be scratched. Others are born out of a world of “why not” and it is perhaps these projects that put the biggest smile on our faces. The WideBoy Advance by [Elliot] of Retro Future is one such project.

Starting with a working Game Boy Advance and a donor one with a busted motherboard, the frankenstein-ification could start. A Dremel split one case in half and removed the sides on another, while trusty old car body filler helps fill and smooth the gaps. A particularly clever trick is to use the Dremel to create channels for the filler to adhere easier. Several areas had to be built up with filler and glued in bits of plastic as a base. As you can see in the video below, the countless hours of sanding, priming, sanding, and more priming led to a beautifully smooth finish. The choice of purple paint really sells the impression of a factory-fresh Game Boy Advance.

The working circuit board was desoldered and the donor board was cut into pieces to fit in the extended sides. Using some magnet wire, connections were bridged over to the original motherboard via the test points on the PCB. [Elliot] didn’t opt to swap the screen to an IPS display or add a backlight. These quality of life improvements are nice, but a dead giveaway that Nintendo didn’t make it. The goal is to get the user to wonder, even if just for a second, what if Nintendo just happened to make this wide one-off handheld console.

[Elliot] made it simply because he found it interesting and enjoyed the form of the thing he made. Is it a hack? Is it art? Probably a little bit of both. This isn’t his first modified Nintendo handheld either. He previously made a long Nintendo Gameboy DMG-01. We love seeing all the wild hacks and tweaks made to Game Boy line, such as this Game Boy Color inside the DMG-01.

Continue reading “The Stretch Limo Of Game Boys”

Beginning The Machine Shop Journey With A DIY CNC

Building a good quality machine shop may seem to present a chicken-and-egg problem, at least for anyone not willing to mortgage their home for the money needed to buy all of these tools new. Namely, that building good tools often requires good tools. To help solve this problem, [Ryan] designed and built this CNC machine which can be built with nothing other than common tools, hardware store supplies, and some readily available parts from the internet.

Since it’s being built from consumer-grade material, [Ryan] has the design philosophy of “buying precision” which means that most of the parts needed for this build are precise enough for their purpose without needing to be worked in any way before incorporation into the mill. For example, he uses a granite plate because it’s hard, flat, heavy, and sturdy enough at the time of purchase to be placed into the machine right away. Similarly, his linear guides do not need to be modified before being put to work with a high degree of precision and minimal calibration. From there, he applies the KISS principle and uses the simplest parts available. With this design process he is able to “bootstrap” a high quality mill for around $1500 USD without needing any extra tools than the ones you likely already have.

The RIG-CNC as it is known has also been made completely open source which further cements its bootstrapability, and there is a lot more detail on the project page and in the video linked below. This project is unique not simply for the mill build from common parts and tools, but because this design philosophy is so robust. Good design goes a lot farther in our builds than a lot of us might realize, and good design often results in more maintainable, hackable things that work for more uses than the original creators may have even thought about.

Continue reading “Beginning The Machine Shop Journey With A DIY CNC”