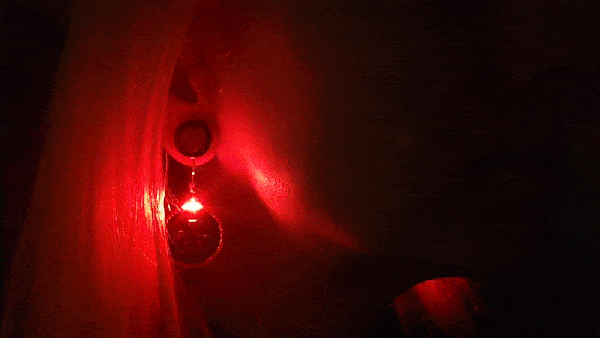
Few things get a Hackaday staffer excited like bunches of tiny LEDs. The smaller and denser the better, any form will do as long as we can get a macro shot or a video of a buttery smooth animation. This time we turn to [Sawaiz Syed] and [Open Kolibri] to deliver the brightly lit goods with the minuscule HALO 90 reactive LED earrings.
The HALO 90’s are designed to work as earrings, though we suspect they’d make equally great brooches, hair accessories, or desk objects. To fit this purpose each one is a minuscule 24 mm in diameter and weighs a featherweight 5.2 grams with the CR2032 battery (2.1 g for the PCBA alone). Functionally their current software includes three animation modes, each selectable via a button on device; audio reactive, halo (fully lit), and sparkle. Check out the documentation for details on expected battery life in each mode, but suffice to say that no matter what these earrings will make it through a few nights out.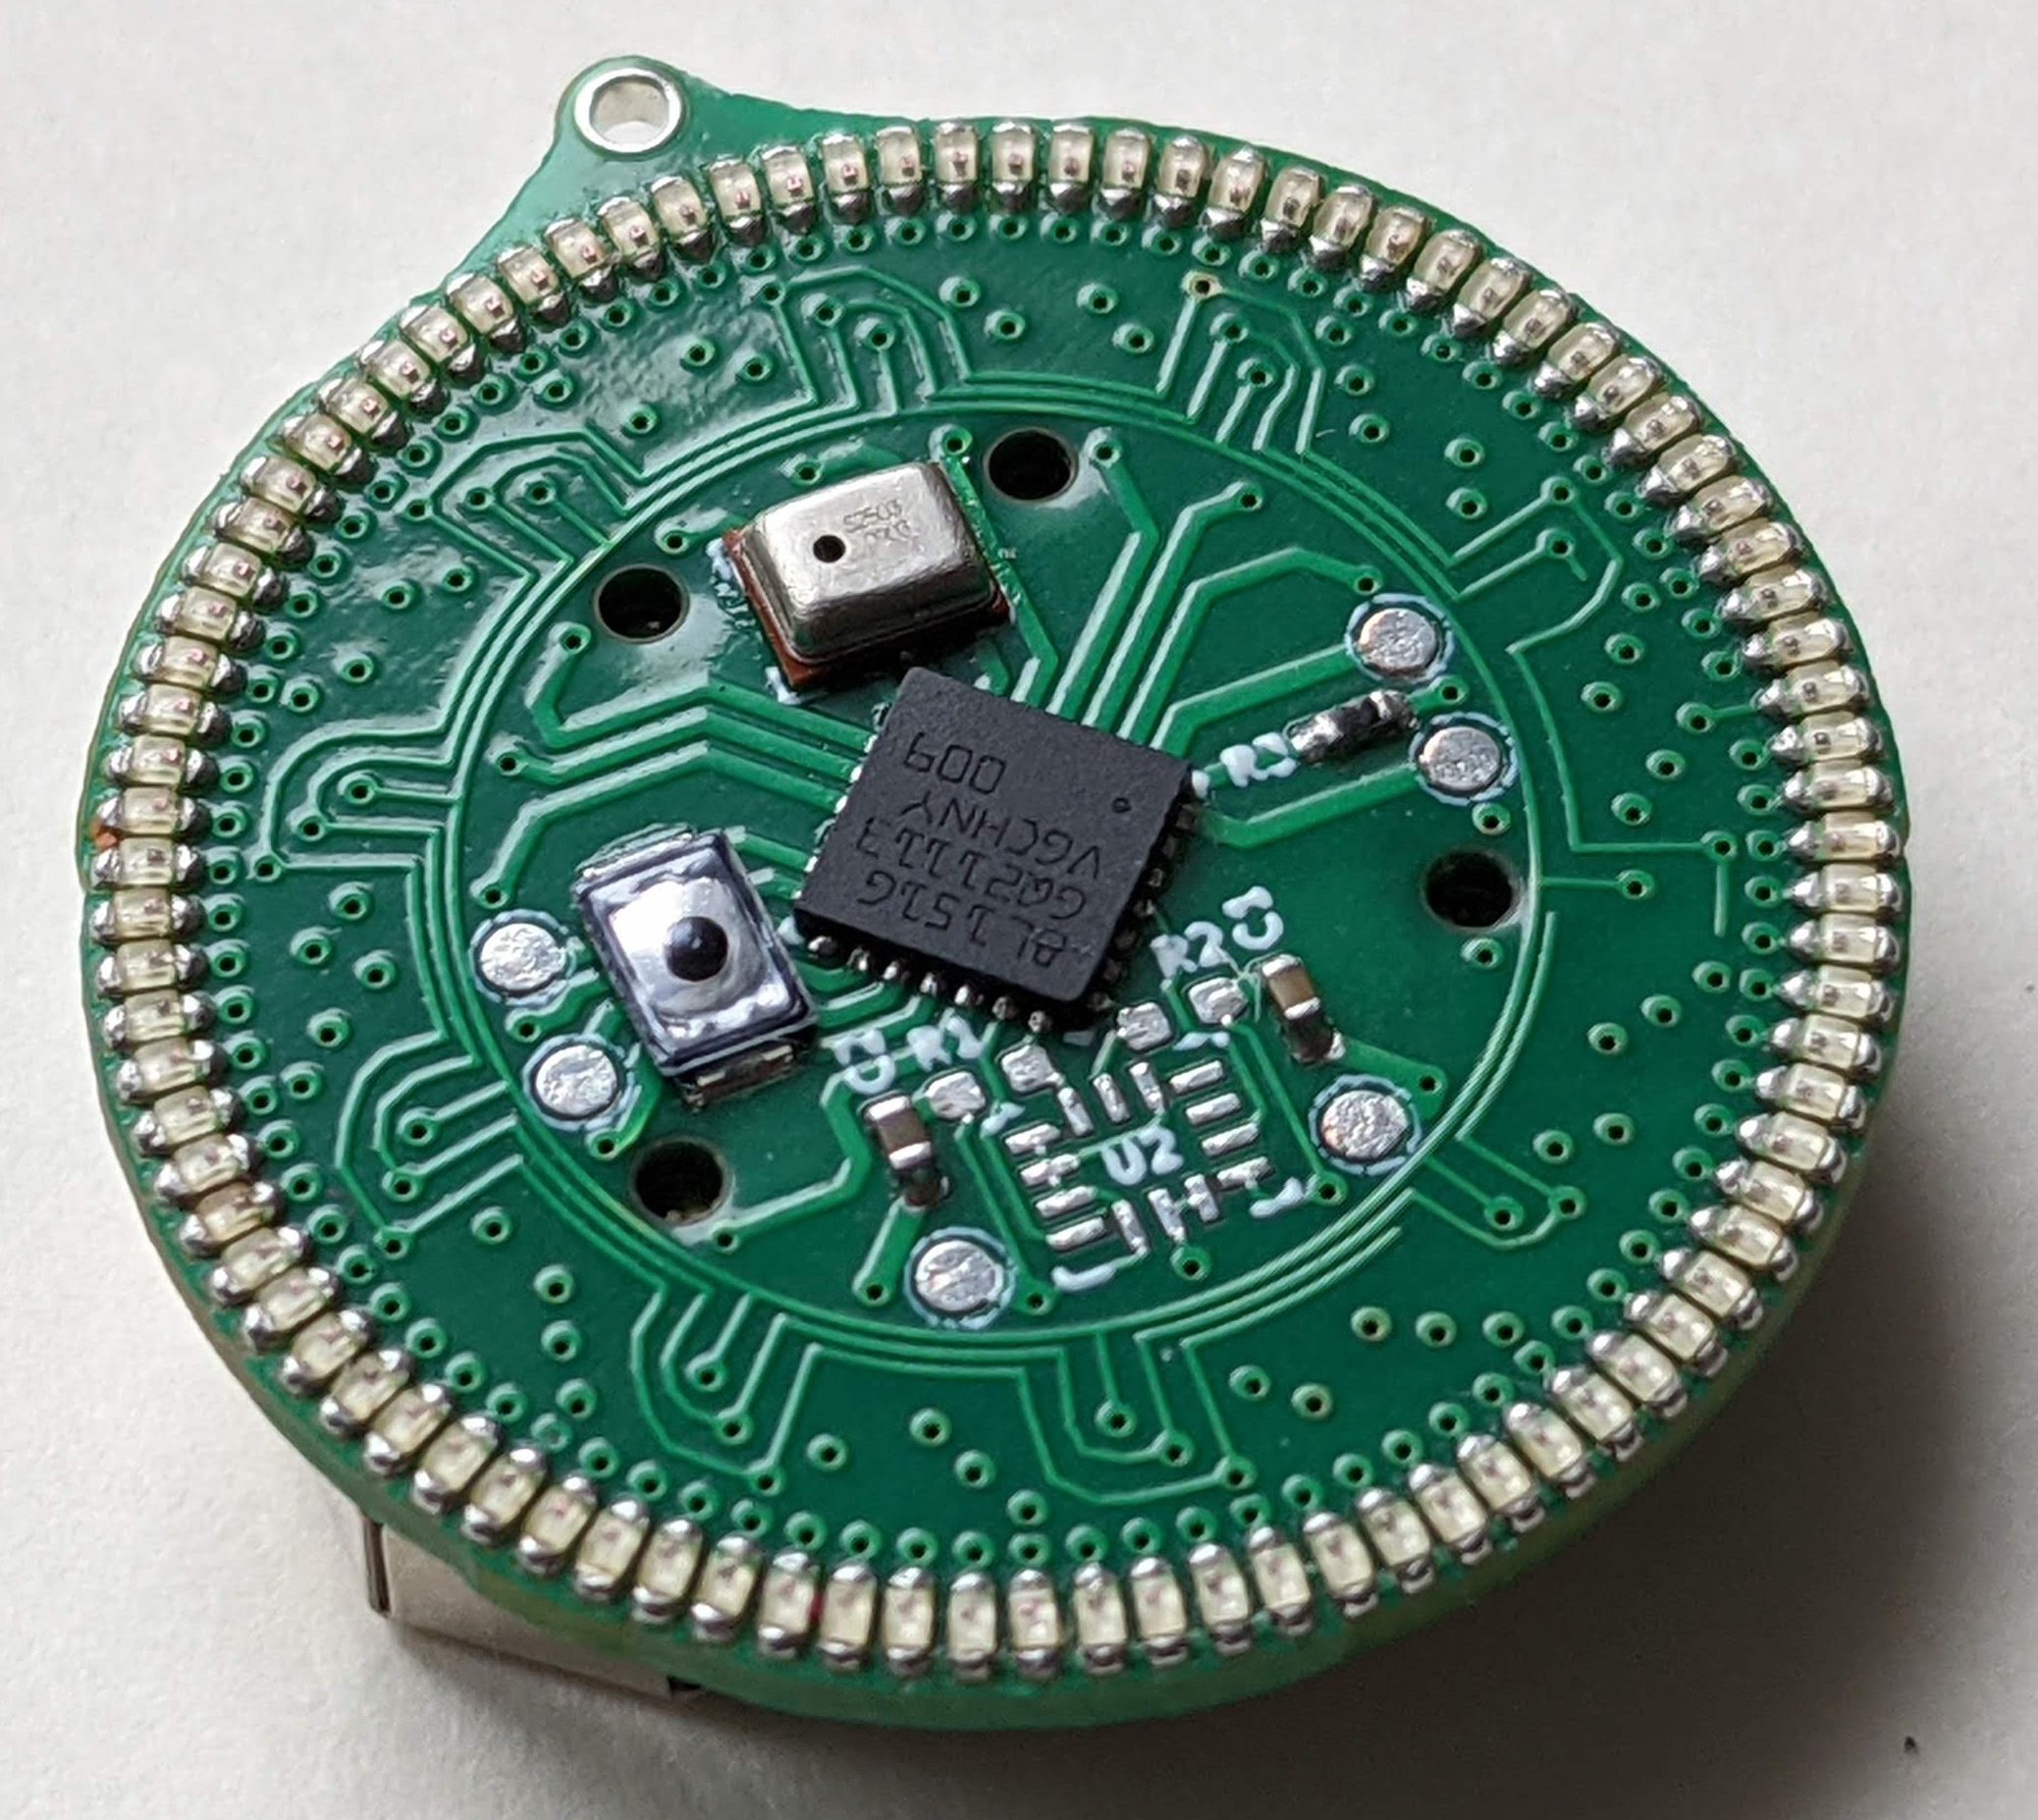
In terms of hardware, the HALO 90’s are as straightforward as you’d expect. Each device is driven by an STM8 at its maximum 16MHz which is more than fast enough to keep the 90 charliplexed 0402 LEDs humming along at a 1kHz update rate, even with realtime audio processing. In fact the BOM here is refreshingly simple with just 8 components; the LEDs, microcontroller and microphone, battery holder and passives, and the button. [Sawaiz] even designed an exceptionally slick case to go with each pair of earrings, which holds two HALO 90’s with two CR2032’s and includes a magnetic closure for the most satisfying lid action possible.
As with some of his other work, [Sawaiz] has produced a wealth of exceptional documentation to go with the HALO 90’s. They’re available straight from him fully assembled, but with documentation this good the path to a home build should be well lit and accessible. He’s even chosen parts with an eye towards long availability, low cost, and ease of sourcing so no matter when you decide to get started it should be a snap.
It was difficult to choose just a few images from [Sawaiz]’s mesmerizing collection, so if you need more feast your eyes on the expanded set after the break.
Continue reading “A HALO Of LEDs For Every Ear” →