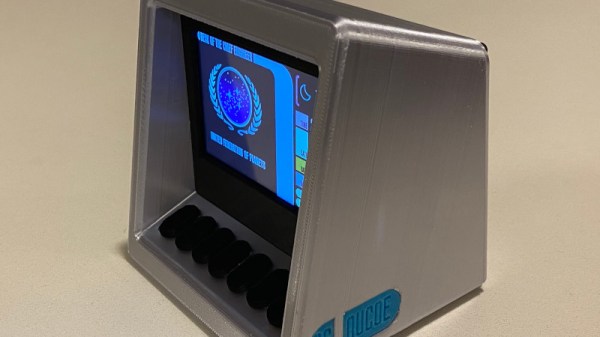
Arduino Does Multitouch

A lot of consumer gadgets use touch sensors now. It is a cheap and reliable way to replace a variety of knobs and switches on everything from headphones to automobiles. However, creating a custom touch controller for a one-off project can be daunting. A recent ACM paper shows how just about any capacitive sensor can work as a multitouch sensor with nothing more than an Arduino although a PC running processing interprets the data for higher-level functions.

The key is that the Arduino excites the grid using PWM and then examines the signal coming out of the grid. Finger poking changes the response quite a bit and the Arduino can sense it using the analog to digital converters onboard. You can find the actual software kit online. The tutorial document is probably more interesting than the ACM paper if you only want to use the kit.

The optimum drive frequency is 10 MHz. The examples rely on harmonics of a lower frequency PWM signal to get there. The analog conversion, of course, isn’t that fast but since your finger touch rate is relatively slow, they treat the signal as an amplitude-modulated input which is very easy to decode.

The sensors can be conductive ink, thread, or copper strips. There are several example applications, including a 3D printed bunny you can pet, a control panel on a sleeve, and an interactive greeting card.

The sensor forms an image and OpenCV detects the actual touch configuration. It appears you can use the raw data from the Arduino, too, but it might be a little harder.

We imagine aluminum foil would work with this technique. If you get to the point of laying out a PCB, this might come in handy.

UNIX Version 0, Running On A PDP-7, In 2019

WIth the 50th birthday of the UNIX operating system being in the news of late, there has been a bit of a spotlight shone upon its earliest origins. At the Living Computers museum in Seattle though they’ve gone well beyond a bit of historical inquiry though, because they’ve had UNIX (or should we in this context say unix instead?) version 0 running on a DEC PDP-7 minicomputer. This primordial version on the original hardware is all the more remarkable because unlike its younger siblings very few PDP-7s have survived.

The machine running UNIX version 0 belongs to [Fred Yearian], a former Boeing engineer who bought his machine from the company’s surplus channel at the end of the 1970s. He restored it to working order and it sat in his basement for decades, while the vintage computing world labored under the impression that including the museum’s existing machine only four had survived — of which only one worked. [Fred’s] unexpected appearance with a potentially working fifth machine, therefore, came as something of a surprise.

To load the OS a disk emulator was connected to the machine, and for possibly the first time in many decades a new UNIX version 0 device driver was written to enable it to be used. The first login was the user “dmr”, a homage to UNIX co-creator Dennis M. Ritchie.

Continue reading “UNIX Version 0, Running On A PDP-7, In 2019”

The ESP32, Laid Bare

Most readers will be familiar with the ESP32, Espressif’s dual-core processor with integrated WiFi and Bluetooth. Few of us though will have explored all of its features, including its built-in encryption facilities and secure booting capability. With these, a developer can protect and secure their code, and keep their devices secure.

That sense of security may now be illusory though, thanks to [LimitedResults] who has developed a series of attacks on the chip that compromise its crypto core, secure boot, and flash encryption. This enables both the chance of arbitrary code execution and firmware extraction on locked-down ESP32 devices.

To achieve all this he used a glitching technique on the device’s power supply, inserting a carefully timed glitch in the rail to coincide with a particular instruction being executed. For those of us who are not experts in this technique, he provides a basic primer with a description of his home-made glitcher made using a CMOS switch chip.

It appears that there is no solution to this attack short of new silicon, however, it should be borne in mind that it’s something that depends upon a specialist hacker with a well-equipped bench, and is thus only likely to be a significant headache to manufacturers. But it undermines a key feature of a major line of microcontrollers, and as such it remains a significant piece of work.

Harmonic Analyzer Does It With Cranks And Gears

Before graphic calculators and microcomputers, plotting functions were generally achieved by hand. However, there were mechanical graphing tools, too. With the help of a laser cutter, it’s even possible to make your own!

The build in question is nicknamed the Harmonic Analyzer. It can be used to draw functions created by adding sine waves, a la the Fourier series. While a true Fourier series is the sum of an infinite number of sine waves, this mechanical contraption settles on just 5.

This is achieved through the use of a crank driving a series of gears. The x-axis gearing pans the notepad from left to right. The function gearing has a series of gears for each of the 5 sinewaves, which work with levers to set the magnitude of the coefficients for each component of the function. These levers are then hooked up to a spring system, which adds the outputs of each sine wave together. This spring adder then controls the y-axis motion of the pen, which draws the function on paper.

It’s a great example of the capabilities of mechanical computing, even if it’s unlikely to ever run Quake. Other DIY mechanical computers we’ve seen include the Digi-Comp I and a wildly complex Differential Analyzer. Video after the break.

Continue reading “Harmonic Analyzer Does It With Cranks And Gears”

How To Design A BGA Breakout Module

Surface mount devices can take some adjusting to for hackers primarily used to working with through-hole components. Despite this, the lure of the hottest new parts has enticed even the most reticent to learn to work with the technology. Of course, time rolls on and BGA parts bring further difficulties. [Nate] from SparkFun worked on the development of the RedBoard Artemis, and broke down the challenges involved.

The RedBoard Artemis is an Arduino-compatible devboard built around the Ambiq Apollo3 chip. In addition to packing Bluetooth and 1 MB of Flash, it’s also capable of running TensorFlow models and using tiny amounts of power. The chip comes in an 81-Ball Grid Array at 0.5mm pitch, which meant SparkFun’s usual PCB fabrication methods weren’t going to cut it.

An initial run of prototype boards was run using 4 layers, blind and buried vias, and other fancy tricks to break out all the necessary signals. While this worked well, it was expensive and inefficient. The only part of the board that needed such fabrication was around the chip itself; the rest of the board could be produced with cheaper 2-layer methods. To improve this for mass production, instead, an SMD module was created to house the Apollo3, which could then be dropped into new designs on cheaper boards as necessary.

[Nate] does a great job of explaining the engineering involved, as well as sharing useful tips for others going down a similar path. So far, this is just part 1, with future posts promising to cover the RF shield design and FCC certification process. [Nate] has always been keen to share his wisdom, and we can’t wait to see what comes next!

FieldKit Is The Grand Prize Winner Of The 2019 Hackaday Prize

FieldKit, an open-source, modular sensor system for conducting research in harsh environments has just been named the Grand Prize winner of the 2019 Hackaday Prize. The award for claiming the top place and title of “Best Product” in this nine-month global engineering initiative is $125,000. Five other top winners and five honorable mentions were also named during this evening’s Hackaday Prize Ceremony, held during the Hackaday Superconference in Pasadena, California.

This year’s Hackaday Prize focused on product development. From one good idea and a working prototype, entrants were encouraged to iterate on their UX, industrial design, ergonomics, software, and mechanical plans as they worked toward a product that is both manufacturable and meets the needs of the user it has been designed for. Out of twenty finalists, the top eleven are covered below. Over $200,000 in cash prizes have been distributed as part of this year’s initiative where thousands of hardware hackers, makers, and artists compete to build a better future. Continue reading “FieldKit Is The Grand Prize Winner Of The 2019 Hackaday Prize”

Behind The Scenes Of The 2019 Superconference Badge

If you count yourself among the several hundred of our closest friends that have joined us at Supplyframe HQ for the 2019 Hackaday Superconference, then by now you’ll have your hands on one of this year’s incredible FPGA badges. It should come as no surprise that an incredible amount of time and effort went into developing and manufacturing this exceptionally unique piece of hardware; the slick gadget in your hands today took nearly an entire year to develop, and work continued on it until very literally the last possible moment.

Badge designer Jeroen Domburg (aka Sprite_TM), Hackaday staff, and a team of dedicated volunteers were still putting the final touches on these ambitious devices less than 24 hours before they were distributed to the first wave of Superconference attendees. Naturally, that’s not exactly how things were supposed to go. But when you’ve got a group of people that want to push the envelope and build something truly incredible, convincing them to actually stop working can be a challenge in itself.

In fact, development of the badge is still ongoing. Fixes and improvements are being made to the software even as you read this, and if you haven’t already, you should upgrade your badge to make sure you’ve got the latest and greatest from our international team of wizards. We all know that conference badges have an unfortunate habit of languishing on the shelf and collecting dust, but the 2019 Superconference badge was built to challenge you for longer than just one weekend. Consider yourself warned: for every Supercon badge that gets tossed in a drawer come Monday, Sprite_TM will shed a single tear.

After the break, come along as we turn back the clock and take a look at the last minute dash to get 500+ badges programmed and ready to go before the doors opened for the 2019 Hackaday Superconference.

Continue reading “Behind The Scenes Of The 2019 Superconference Badge”