Hackaday editors Mike Szczys and Elliot Williams talk over the last three weeks full of hacks. Our first “back to normal” podcast after Supercon turns out to still have a lot of Supercon references in it. We discuss Raspberry Pi 4’s HDMI interfering with its WiFi, learn the differences between CoreXY/Delta/Cartesian printers, sip on Whiskey aged in an ultrasonic jewelry cleaner, and set up cloud printing that’s already scheduled for the chopping block. Along the way, you’ll hear hints of what happened at Supercon, from the definitive guide to designing LEDs for iron-clad performance to the projects people hauled along with them.
Take a look at the links below if you want to follow along, and as always tell us what you think about this episode in the comments!
Take a look at the links below if you want to follow along, and as always, tell us what you think about this episode in the comments!
On Star Trek, all Kirk and friends had to do was snap the button on the always conveniently located intercom panel, start talking, and the intended recipient would immediately respond no matter where they were in the ship. How did it work? Who knows. In spite of, or perhaps even because of, the lightly-explained nature of the technology, the cherry-red wall intercoms still hold a certain charm for fans of the groundbreaking show.
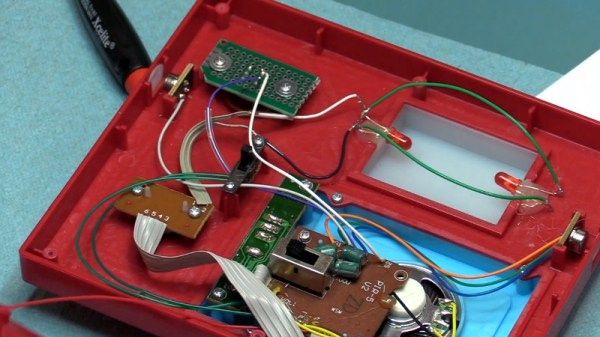
A viewer sent [Fran Blanche] a scaled down replica of the intercom from ThinkGeek, and while it certainly looks fairly close to the original prop, it has a couple of annoying design elements. When triggered by the side-mounted motion sensors, the panel will play either the iconic swoosh of the automatic doors or the “Red Alert” sound effect. It’s a cute idea for a kid’s bedroom maybe, but not exactly ideal for somebody who regularly records YouTube videos.
Peak 23rd century technology
So the first order of business was to cut the motion sensors out of the circuit and replace them with a push button. [Fran] draws up a quick diagram to explain how these sensors work, and shows that they can easily be bypassed with a momentary switch since they normally bring the line high when triggered. She then converted the indicator light on the right side of the panel into a button to enable the alert sound effect, which is more accurate to how it worked in the show anyway.
The other issue, and perhaps the most egregious to Star Trek fans, is that the “Red Alert” indicator on the top of the panel didn’t actually flash like it did in the show. To design and build this panel and not put a few LEDs behind that piece of frosted plastic seems a bit like producing a Matchbox car and forgetting to make the wheels spin. With a couple of red LEDs and a bit of new wiring, the oversight was quickly rectified.
While it might not be perfect, at least ThinkGeek actually produced a functional product this time. It could have ended up like one of their April Fool’s “products” that never get put into production, forcing a desperate Trekkie to begrudgingly build his own version.
CVE-2019-5700 is a vulnerability in the Nvidia Tegra bootloader, discovered by [Ryan Grachek], and breaking first here at Hackaday. To understand the vulnerability, one first has to understand a bit about the Tegra boot process. When the device is powered on, a irom firmware loads the next stage of the boot process from the device’s flash memory, and validates the signature on that binary. As an aside, we’ve covered a similar vulnerability in that irom code called selfblow.
On Tegra T4 devices, irom loads a single bootloader.bin, which in turn boots the system image. The K1 boot stack uses an additional bootloader stage, nvtboot, which loads the secure OS kernel before handing control to bootloader.bin. Later devices add additional stages, but that isn’t important for understanding this. The vulnerability uses an Android boot image, and the magic happens in the header. Part of this boot image is an optional second stage bootloader, which is very rarely used in practice. The header of this boot image specifies the size in bytes of each element, as well as what memory location to load that element to. What [Ryan] realized is that while it’s usually ignored, the information about the second stage bootloader is honored by the official Nvidia bootloader.bin, but neither the size nor memory location are sanity checked. The images are copied to their final position before the cryptographic verification happens. As a result, an Android image can overwrite the running bootloader code. Continue reading “This Week In Security: Tegra Bootjacking, Leaking SSH, And StrandHogg”→
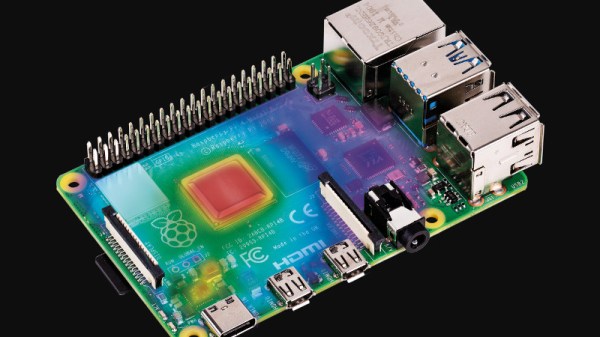
When the Raspberry Pi 4 was first launched, one of its few perceived flaws was that it had a propensity to get extremely hot. It’s evidently something the Pi people take very seriously, so in the months since they have addressed the problem with a set of firmware updates. Now they’ve taken a look at the effect of the fixes in a piece on the Raspberry Pi web site, and it makes for an interesting comparison.
The headline figure is that all updates together remove about a watt of power from the load, a significant quantity for what is still a board that can run from a capable phone charger. Breaking down the separate parts of the updates is where the meat of this story lies though, as we see the individual effects of the various USB, memory, power management and clocking updates. In temperature terms they measure an on-load drop from 72.1 °C to 58.1 °C, which should be a significant improvement for any Pi 4 owner.
There is a debate to be had over in what role a computer such as a Pi should serve. As successive revisions become ever more desktop-like in their capabilities, do they run the risk of abandoning the simplicity of a cheap Linux box as a component that makes us come back for more? It’s a possibility, but one they have very well addressed by developing the Pi Zero. They have also successfully avoided the fate of the Arduino — inexorably tied to its ATmega powered original line despite newer releases. As we have frequently said when reviewing Raspberry Pi competitors, it’s the software support that sets them apart from the herd, something this power-draw story demonstrates admirably.
Anyone who was at Supercon will no doubt remember the badges that dangled around everyone’s neck. Some were reasonable, while some were neck-straining monsters that added anything and everything to hack the badge into something cool. We saw everything from AI cameras to a fully autonomous vehicle being worn with pride.
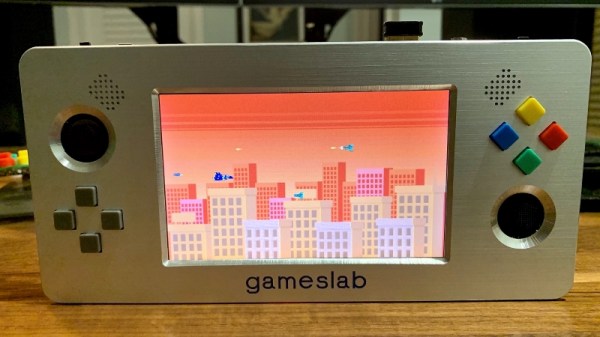
Sadly, one that we missed was Gameslab, [Craig J. Bishop]’s FPGA-based portable game console. No, not that FPGA-based game console; in an example of great minds thinking alike, [Craig] had actually been toying with his own handheld console design for quite some time. And we have to say the results are stunning.
The FPGA at the heart of this is a Xilinx Zynq FPGA-ARM Cortex A9 combo SoC, normally a prohibitively expensive monster of a chip. When [Craig] found “refurbished” Zynq chips on eBay for less than 10% of the cost of new units, it was literally game-on for the build. The console required a six-layer PCB to support the big BGA chip and the hundreds of support components around it. There’s a 5″ TFT touchscreen with a video controller implemented in the FPGA, a stereo sound system, and all the buttons and thumbsticks you’d expect on a modern console.
For our money, the best part is the case, about which [Craig] has yet to share any details. But it looks like a machined aluminum plate with wide chamfers around each cutout that contrast nicely with the brushed surface. We’ll be looking forward to more details on that and on progress with Gameslab.
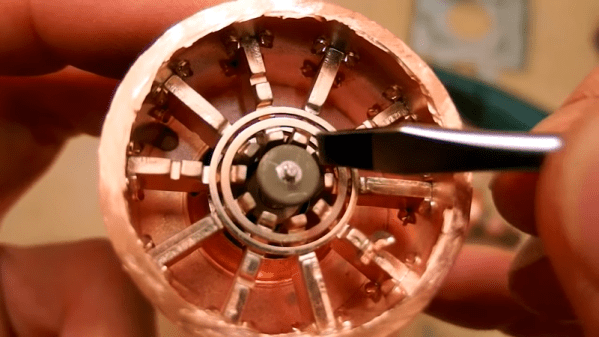
Microwave ovens are everywhere, and at the heart of them is a magnetron — a device that creates microwaves. [DiodeGoneWild] tore one apart to show us what was inside and how it works. If you decide to do this yourself, be careful. The magnetron may have insulators made of beryllium oxide and inhaling dust from the insulator even one time can cause an incurable lung condition.
Luckily, you can’t get a lung problem from watching a video. In addition to just seeing the guts of the magnetron, there are also explanations about how everything works with some quick sketches to illustrate the points.
Have you ever taken a look at all the information that Google has collected about you over all these years? That is, of course, assuming you have a Google account, but that’s quite a given if you own an Android device and have privacy concerns overruled by convenience. And considering that GPS is a pretty standard smartphone feature nowadays, you shouldn’t be surprised that your entire location history is very likely part of the collected data as well. So unless you opted out from an everchanging settings labyrinth in the past, it’s too late now, that data exists — period. Well, we might as well use it for our own benefit then and visualize what we’ve got there.
Location data naturally screams for maps as visualization method, and [luka1199] thought what would be better than an interactive Geo Heatmap written in Python, showing all the hotspots of your life. Built around the Folium library, the script reads the JSON dump of your location history that you can request from Google’s Takeout service, and overlays the resulting heatmap on the OpenStreetMap world map, ready for you to explore in your browser. Being Python, that’s pretty much all there is, which makes [Luka]’s script also a good starting point to play around with Folium and map visualization yourself.
While simply just looking at the map and remembering the places your life has taken you to can be fun on its own, you might also realize some time optimization potential in alternative route plannings, or use it to turn your last road trip route into an art piece. Just, whatever you do, be careful that you don’t accidentally leak the location of some secret military facilities.