Starlite: Super Material That Protects Hands From Pesky Blowtorches

A super-material that’s non-toxic, highly flame resistant, and a good enough insulator, you can literally hold fire in your hand? Our interest was definitely caught by [NightHawkInLight] and his recent video about Starlite, embedded below the break.

Starlite was the brainchild of English hairdresser, [Maurice Ward]. The famous demo was an egg, coated in Starlite, and blasted with a blowtorch for a full 5 minutes. After heating, he cracked the egg to show it still raw. The inventor died in 2011, and apparently the recipe for Starlite died with him.

[NightHawkInLight] realized he had already made something very similar, the Pharoah’s Serpent demonstration, also known as a black snake. In both examples, a carbon foam is produced, providing flame resistance and insulation. A bit of trial and error later, and he’s out doing the original Starlight demo, pointing the blow torch at his hand instead of an egg.

Continue reading “Starlite: Super Material That Protects Hands From Pesky Blowtorches”

The Very Slow Movie Player Does It With E-Ink

Most displays are looking to play things faster. We’ve got movies at 60 frames per second, and gaming displays that run at 144 fps. But what about moving in the other direction? [Bryan Boyer] wanted to try this out, so he built the VSMP, or Very Slow Movie Player. It’s a neat device that plays back a movie at about 24 fph (frames per hour) on an e-ink display to demonstrate something that [Bryan] calls Slow Seeing, which, he says “helps you see yourself against the smear of time.” A traditional epic-length movie is now going to run you greater than 8,000 hours of viewing.

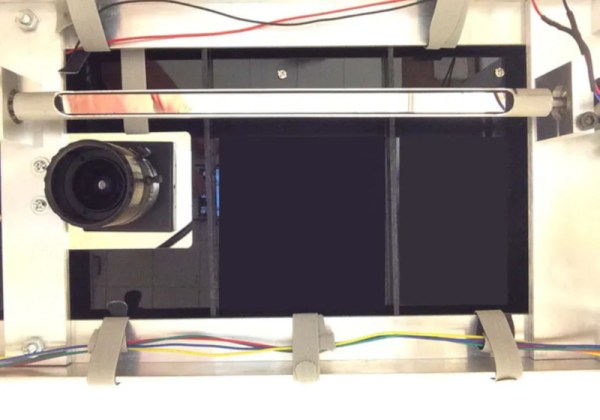
Artistic considerations aside, it’s an interesting device from a technical point of view. [Bryan] built it from a 7.4-inch e-ink display from Pervasive Displays. The controller is connected to a Raspberry Pi Zero, which is running a Python script to convert a frame of the movie file into a dithered file, then send it to the display. Because the Pi Zero isn’t a very fast computer, this takes some time, and thus the slow speed of the VSMP. Originally, [Bryan] had set it up to run as fast as the system could manage, which was about 25 seconds per frame, or about 2 frames per minute. He decided to slow it down a bit further to the more attractive multiple of 24 frames per hour to contrast with the 24 frames per second of the original movie. He did this by using a CRON job that kicks of the conversion script once every 2.5 minutes and increments the frame counter. All of this is topped off with a nice 3D-printed case that has a lovely interference pattern to make a rather neat and intriguing project.

Perhaps the best part of this is see a time-lapse of the VSMP — life moves quickly around it while 2001: A Space Odyssey plays at normal speed.

Continue reading “The Very Slow Movie Player Does It With E-Ink”

This Raspberry Pi Is A Stereo Camera And So Much More

Over the years we have featured a huge array of projects featuring the Raspberry Pi, but among them there is something that has been missing in all but a few examples. The Raspberry P Compute Module is the essentials of a Pi on a form factor close to that of a SODIMM module, and it is intended as a way to embed a Pi inside a commercial product. It’s refreshing then to see [Eugene]’s StereoPi project, a PCB that accepts a Compute Module and provides interfaces for two Raspberry Pi cameras.

What makes this board a bit special is that as well as the two camera connectors at the required spacing for stereophotography it also brings out all the interfaces you’d expect on a regular Pi, so there is the familiar 40-pin expansion header as well as USB and Ethernet ports. It has a few extras such as a pin-based power connector, and an on-off switch.

Where are they going with this one? So far we’ve seen demonstrations of the rig used to create depth maps with ROS (Robot Operating System). But even more fun is seeing the 3rd-person-view rig shown in the video below. You strap on a backpack that holds the stereo camera above your head, then watch yourself through VR goggles. Essentially you become the video game. We’ve seen this demonstrated before and now it looks like it will be easy to give it a try yourself as StereoPi has announced they’re preparing to crowdfund.

So aside from the stereophotography why is this special? The answer comes in that it is as close as possible to a fresh interpretation of a Raspberry Pi board without being from the Pi Foundation themselves. The Pi processors are not available to third party manufacturers, so aside from the Odroid W (which was made in very limited numbers) we have never seen a significant alternative take on a compatible Raspberry Pi. The idea that this could be achieved through the Compute Module is one that we hope might be taken up by other designers, potentially opening a fresh avenue in the Raspberry Pi story.

The Raspberry Pi Compute Module has passed through two iterations since its launch in 2014, but probably due to the lower cost of a retail Raspberry Pi we haven’t seen it in many projects save for a few game consoles. If the advent of boards like this means we see more of it, that can be no bad thing.

Continue reading “This Raspberry Pi Is A Stereo Camera And So Much More”

3D-Printing Wankel Engine From Mazda’s Beloved “Rotary Rocket”

Although there was briefly a company called Rotary Rocket, the term is much better known as a nickname for the Mazda RX-7 — one of the few cars that used a Wankel, or rotary, engine. If you ever wondered how these worked, why not print a model? That’s what [Engineering Explained] did. They printed a 1/3 scale model and made a video explaining and demonstrating its operation. The model itself was from Thingiverse, created by [EricThePoolBoy].

One thing we really liked about the model was the use of lights to show the different stages of combustion. Cool air intake is a blue light, hot air is red, and so on. It really helps visualize what’s happening. You can watch the video below.

If you haven’t seen a Wankel before, it is a clever design. It has very few moving parts and offers very smooth power transfer and high power to weight ratio. The downside, though, is that the engine deliberately burns oil to lubricate and seal, so it is difficult to meet emission standards and requires a lot of oil. The fuel efficiency of current designs is not very good either, especially since manufacturers will often trade fuel efficiency for better emissions.

If you’d like to read more about the Wankel, check out our earlier post (and the 165 comments attached). We also looked at — or rather through — another Wankel earlier this year.

Continue reading “3D-Printing Wankel Engine From Mazda’s Beloved “Rotary Rocket””

Turning LEGO Blocks Into Music With OpenCV

We’re not sure what it is, but something about LEGO and music go together like milk and cookies when it comes to DIY musical projects. [Paul Wallace]’s Lego Music project is a sequencer that uses the colorful plastic pieces to build and control sound, but there’s a twist. The blocks aren’t snapped onto anything; the system is entirely visual. A computer running OpenCV uses a webcam to watch the arrangement of blocks, and overlays them onto a virtual grid where the positions of the pieces are used as inputs for the sequencer. The Y axis represents pitch, and the X axis represents time.

Embedded below are two videos. The first demonstrates how the music changes based on which blocks are placed, and where. The second is a view from the software’s perspective, and shows how the vision system processes the video by picking out the colored blocks, then using their positions to change different values which has an effect on the composition as a whole.

Continue reading “Turning LEGO Blocks Into Music With OpenCV”

POV Tops Hobbyist Abilities

Sometimes a beautiful project is worth writing on that merit alone, but when it functions as designed,someone takes the time to create a thorough and beautiful landing page for their project, we get weak in the knees. We feel the need to grab the internet and point our finger for everyone to see. This is one of those projects that checks all our boxes. [Nathan Petersen] made a POV toy top called Razzler, jumping through every prototyping hoop along the way. The documentation he kept is what captured our hearts.

The project is a spinning top with an integrated persistence-of-vision (POV) display. That’s the line of LEDs that you see here. To sync up the patterns, the board includes an IMU, but detecting angular velocity with either gyroscope or accelerometer proved problematic. [Nathan’s] writeup of this is worth the read itself, but you’ll also enjoy the CNC workworking part of the project used to create the body of the spinning top.

This was [Nathan]’s first big solo project, and so many of the steps are explained by someone who just entered the deep-end very quickly. If you have experience, you may grin at the simplified reasonings, but for a novice, it makes for an approachable lesson. The way he selects hardware and firmware is pragmatic and perhaps even overkill, so you know he’s going into engineering. This overshot saved him when there were communication problems which needed a sacrifice of some processing power to run I2C on some GPIO.

We hope you enjoy reading about this combinations of POV, firmware (or is it?), and centrifugal force.

Infinity Cube Is Gorgeous Yet Simple

Typically when we hear the words “LED” and “Cube”, we think of small blinking devices on protoboard designed to flex one’s programming and soldering skills. However, while [Heliox]’s Cube Infini could be described as “a cube of LEDs”, it’s rather a different beast (video in French, subtitles available).

The cube starts with a 3D printed frame, designed in Fusion 360. The devil really is in the details — [Heliox] puts in nice touches, such as the artistic cube relief on the base, and the smart integrated cable management in the edges. The faces of the cube are plexiglass sheets, covered with a one-way reflective film that is applied in a similar manner to automotive window tint. For lighting, a high-density LED strip is fitted to the inside edges, chosen for maximum visual effect. It’s controlled by an IR remote and a cheap control module from Amazon.

While the build contains no particularly advanced tools, materials, or techniques, the final result is absolutely stunning. It’s a piece we’d love to have as a lamp in a stylish loungeroom or study. [Heliox] does a great job of explaining how the cube is designed and fits together, and it’s a testament to just what can be achieved with a little ingenuity and hard work.

Once you’re done here, check out this ping-pong based build.

Continue reading “Infinity Cube Is Gorgeous Yet Simple”