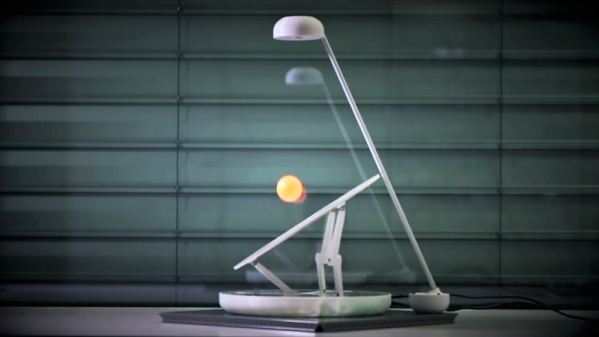
Do Space Probes Fail Because Of Space Weather?

Over the past few decades, numerous space probes sent to the far-flung reaches of the Solar System have fallen silent. These failures weren’t due to communications problems, probes flying into scientifically implausible anomalies, or little green men snatching up the robotic scouts we’ve sent out into the Solar System. No, these space probes have failed simply because engineers on Earth can’t point them. If you lose attitude control, you lose the ability to point a transmitter at Earth. If you’re managing a space telescope, losing the ability to point a spacecraft turns a valuable piece of scientific equipment into a worthless, spinning pile of junk.

The reasons for these failures is difficult to pin down, but now a few people have an idea. Failures of the Kepler, Dawn, Hayabusa, and FUSE space probes were due to failures of the reaction wheels in the spacecraft. These failures, in turn, were caused by space weather. Specifically, coronal mass ejections from the Sun. How did this research come about, and what does it mean for future missions to deep space?

Continue reading “Do Space Probes Fail Because Of Space Weather?”

How Big Is Your Oscilloscope? One Inch?

We are anxious to see the finished product of [Mark Omo’s] entry into our one square inch project. It is a 20 megasample per second oscilloscope that fits the form factor and includes a tiny OLED screen. We will confess that we started thinking if you could use these as replacements for panel meters or find some other excuse for it to exist. We finally realized, though, that it might not be very practical but it is undeniably cool.

There are some mockup PCB layouts, but the design appears feasible. A PIC32MZ provides the horsepower. [Mark] plans to use an interleaved mode in the chip’s converters to get 20 megasamples per second and a bandwidth of 10 MHz. It appears he’ll use DMA to drive the OLED. In addition to the OLED and the PIC, there’s a termination network and a variable gain stage and that’s about it.

Continue reading “How Big Is Your Oscilloscope? One Inch?”

Automagic Tool Makes KiCAD Schematic Symbols From PDFs

Last time we talked about a KiCAD tool it was to describe a way to make the zen-like task of manual assembly more convenient. But what about that most onerous of EE CAD tasks, part creation? Home makers probably don’t have access to expensive part library subscriptions or teams of people to create parts for them, so they are left to the tedium of creating them by hand. What if the dream tool existed that could read the darn PDF by itself and make a part? It turns out [Sébastien] made that tool and it’s called uConfig.

uConfig has a pretty simple premise. It scrapes manufacturer datasheets in PDF form, finds what it thinks are diagrams of parts with pin names, functions, etc, and emits the result as parts in a KiCAD library. To aid in the final conversion [Sébastien] added rules engine which consume his custom KiCAD Style Sheets which specify how to categorize pins. In the simple case the engine can string match or use regex to let you specify things like “all pins named VDD[A-C] should be power pins”. But it can also be used to move everything it thinks belongs to “GPIOB” and stick them on the bottom of the created symbol. We could imagine features like that would be of particular use breaking out gigantic parts like a 400 ball BeagleBone on a chip.

Thanks for the tip [arturo182]!

Better Than Original Pong Using Arduino

Games like Pong are legendary, not only in the sense that they are classic hours fun but also that they have a great potential for makers in stretching their learning legs. In an attempt at recreating the original paddle games like Pong and Tennis etc, [Grant Searle] has gone into the depths of emulating the AY-2-8500 chip using an Arduino.

For the uninitiated, the AY-3-8500 chip was the original game silicon that powered Ball & Paddle that could be played on the domestic television. Running at 2 MHz, it presented a 500 ns pixel width and operated to a maximum of 12 Volts. The equivalent of the AY-3-8500 is the TMS1965NLA manufactured by Texas Instruments for those who would be interested.

[Grant Searle] does a brilliant job of going into the details of the original chip as well as the PAL and NTSC versions of the device. This analysis will come in handy should anyone choose to make a better version. He talks about the intricacies of redrawing the screen for the static elements as well as the ball that bounces around the screen. The author presents details on ball traversal, resolution, 2K memory limit and its workarounds.

Then there are details on the sound and the breadboard version of the prototype that makes the whole write-up worth one’s time. If you don’t fancy the analog paddles and would rather use a wireless modern-day touch, check out Playing Pong with Micro:bits

Thanks [Keith O] for the tip.

No Signal For Your Radio-Controlled Watch? Just Make Your Own Transmitter

You can win any argument about the time when you have a radio controlled watch. Or, at least, you can if there’s any signal. [Henner Zeller] lives in a place where there is no reception of the DCF77 signal that his European wristwatch expects to receive. Consequently, he decided to make his own tiny transmitter, which emulates the DCF77 signal and allows the watch to synchronise.

A Raspberry Pi Zero W is the heart of the transmitter, and [Henner] manages to coax it into generating 77500.003Hz on a GPIO pin – close enough to the 77.5kHz carrier that DCF77 uses. The signal is AM, and transmits one bit/s, repeating every minute. A second GPIO performs the required attenuation, and a few loops of wire are sufficient for an antenna which only needs to work over a few inches. The Raspberry Pi syncs with NTP Stratum 1 servers, which gives the system time an accuracy of about ±50ms. The whole thing sits in a slick 3D printed case, which provides a stand for the watch to rest on at night; this means that every morning it’s synchronised and ready to go.

[Henner] also kindly took the time to implement the protocols for WWVB (US), MSF (UK) and JJY (Japan). This might be just as well, given that we recently wrote about the possibility of WWVB being switched off. Be sure to check the rules in your area before giving this a try.

We’ve seen WWVB emulators before, like this ATtiny45 build, but we love that this solution is an easy command line tool which supports many geographical locations.

A No-Fuss Rack Of Ham

With any hobby, it’s easy for things to get out of hand. Equipment can get scattered around the house, chargers lost in the car while cables languish in the shed… but it doesn’t have to be this way. With a go-bag or go-box, everything required is kept together in a ready-to-go condition. Heading out for a day of filming? Grab the go-bag and you’re all set. [oliverkrystal] wanted to apply this to a ham radio setup, and built this ham shack-in-a-box.

Wanting to use proven components and keep things rugged and usable, the build starts with a 6U-sized plastic rack mount case. This saves weight over plywood versions and is nice and tough. A combination of off-the-shelf rack mount parts and 3D printed pieces are brought together to make it all happen. [oliverkrystal]’s printed cable organisers are a particular treat, and something we think could help a lot of builds out there.

It all comes together as an impressive self-contained unit with two radios, an antenna tuner, in-built illumination and other useful features. No longer does one have to scramble around preparing gear for the weekend’s hamventures – grab the box and you’re ready to go!

Perhaps you don’t have a lot of ham gear, though? Try this setup to get going for less than $100.

ATX Adapter For The IBM PCJr Now Available

We’ve mentioned previously the challenges that come with maintaining vintage computers which in some cases are pushing 40 years old. Components, even high quality ones, eventually fail and need to be replaced. Now if it’s a fairly popular vintage machine, replacement parts usually aren’t too hard to come by. But what if you’re dealing with a machine that’s not just vintage, but was also such a commercial flop that parts are scarce?

Such is the life for anyone who owns one of the 500,000 IBM PCJrs that Big Blue managed to get out of the door during the year or so the product was on the market. As [AkBKukU] found, a replacement AC adapter for the odd-ball computer was going to cost more than what he paid for the thing, so he set to work on creating an adapter so he could use a modern ATX PSU on the machine. After a couple of months of ironing out the kinks, the design is finally ready for consumption.

In the end, the PCB design itself is quite simple. It’s really just a matter of switching around some pins from the standard ATX plug to the edge connector on the PCJr. There’s also a connector for powering a floppy drive, as well as headers for a fan and power switch.

[AkBKukU] has come up with two ways to use the adapter. You can either go with a standard ATX PSU, in which case it will need to sit outside the machine due to its size, or use a PicoPSU which allows you to keep the whole thing internal. If you don’t mind spending the cash, the PicoPSU method is a much cleaner installation that still provides plenty of power. Depending on which route you take, there are different 3D printed plates to adapt the computer’s rear panel to fit the new hardware.

All the files to build your own version are in the GitHub repository, and [AkBKukU] is doing some low volume runs of both kits and assembled adapter. If this project looks familiar, it’s because we reported on it back when it was still a hand-scratched PCB that didn’t always work as expected.

[Thanks to Gregg for the tip.]

Continue reading “ATX Adapter For The IBM PCJr Now Available”