For better or for worse, a considerable number of the projects we’ve seen here at Hackaday can be accurately summarized as: “Raspberry Pi put into something.” Which is hardly a surprise, the Pi is so tiny that it perfectly lends itself to getting grafted into unsuspecting pieces of consumer tech. But we see far fewer projects that manage to do the same trick with proper x86 PC hardware, but that’s not much of a surprise either given how much larger a motherboard and its components are.
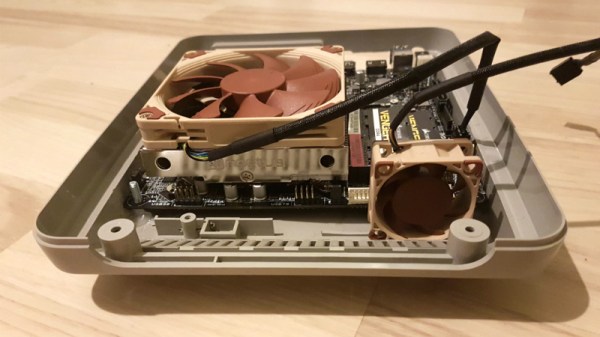
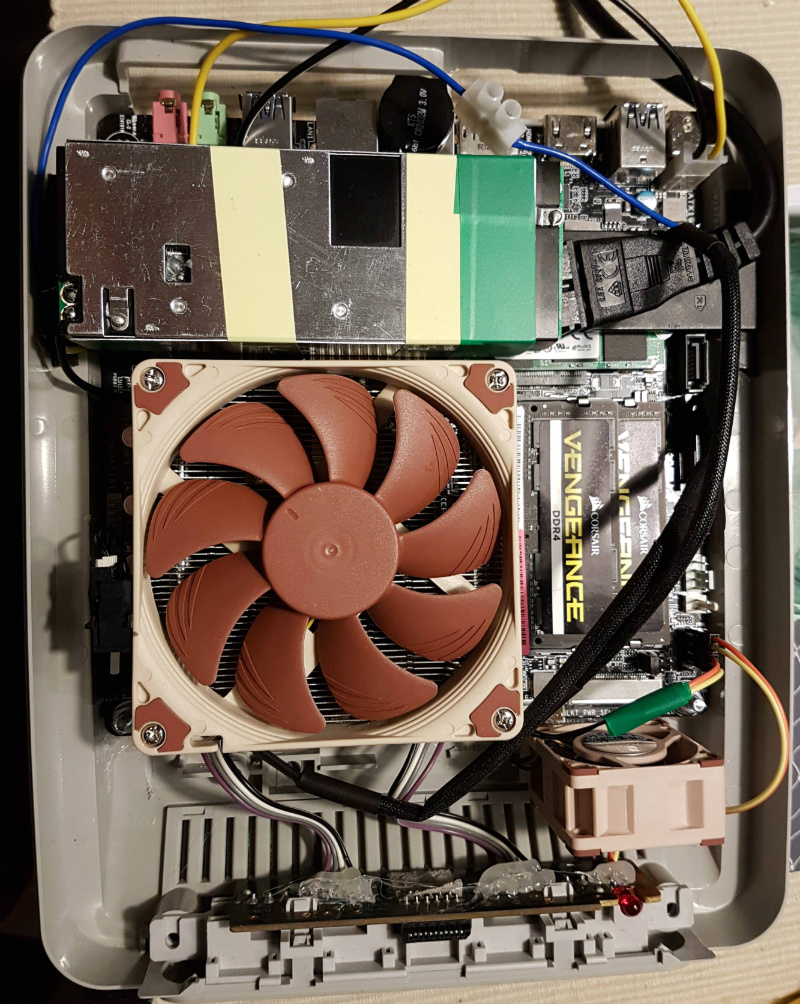 So this PC built into a Super Nintendo case by [NoshBar] is something of a double rarity. Not only does it ditch the plodding Raspberry Pi for a Mini-ITX Intel i5 computer, but it manages to fit it all in so effortlessly that you might think the PAL SNES case was designed by a time traveler for this express purpose. The original power switch and status LED are functional, and you can even pop open the cart slot for some additional airflow.
[NoshBar] started by grinding off all the protruding bits on the inside of the SNES case with a Dremel, and then pushed some bolts through the bottom to serve as mounting posts for the ASUS H110T motherboard. With a low profile Noctua CPU cooler mounted on top, it fits perfectly within the console’s case. There was even enough room inside to add in a modified laptop charger to serve as the power supply.
To round out the build, [NoshBar] managed to get the original power slider on the top of the console to turn the PC on and off by gluing a spring-loaded button onto the side of the CPU cooler. In another fantastic stroke of luck, it lined up almost perfectly with where the power switch was on the original SNES board. Finally, the controller ports have been wired up as USB, complete with an adapter dongle.
[NoshBar] tells us the inspiration for sending this one in was the Xbox-turned-PC we recently covered, which readers might recall fought back quite a bit harder during its conversion.