Hackaday Links Column Banner

Hackaday Links: November 6, 2016

Here’s a life protip for you: get really, really good at one video game. Not all of them; you only want to be good – top 10% at least – at one video game. For me, that’s Galaga. It’s a great arcade game, and now it’s IoT. [justin] has been working on publishing high scores from a Galaga board to the Internet. The electronics are actually pretty simple – just a latch on a memory address, and an ESP8266 for comms.

On with the mergers and acquisitions! Lattice has been sold to Canyon Bridge, a Chinese private equity firm, for $1.3 Billion. Readers of Hackaday should know Lattice as the creators of the iCE40 FPGA platform, famously the target of the only Open Source FPGA toolchain.

The Internet of Chocolate Chip Cookies. Yes, it’s a Kickstarter for a cookie machine, because buying a tube of pre-made cookie dough is too hard. There is one quote I would like to point out in this Kickstarter: “Carbon Fiber Convection Heating Element (1300W) is more energy-efficient than traditional electric elements and heats up instantly.” Can someone please explain how a heating element can be more efficient? What does that mean? Aren’t all resistive heating elements 100% efficient by default? Or are they 0% efficient? The Internet of Cookies broke my brain.

The USB Rubber Ducky is a thumb-drive sized device that, when plugged into a computer, presents itself as a USB HID keyboard, opens up a CLI, inputs a few commands, and could potentially do evil stuff. The USB Rubber Ducky costs $45, a Raspberry Pi Zero and a USB connector costs $6. [tim] built his own USB Rubber Ducky, and the results are great.

Touchless MIDI: The Secret’s In The Mitten

MIDI is a great tool for virtually any musician. Unless you’re a keyboard player, though, it might be hard to use it live. [Evan] recently came up with a great solution for all of the wistful guitar players out there who have been dreaming of having a MIDI interface as useful as their pianist brethren, though. He created a touchless MIDI controller that interfaces directly with a guitar.

Continue reading “Touchless MIDI: The Secret’s In The Mitten”

Harpsi-Gourd Gets You Into Thanksgiving Spirit

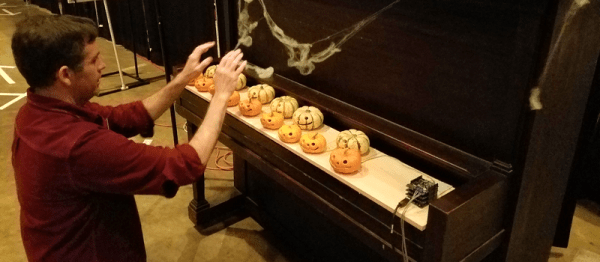
Halloween might be over, but for some of us there’s still another pumpkin-centric holiday right around the corner to give us an excuse to build projects out of various gourds. During a challenge at a local event, [Michael] came up with a virtual cornucopia of uses for all of the squashes he had on hand and built a touch-sensitive piano with all of them.

The musical instrument was dubbed the Harpsi-Gourd and makes extensive use of the Arduino touch-sensitive libraries. Beyond that, the project was constructed to be able to fit into a standard sized upright piano. While only 15 pumpkins are currently employed, the instrument can be scaled up to 48 pumpkins. Presumably they would need to be very small for the lid of the piano to still close.

The Harpsi-Gourd is a whimsical re-imagining of the original Makey Makey which can be used to do all kinds of things, including play Mario Bros. There are all kinds of other food-based musical instruments at your disposal as well, though.

How Hot Is Your Faucet? What Color Is The Water?

How hot is the water coming out of your tap? Knowing that the water in their apartment gets “crazy hot,” redditor [AEvans28] opted to whip up a visual water temperature display to warn them off when things get a bit spicy.

This neat little device is sequestered away inside an Altoids mint tin — an oft-used, multi-purpose case for makers. Inside sits an ATtiny85 microcontroller  — re-calibrated using an Arduino UNO to a more household temperature scale ranging from dark blue to flashing red — with additional room for a switch, while the 10k ohm NTC thermristor and RGB LED are functionally strapped to the kitchen faucet using electrical tape. The setup is responsive and clearly shows how quickly [AEvans28]’s water heats up.

Continue reading “How Hot Is Your Faucet? What Color Is The Water?”

Tony The Pinball Wizard 3D Prints Full Sized Pinball Machine

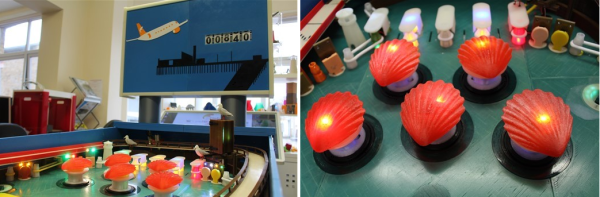
[Tony] has designed and 3D printed a full-sized pinball machine and it’s absolutely incredible. And by 3D-printed, we mean 3D-printed! Even the spring for the plunger printed plastic.

The bumper design is particularly interesting. The magic happens with two rings of conductive filament. the bottom one is stationary while the top one is a multi material print with a flexible filament. When the ball runs into the bumper the top filament flexes and the lower rings contact. Awesome. Who wants to copy this over to a joystick or bump sensor for a robot first? Send us a tip!

The whole document can be read as a primer on pinball design. [Tony] starts by describing the history of pinball from the French courts to the modern day. He then works up from the play styles, rules, and common elements to the rationale for his design. It’s fascinating.

Then his guide gets to the technical details. The whole machine was designed in OpenSCAD. It took over 8.5 km of eighty different filaments fed through 1200+ hours of 3D printing time (not including failed prints) to complete. The electronics were hand laid out in a notebook, based around custom boards, parts, and two Arduinos that handle all the solenoids, scoring, and actuators. The theme is based around a favorite bowling alley and other landmarks.

It’s a labor of love for sure, and an inspiring build. You can catch a video of it in operation after the break.

Pi Zero Powered Skateboard

There’s something to be said for whizzing around town on your own automatic personal transport. It’s even better when you’ve built it yourself. That’s just what [The Raspberry Pi Guy] did – built a Wiimote controlled, Raspberry Pi Zero powered skateboard and whizzed around Cambridge to show it off.

It’s a fairly simple build – skateboard, battery, motor and mount, controller, Wiimote and Pi Zero. The Raspberry Pi controls the motor controller which in turn controls the motor speed. The Python code that [The Raspberry Pi Guy] wrote comes in at around a hundred lines and manages the motor controller and the Bluetooth connection to the Wiimote, which is used to control the board’s speed while the user controls the steering. [The Raspberry Pi Guy] says he’s gotten up to 30 km/h on the skateboard, which, given a powerful enough motor and a non-bumpy surface isn’t hard to believe.

It may seem a bit of overkill, running a bit of Python on a Raspberry Pi to run a motor (others have done it with something simpler) but it’s a fun project nonetheless. [The Raspberry Pi Guy] describes where he got the parts to put the skateboard together and has released the Python code on his GitHub page.

Continue reading “Pi Zero Powered Skateboard”

Icehat on a Raspberry Pi Zero

Give Your RPi A Cool FPGA Hat

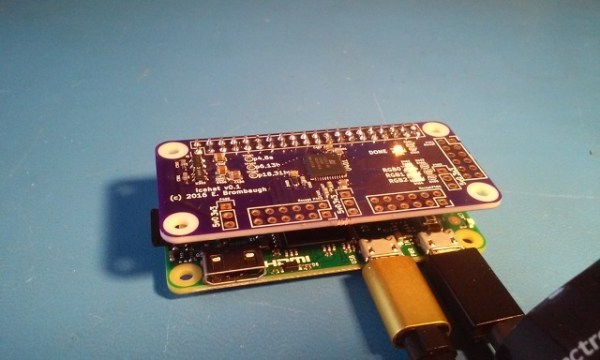
Need additional, custom IO for your Raspberry Pi? Adding an FPGA is a logical way to expand your IO, and allow for high speed digital interfaces. [Eric Brombaugh]’s Icehat adds a Lattice iCE5LP4K-SG48 FPGA in a package that fits neatly on top of the Raspberry Pi Zero. It also provides a few LEDs and Digilent compatible PMOD connectors for adding peripherals. The FPGA costs about six bucks, so this is one cheap FPGA board.

The FPGA has one time programmable memory, but can also be programmed over SPI. This allows the host Pi to flash the FGPA with the latest bitstream at boot. Sadly, this particular device is not supported by the open source Icestorm toolchain. Instead, you’ll need Lattice’s iCEcube2 design software. Fortunately, this chip is supported by the free license.

Icehat is an open source hardware design, but also includes a software application for flashing a bitstream to the FPGA from the Pi and an example application to get you started. All the relevant sources can be found on Github, and the PCB is available on OSHPark.

While this isn’t the first pairing of a Raspberry Pi and FPGA we’ve seen, it is quite possibly the smallest, and can be built by hand at a low cost.