Disappearing Writing With UV Laser Reveals Whitening Agents In Myriad Products

Many a budding maker has experimented with invisible inks, with a wide variety of solutions having a viable set of properties for this purpose. However, [Ben Krasnow] stumbled upon a different method entirely when tinkering with a UV laser.

The effect is subtle, but remains visible for several minutes.

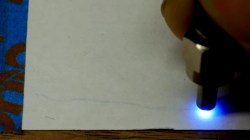
The laser in question was a MNL100 UV laser, configured to produce nanosecond-scale 20 kW pulses at up to 24 Hz, operating at wavelength of 337 nm, deep in the ultraviolet. After piping the laser light through an optical fiber and aiming it at some regular white paper, dark marks were observed, which disappear without a trace over the course of a few minutes.

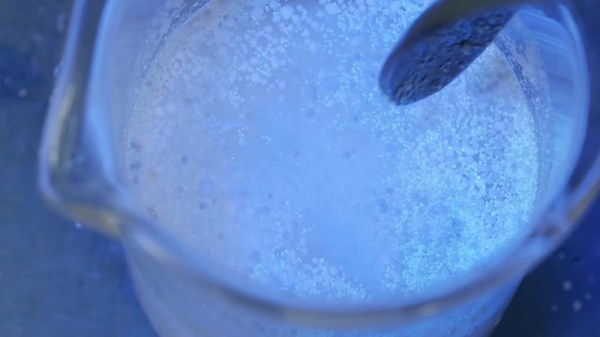
Upon investigation, the dark marks seemed to be the result of fluorescent whitening agents in the paper. It appears they are overloaded or otherwise changed chemically by the laser, and slowly return back to normal over time. Further experiments showed that hydrogen peroxide was able to remove the marks instantly, and an argon atmosphere slowed the rate at which the marks faded.

It’s an interesting look at an odd chemical effect, with the benefit of a well-equipped optics lab to analyse what’s going on. Following the phenomenon down the rabbit hole leads to some tips on how to extract fluorescent additives from common laundry detergent. Be it paper, plastic, or textile, if it looks really bright white to your eye it probably contains stilbene organic compounds as optical brighteners, a hidden trait you never actually thought about before. Video after the break.

Continue reading “Disappearing Writing With UV Laser Reveals Whitening Agents In Myriad Products”

Disrupting Cell Biology Hack Chat With Incuvers

Join us on Wednesday 5 June 2019 at noon Pacific for the Disrupting Cell Biology Hack Chat with Incuvers!

A lot of today’s most successful tech companies have creation myths that include a garage in some suburban neighborhood where all the magic happened. Whether there was literally a garage is not the point; the fact that modest beginnings can lead to big things is. For medical instrument concern Incuvers, the garage was actually a biology lab at the University of Ottawa, and what became the company’s first product started as a simple incubator project consisting of a Styrofoam cooler, a space blanket, and a Soda Stream CO2 cylinder controlled by an Arduino.

From that humble prototype sprang more refined designs that eventually became marketable products, setting the fledgling company on a course to make a huge impact on the field of cell biology with innovative incubators, including one that can image cell growth in real time. What it takes to go from prototype to product has been a common theme in this year’s Hack Chats, and Noah, Sebastian, and David from Incuvers will drop by Wednesday to talk about that and more.

join-hack-chatOur Hack Chats are live community events in the Hackaday.io Hack Chat group messaging. This week we’ll be sitting down on Wednesday June 5 at 12:00 PM Pacific time. If time zones have got you down, we have a handy time zone converter.

Click that speech bubble to the right, and you’ll be taken directly to the Hack Chat group on Hackaday.io. You don’t have to wait until Wednesday; join whenever you want and you can see what the community is talking about.

UV Glow Clock Tells The Time Glowingly

Reddit user [TuckerPi] wanted to make something to thank his father for helping him get through his engineering degrees. He hit it out of the park with this awesome glowing clock. The clock uses a strip of UV glow tape, which is rotated by a small stepper motor. On one side a UV LED is moved up and down by a second motor to make the tape glow underneath it. A Raspberry Pi drives the whole system, writing the time on the tape and rotating it to face outwards. Once a minute the clock rewrites the time on the rubber.

This is a lovely build that shows what [TuckerPI] learned in college, as he built most of the mechanism himself, cutting his own metal gears and parts and making a nice, simple case from African mahogany. He also shows his mistakes, such as his first attempt to build the glowing mechanism from silicon rubber mixed with UV powder. Although it worked initially, he found that the UV powder fell out of the rubber after a short while, so he replaced it with UV glow tape.

[TuckerPi] hasn’t published the full schematics of the device, but there is a lot of detail in the Imgur photos of the build and in the Reddit thread where he discussed the build. Kudos to him for finding an interesting and unique way to thank his father for his help.

Continue reading “UV Glow Clock Tells The Time Glowingly”

The (UV) Writing’s On The Wall

[Michael Karliner]’s Belshazzar, named for the Biblical character upon whose wall the writing appeared, is a unique light painting machine, that tracks an array of UV LEDs across a glow-in-the-dark background to paint transient dot-matrix letters in light. It was one of many cyberpunk-themed art pieces in Null Sector at the 2018 Electromagnetic Field hacker camp this summer.

The row of LEDs hangs down from a carriage that traverses a tubular rail, and is edged forward by means of a stepper motor driving a roller. This arrangement delivers the benefit that it can be scaled for displays of any length. The LEDs are driven from an Arduino via a Texas Instruments TLC5940 PWM driver ship.The result can be seen in the video below the break, and those who saw it at EMF may remember it tracing suitably dystopian phrases.

Continue reading “The (UV) Writing’s On The Wall”

Life Imitates Art: 3D Printed Banksy Frame “Shreds” Oeuvre, Prints Money

[Dave Buchanan] is giving the world his own take on the now famous shredding Banksy frame. This version has a few extra features though – like reverse shredding and printing money! Like many of us, [David] was impressed with the Banksy art auction shredding last week. We’re still not sure how he pulled it off, and the jury is still out if it was real, or all some sort of stunt involving the auction house.

[David] took his inspiration straight to CAD software, and designed a miniature version of the frame. A quick trip to the 3D printer and he had the actual frame in hand.  He even hand-painted his own copy of Girl with Balloon on canvas. Assembly didn’t quite go as planned, a few parts had to be adjusted — i.e. cut off and hot-glued together. But in the end, the hack worked – the frame would shred and un-shred the painting whenever someone cranked the handle.

If you haven’t guessed yet, [David’s] frame is a version of the classic money printing trick. What looks like two rollers is actually a simple belt drive. The mechanism pulls in one piece of paper while pushing out a hidden piece. It creates the illusion of printing money – or of shredding art. Given Banksy’s sense of humor, we can’t help but wonder if his frame worked the same way.

[David] is working on a re-design of his piece which will be easier to build — so keep an eye on his Reddit thread if you’d like to print your own.

Continue reading “Life Imitates Art: 3D Printed Banksy Frame “Shreds” Oeuvre, Prints Money”

Arduino Clock Jots Down The Time, In UV

We’re big fans of the impractical around here at Hackaday. Sure there’s a certain appeal to coming up with the most efficient method to accomplish your goal, the method that does exactly what it needs to do without any superfluous elements. But it’s just not as much fun. If at least one person doesn’t ask “But why?”, then you probably left something on the table, design wise.

So when we saw this delightfully complex clock designed by [Tucker Shannon], we instantly fell in love. Powered by an Arduino, the clock uses an articulated arm with a UV LED to write out the current time on a piece of glow-in-the-dark material. The time doesn’t stay up for long depending on the lighting in the room, but at least it only takes a second or two to write out once you press the button.

Things are pretty straightforward inside the 3D printed case. There’s an Arduino coupled with an RTC module to keep the time, which is connected to the two standard hobby servos mounted in the front panel. A UV LED and simple push button round out the rest of the Bill of Materials. The source code is provided, so you won’t have to figure out the kinematics involved in getting the two servos to play nicely together if you want to try this one at home.

We’ve seen many clocks powered by Arduinos over the years, occasionally they even have hands. But few can boast their own robotic arm.

Continue reading “Arduino Clock Jots Down The Time, In UV”

3D Printering: Print Smoothing Tests With UV Resin

Smoothing the layer lines out of filament-based 3D prints is a common desire, and there are various methods for doing it. Besides good old sanding, another method is to apply a liquid coating of some kind that fills in irregularities and creates a smooth surface. There’s even a product specifically for this purpose: XTC-3D by Smooth-on. However, I happened to have access to the syrup-thick UV resin from an SLA printer and it occurred to me to see whether I could smooth a 3D print by brushing the resin on, then curing it. I didn’t see any reason it shouldn’t work, and it might even bring its own advantages. Filament printers and resin-based printers don’t normally have anything to do with one another, but since I had access to both I decided to cross the streams a little.

The UV-curable resin I tested is Clear Standard resin from a Formlabs printer. Other UV resins should work similarly from what I understand, but I haven’t tested them.

Continue reading “3D Printering: Print Smoothing Tests With UV Resin”