Super Smash Bros Kinect

Super Smash Bros Gets A Revamp With The Microsoft Kinect

[Eric] just sent in this awesome Kinect hack that he and a few friends worked on. Playing Super Smash Bros with a Kinect.

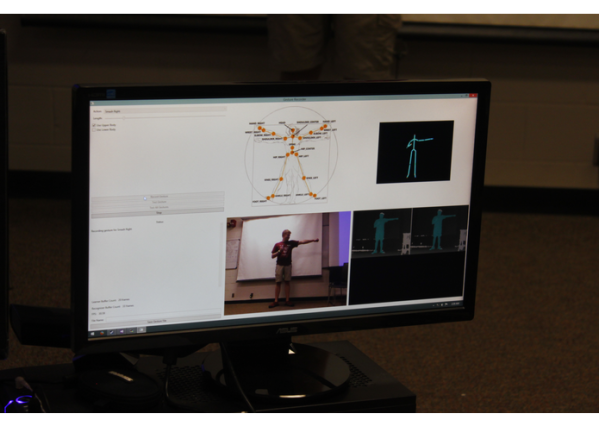
The system makes use of two Kinects, and three PCs. The first Kinect records each individual players moves, while the second Kinect watches both players “fight” each other. The first PC runs an Nintendo 64 emulator to play the game.character selection
The second PC runs a camera with OpenCV to add another cool but perhaps unnecessary feature, you see, even the character selection is a physical process, adding to the idea of playing the entire game with your body. A glass table allows players to set their 3D printed token onto the glass, effectively placing it on the character they would like to use.

And when the match ends, a windshield wiper knocks off the losing player’s token from the table.

The third PC is responsible for running both Kinects, which then has to send the resulting commands back to first PC over a TCP connection for input into the game.

They introduced it to the public at MHacks Fall 2014, a hacking competition sponsored by Dell and Intel. Video Below.

Continue reading “Super Smash Bros Gets A Revamp With The Microsoft Kinect”
VFD Wristwatch

The ChronodeVFD Wristwatch

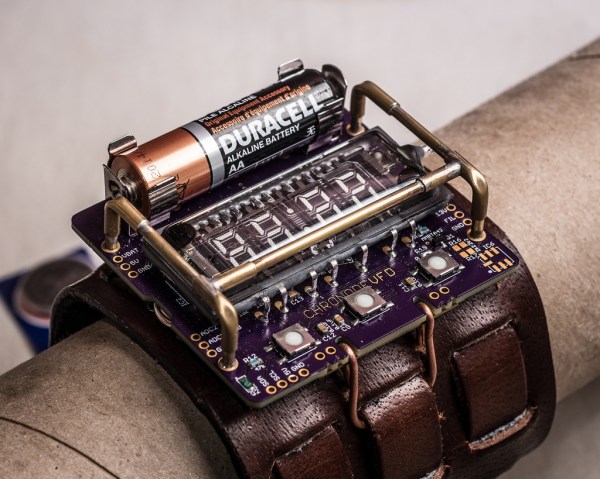
Not just another steampunk fashion statement, [Johngineer’s] ChronodeVFD wristwatch is as intricate as it is beautiful. Sure, we’ve seen our share of VFD builds (and if you want a crash course in vacuum fluorescent displays, check out Fran’s video from earlier this year) but we seldom see them as portable timepieces, much less ones this striking.

The ChronodeVFD uses a IVL2-7/5 display tube, which in addition to being small and low-current is also flat rather than rounded, and features a transparent backing. [Johngineer] made a custom board based around an AtMega88 and a Maxim DS3231 RTC (real time clock): the latter he admits is a bit expensive, but no one complains about left-overs that simplify your design.

The VFD runs off a Maxim MAX6920 12-bit shift register and is powered by a single alkaline AA battery. A rechargable NiMH would have been preferable, but the lower nominal voltage meant lower efficiency for his boost converters and less current for the VFD. [Johngineer] won’t get much more than 6-10 hours of life, but ultimately the ChronodeVFD is a costume piece not meant for daily wear. Swing by his blog for a number of high-res photos and further details on how he built the brass tubing “roll cage” enclosure as well as the mounts for the leather strap.

mobilesolderingworkstation

Mobile Soldering Workstation Sets Up Quickly, Lets You Get To Work

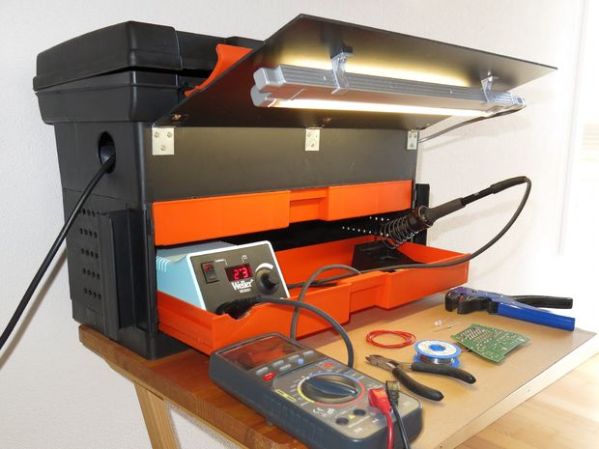
Who here hasn’t put off soldering up a project because pulling out and setting up all your soldering gear is a pain? A lot of hobbyists don’t have a dedicated workbench for such activities and their gear may even be packed away somewhere inconvenient. [laxap] has come up with a solution using a plastic toolbox as a base for his Mobile Soldering Workstation.

[laxap] started with a regular off the shelf toolbox that has a lid and three drawers on the bottom. Although the Weller soldering iron base fit nicely in the bottom drawer, it did necessitate ditching the middle drawer for clearance. The compartmentalized top drawer is unmodified and holds parts and supplies in an orderly fashion.

Lifting up the lid of the box reveals a removable tray, which as intended, is a great spot to store tools such as a multimeter and wire strippers. The area under the removable tray is reserved for a power strip and power cord storage. A hole drilled in the side of the toolbox allows quick access to the power strip’s plug, a quick pull out and plug in is all that is necessary to get this workstation powered up.

That front flip up panel was made specifically for this project. Not only does it help keep the drawers from sliding open during transport, it also holds a lamp to aid in seeing what you’re doing! A bent aluminum strip acts as a latch to keep the panel in position.

It’s a pretty simple idea but it certainly gets the job done and makes soldering a whole bunch more convenient. If you like mobile workbenches, you may want to check out this all-wooden shelf style or one that features integrated solderless breadboards.

jackolantern

Simple LED Project To Spice Up Your Halloween Party

[Paul’s] project is a great example of how you can take a simple project and turn it into something more interesting. He built himself a jack-o-lantern with an Internet controlled RGB LED embedded inside.

[Paul] first wired up an RGB LED to a Raspberry Pi. He was sure to wire up each color using a 100ohm resistor to prevent the LED from burning out. The web interface was written in Python. The interface is pretty simple. It consists of three text fields. The user enters a value between 0 and 255 for each of the three LED colors. The program then lights up the LED accordingly.

[Paul] realized he would need a diffuser for the LED in order to really see the blended colors properly. Instead of using a common solution like a ping-pong ball, he opted to get festive and use a plastic jack-o-lantern. [Paul] removed the original incandescent bulb from the lantern and mounted the LED inside instead. The inside of the pumpkin is painted white, so it easily diffuses the light. The result is a jack-o-lantern that glows different colors as defined by his party guests. Be sure to check out the demonstration video below.

Walkman-esque Human Interface Device

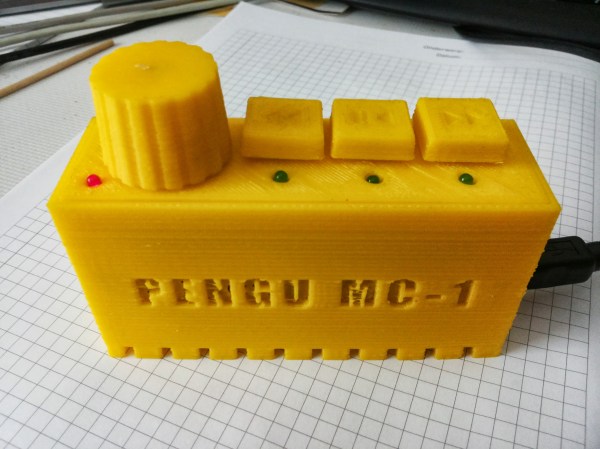
Cheap keyboards never come with extra buttons, and for [Pengu MC] this was simply unacceptable. Rather than go out and buy a nice keyboard, a microcontroller was found in the parts drawer and put to work building this USB multimedia button human interface device that has the added bonus of looking like an old-school Walkman.

The functions that [Pengu MC] wants don’t require their own drivers. All of the buttons on this device are part of the USB standard for keyboards: reverse, forward, play/pause, and volume. This simplifies the software side quite a bit, but [Pengu MC] still wrote his own HID descriptors, tied all of the buttons to the microcontroller, and put it in a custom-printed enclosure.

If you’re looking to build your own similar device, the Arduino Leonardo, Micro, or Due have this functionality built in, since the USB controller is integrated on the chip with everything else. Some of the older Arduinos can be programmed to do the same thing as well! And, with any of these projects, you can emulate any keypress that is available, not just the multimedia buttons.

Developers posing with the J-Deite Quarter

Meet J-Deite Quarter, The 4-Foot-Tall Transformer

There’s just something about the idea of robots turning into everyday objects that fascinates us all. It seems Japan outdoes the world in that category, and the J-Deite project is no exception. J-Deite Quarter is the first transforming robot to come from the collaborative project between  [Kenji Ishida] of Brave Robotics, [Watur Yoshizaki] of Asratec Corp., and Tomy Co. Ltd. If Brave Robotics sounds familiar, that’s because this isn’t the first transforming robot [Kenji Ishida] has produced, nor the first featured on Hackaday.

The J-Deite Quarter weighs 77lbs (35kg) and can run for an hour on a single battery charge. It’s joints are powered by Futaba servos. It is controlled by the proprietary V-SIDO OS designed by [Watur Yoshizaki]. As a robot, it stands at 4.25 feet (1.3m). It walks at a rather slow speed of 0.6mph (1km/hr). It has several points of articulation; it can bend its arms and flex its fingers. In less than 30 seconds, the robot transforms into an equally long two-seat sports car with a maximum speed of just over 6mph (10km/hr). Overall, the J-Deite Quarter is no speed demon, but it is noteworthy for being functional in both forms.

The web site has a cute backstory featuring a green meteorite that allows the “real” J-Deiter to communicate with the developers trying to create a robot in its image. Along with the video, it resembles a marketing ploy for a toy, which could explain Tomy’s involvement. After all, Tomy, along with Hasbro, developed the original Transformers toy line. Unfortunately, the J-Deiter Quarter is just a prototype, with no plans for mass production at this time. Instead, the project’s focus is on making a bigger and better J-Deiter. There are plans for a J-Deiter Half (8-foot-tall) to be developed by 2016, with the final goal of creating a 16-foot-tall transforming robot by 2020.

Enjoy the video that shows what J-Deite Quarter is capable of (with added sound effects, of course) after the break. Now, if you’ll excuse me, I have a sudden hankering to watch some Transformers and Voltron cartoons.

[via SimpleBotics]

Continue reading “Meet J-Deite Quarter, The 4-Foot-Tall Transformer”

Mehdi wth his homemade taser

[Mehdi’s] Shocking Stun Gun Tutorial

[Mehdi Sadaghdar] never lets little things like fire, shocks, or singed fingers get in the way of his projects.  His latest is a tutorial on making a simple electroshock device. A stun weapon creates a very high voltage, and is used in law enforcement to temporarily disable a person. [Mehdi] stresses repeatedly to not use this on anyone. If you do, he won’t like you anymore. Of course, if you’ve seen any of his previous videos, you know he’ll shock himself and set something on fire before the project is complete.

To create his stunner, [Mehdi] used a car ignition to produce a high voltage. The igniton coil, which is a specialized transformer, allowed him to generate the >10000V output needed for the stunner. The coil has a 60:1 ratio and is powered by a 12V DC supply. Since a coil is a short at DC, the system only creates a high voltage pulse when power is disconnected. However, the pulse was too short to create a satisfying arc. [Mehdi] added a capacitor, creating an LC circuit that oscillates as the charge decays, creating a nicer spark. He then used an RC circuit and a relay to create a simple oscillating switch. For the finishing touch, he created a spark gap on the secondary of the transformer with two nails. In typical [Mehdi] fashion, he nearly fried his digital caliper in the process.

The end result is a nice spark that warms the cockles of [Mehdi’s] fibrillating heart. We commend him for being such a brave masochist in the name of science.  Check out his tutorial after the break!

Continue reading “[Mehdi’s] Shocking Stun Gun Tutorial”