Displaying Incoming Server Attacks By Giving Server Logs A Scoreboard

In the server world, it’s a foregone conclusion that ports shouldn’t be exposed to the greater Internet if they don’t need to be. There are malicious bots everywhere that will try and randomly access anything connected to a network, and it’s best just to shut them off completely. If you have to have a port open, like 22 for SSH, it’ll need to be secured properly and monitored so that the administrator can keep track of it. Usually this is done in a system log and put to the side, but [Nick] wanted a more up-front reminder of just how many attempts were being made to log into his systems.

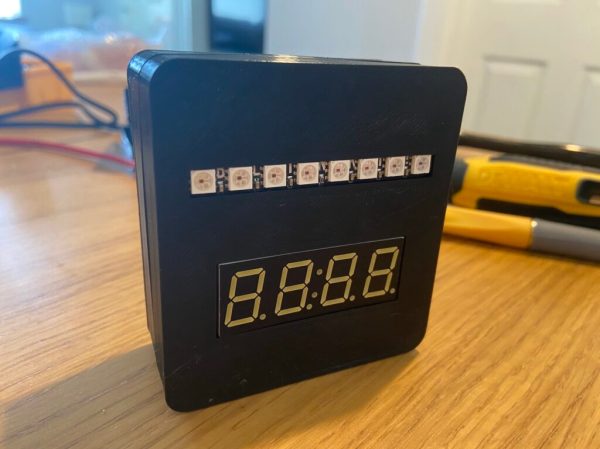
This build actively monitors attempts to log into his server on port 22 and notifies him via a numerical display and series of LEDs. It’s based on a Raspberry Pi Zero W housed in a 3D-printed case, and works by interfacing with a program called fail2ban running on the server. fail2ban‘s primary job is to block IP addresses that fail a certain number of login attempts on a server, but being FOSS it can be modified for situations like this. With some Python code running on the Pi, it is able to gather data fed to it from fail2ban and display it.

[Nick] was able to see immediate results too. Within 24 hours he saw 1633 login attempts on a server with normal login enabled, which was promptly shown on the display. A video of the counter in action is linked below. You don’t always need a secondary display if you need real-time information on your server, though. This Pi server has its own display built right in to its case.

Continue reading “Displaying Incoming Server Attacks By Giving Server Logs A Scoreboard”

A Cyclopic LCD Case For Your Raspberry Pi Server

If you’ve got a personal website that needs hosting or a few hundred gigabytes of files that could use a centralized storage location, the Raspberry Pi’s small size and extreme energy efficiency make it a compelling server choice compared to that curbside Pentium 4 box you’ve been trying to find a home for. All you need is something to put in.

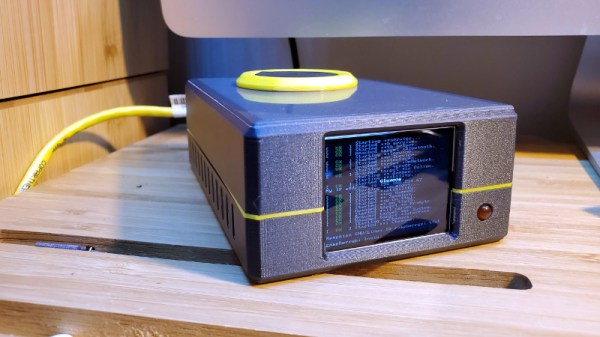
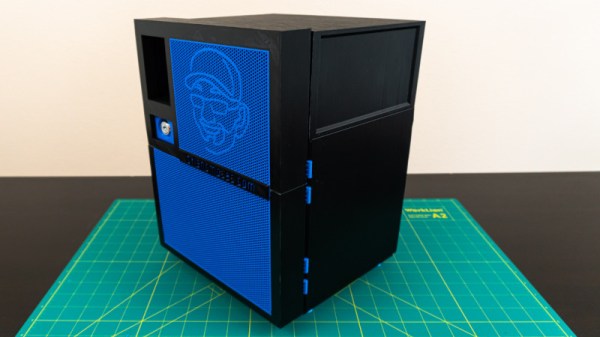
Of course there’s no shortage of Pi case designs ready to be extruded from your 3D printer, but we recently found ourselves particularly taken with this unique one designed by [Ken Segler]. It’s not only small and sleek with a dash of futuristic flair, but it includes a front-mounted two inch 240 x 320 IPS display that connects to the Pi over SPI. At the minimum that gives you a way to see all those beautiful boot messages on startup, but with a little code, it could provide you with various system statics and status messages at a glance.

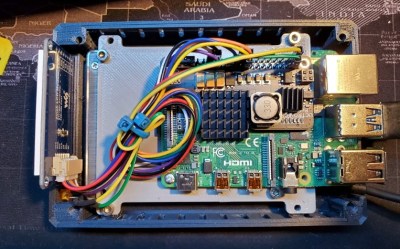
While the LCD is clearly the star of the show here, the case also has a few other nice features that make it worthy of your consideration. The magnetically attached fan filter on the the top, for one. The stacked layout that puts the Pi directly above the SSD also makes for a relatively compact final product.

One thing to note though is that [Ken] is using Power-over-Ethernet, meaning there’s no spot for a dedicated power jack on the case. It’s an easy enough feature to add into your own build, but naturally not everyone’s network is suitably equipped. In that case, beyond the normal annoyances of editing STL files, it shouldn’t be too much trouble to add one in without having to literally hack your way through the printed plastic.

A Very Buttoned Up Raspberry Pi Media Server

Projects that turn the Raspberry Pi into a low-cost Network Attached Storage (NAS) solution are very common; all you need is the right software, the Pi itself, and some USB storage devices. But unless you particularly like the “Medusa” look, with loose cables running all over the place, you’ll probably want to put the hardware into a suitable enclosure. Unfortunately, that’s where the somewhat unusual layout of the Pi can make things tricky.

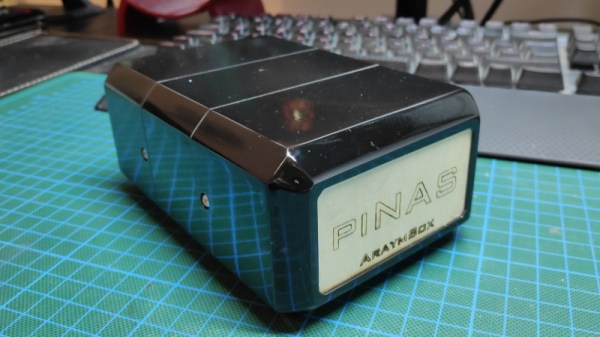
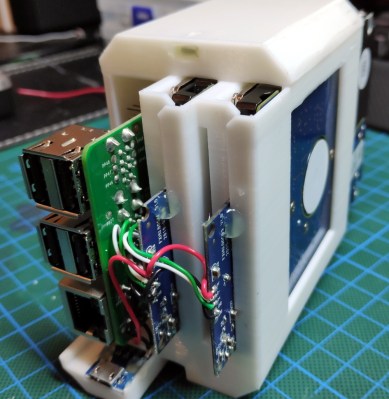
Which is why [AraymBox] came up with this unique “capsule” enclosure for the Raspberry Pi and two USB-attached hard drives. Every effort has been made to keep the outside of this design as clean and streamlined as possible. The asymmetrical loops of wires that we so often see on other projects are gone, with everything been brought inside thanks to some clever wiring. This enclosure looks like a professional product, and if you’re willing to put in the effort, you can have one to call your own.

The good news is that the 3D printed enclosure only has four parts, albeit rather large ones, and none of which require support material. So it should be an easy print even on a relatively low-end machine. Of course, you’re not going to get that futuristic metallic look without a little work. You’ll need to do a considerable amount of sanding, filling, and paint work to get that kind of a surface finish. Then again, that rough “just printed” look has a certain cyberpunk appeal to it as well.

But the printed enclosure is only half the battle. Inside, [AraymBox] has soldered the USB to SATA adapter cables directly to the Raspberry Pi to keep things tight and compact. A micro USB breakout board was then used to add a power connector on the back of the device where the Ethernet and USB ports are, solving the issue of having one lonely USB cable coming out of the side of the case.

In the past we’ve seen other attempts to create a 3D printable enclosure for Pi servers, with varying levels of success. While some would argue that the better solution is to just throw the Pi and the drives in a large enough enclosure that it doesn’t matter what the wiring looks like, we appreciate the effort that some hackers are willing to put in to make something custom.

Custom Lego Server Case Looks As Though It Came Straight From A Data Center

The picture above appears to show two unremarkable 2U rack servers, of the kind that are probably hosting the page you’re reading right now. Nothing special there – until you look carefully and realize that the rack server case on the left is made entirely from Lego. And what’s more, the server even works.

When it comes to building Lego computers, [Mike Schropp] is the guy to call. We’ve previously featured his Lego gaming computer, a striking case wrapped around what was a quite capable machine by 2016 standards, as well as an earlier case that reminds us a little of a NeXT. His reputation for Lego-clad computers led server maker Silicon Mechanics to commission a case for a trade show, and [Mike] jumped at the challenge.

Making a home-grade machine is one thing, but supporting all the heavy drives, power supplies, and fans needed to make the machine work is something else. He used a combination of traditional Lego pieces along with a fair sampling of parts from the Lego Technics line to pull off the build, which looks nearly perfect. Sadly, the Lego unit sizes make the case slightly taller than 2U, but that’s a small quibble when everything else matches so well, even the colors. And the fact that the server works, obviously important for a trade show demo, is pretty amazing too. The power supplies are even hot-swappable!

Congratulations to [Mike] on yet another outstanding Lego creation.

Secret Messages Could Be Hiding In Your Server Logs

[Ryan Flowers] writes in with a clever little hack that can allow you to hide data where nobody is going to go looking for it. By exploiting the fact that a web server will generally log all HTTP requests whether or not it’s valid, he shows how you can covertly send a message by asking the server for a carefully crafted fictitious URL.

We aren’t talking about requesting “yousuck.txt” from the server that hosts your least favorite website, either. As [Ryan] demonstrates, you can compress a text file, encode it with uuencode, and then send it line by line to the destination server with curl. He shows how the process, which he calls “CurlyTP” can be done manually on the command line, but it would be a simple matter of wrapping it up in a Bash script.

To get the message back, you just do the opposite. Use grep to find the lines in the log file that contain the encoded data, and then put them through uudecode to get the original text back. Finding the appropriate lines in the log file is made easier by prepending a prearranged keyword to the beginning of the URL requests. The keyword can be changed for each message to make things easier to keep track of.

If you’re still wondering why anyone would go through the trouble to do this, [Ryan] provides an excellent example: a covert “dead drop” where people could leave messages they’d rather not send through the usual channels. As long as the sender used a service to mask their true IP address, they could anonymously deliver messages onto the server without having to use any special software or protocol they might not have access to. Even the most restrictive firewalls and security measures aren’t likely to be scanning URLs for compressed text files.

We’ve seen web-based dead drops done with Python in the past, and even purpose built “PirateBoxes” that allow people to covertly exchange files, but we like how this method doesn’t require any special configuration on the server side. You should check your server logs, somebody might be trying to tell you something.

3D Printing A NAS Server Case

It’s good to back up, and despite that, few of us do. [Brian] we suspect is of the more diligent persuasion, given his strong enthusiasm for network attached storage. Recently, he found himself looking for a new case for his DIY build, and decided to go the 3D printed route.

The case is the design of one [Toby K], who sells the design online. [Brian] set out to produce the case himself using a Prusa i3, investing much time into the process. Total print time for the successful parts alone was over 227 hours, not including the failed parts and reprints.

Assembly caused some headaches, with various hinges and dovetails not fitting together perfectly first time. Not one to shy away from some proper down and dirty making, [Brian] was able to corral the various parts into fitting with a combination of delicate hammering, filing, and reprinting several broken pieces.

Overall, accounting for the filament used and hardware required, [Brian] spent over $200 producing the case. For those who just need a housing for their NAS, it doesn’t make a whole lot of financial sense. But for those who enjoy the build, and like the opportunity to customize their case as they see fit, the time and money can certainly be worth it. As [Brian] states, there aren’t too many cases on the market that ship with his logo on the grill.

We’ve seen other 3D printed case builds before, too. Video after the break.

Continue reading “3D Printing A NAS Server Case”

Making An Update Server For PythonAnywhere And GitHub

Cloud based IDEs and development tools have grown over the years, though most have limitations in their free tiers and may not be fully compatible with other services such as GitHub. [Aadi Bajpai] loved using PythonAnywhere and to collaborate using GitHub, so he made a update server that automatically updates the running code once you make a push to Github

PythonAnywhere gives you access to a python shell over a web browser, and also lets you run a web app that can be accessed via a custom sub-domain. Even though it does not have direct integration with GitHub, you can drop to the bash shell to and get access to a git client.

For this hack, [Aadi Bajpai] utilizes the webhooks from GitHub that are triggered when a push event is detected. A flask server running on PythonAnywhere is written such that once triggered by the get POST request, it locally executes a git pull from the repository. There a bit more work that allows adding a bit of security sauce to the recipe but it is a pretty elegant solution and can be used for other cases as well.

Setting up alert notifications has been demonstrated to be an interesting task, though integrating Discord or Slack for notifications adds a little more bragging rights.