The drone is based around an Arduino Pro Mini, and uses an MPU6050 IMU for motion sensing and flight control. Communication with the drone is via an NRF24L01. Four small coreless motors are used for propulsion, driven by tiny MOSFETs, and the whole assembly is run via a teeny 220 mAh lithium-polymer battery. Oh, and there’s an FPV camera so you can put on some goggles and see where it’s going!
Control is via MultiWii software, written specifically for building multirotor craft. [Max] flies the craft using a controller of his own creation, again using an NRF24L01 for communication.
It’s a neat build, and a titchy one too! Tiny drones have a character all their own, even if they can’t really stand up to windier outdoor environments. Video after the break.
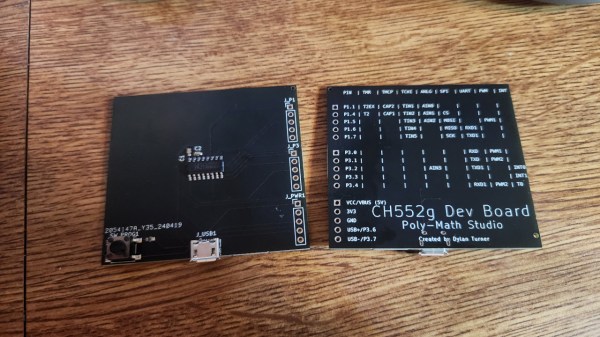
We might just never get tired of covering cool small cheap MCUs, and CH552G sure fits this description. Just so you know, here’s a Hackaday.io project you should check out – a CH552G devboard that’s as simple as it sufficient, in case you needed a tangible reminder that this chip exists, has a lively community, and is very much an option for your projects.
The devboard design by [Dylan Turner] is so straightforward, it’s almost inspiring – a square of PCB with the chip in the center and plenty of empty space for your mods. Everything is open-source with KiCad sources stored on GitHub. The most lovely aspect of this board, no doubt, is having the pin mapping written on the bottom, with all the alternate pin functions – you won’t have to constantly glance at the datasheet while wiring this one up. Plus, of course, there’s the microUSB port for programming, and the programming mode button that a few CH552 projects tend to lack.
It’s simple, it’s self-documenting, it’s breadboardable, and it’s definitely worth putting into the shopping cart at your PCB fab of choice. Oh, and there are bringup instructions on GitHub, in case you need them. Whether you want to prototype the cheapest macropad or keyboard ever, or perhaps a reflow hotplate, the CH552 delivers. If these CH552 projects aren’t enough to light your fire, here are a dozen more.
One of the most basic tools for tinkering with electronics is a multimeter. Today, even a cheap meter has capabilities that would have been either very expensive or unobtainable back in the 1970s. Still, even then, a meter was the most affordable way to do various tasks around the shop. Is this cable open? Are these two wires shorted? What’s the value of this resistor? Is the circuit getting power? Is the line voltage dropping? You can answer all those questions — and many more — with a basic meter. But there’s one thing that hasn’t changed much over the years: probes. That’s a shame because there are a lot of useful options.
The probes that came with your meter probably have much in common with the probes a 1970-era meter had. Yeah, the banana plugs probably have a little plastic cover, and the plastic itself might be a little different. Parts are small these days, so the tips might be a little finer than older probes. But if you sent your probes back in time, few people would notice them.
The Blinders Syndrome
One problem is that those probes are usually good enough. We’ve all clipped an alligator clip to a test probe. I’ve even fashioned super pointy probes out of syringes. Years ago, I bought an expensive kit with many attachments I rarely use, like little hooks and spade lugs. Then, I happened to go down the wrong aisle at Harbor Freight.
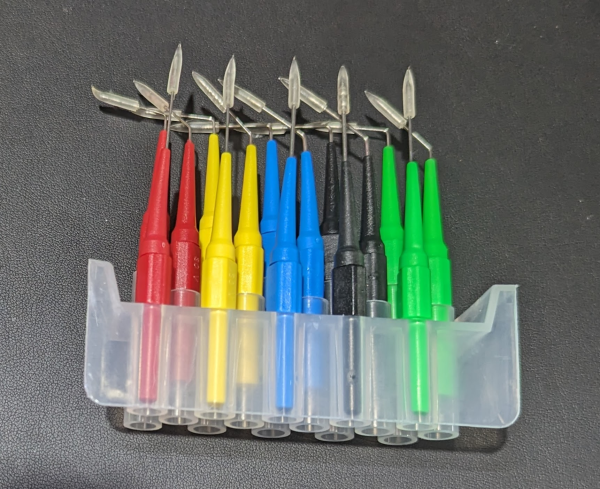
Back probes ready for action.
In the automotive section, I noticed a tidy plastic box labeled “22 pc. back probe kit.” I’d never heard the term “back probe,” but it was clearly some sort of wire. It turns out the kit has a bunch of very fine needles on banana jacks and some patch cables to connect them to your meter.
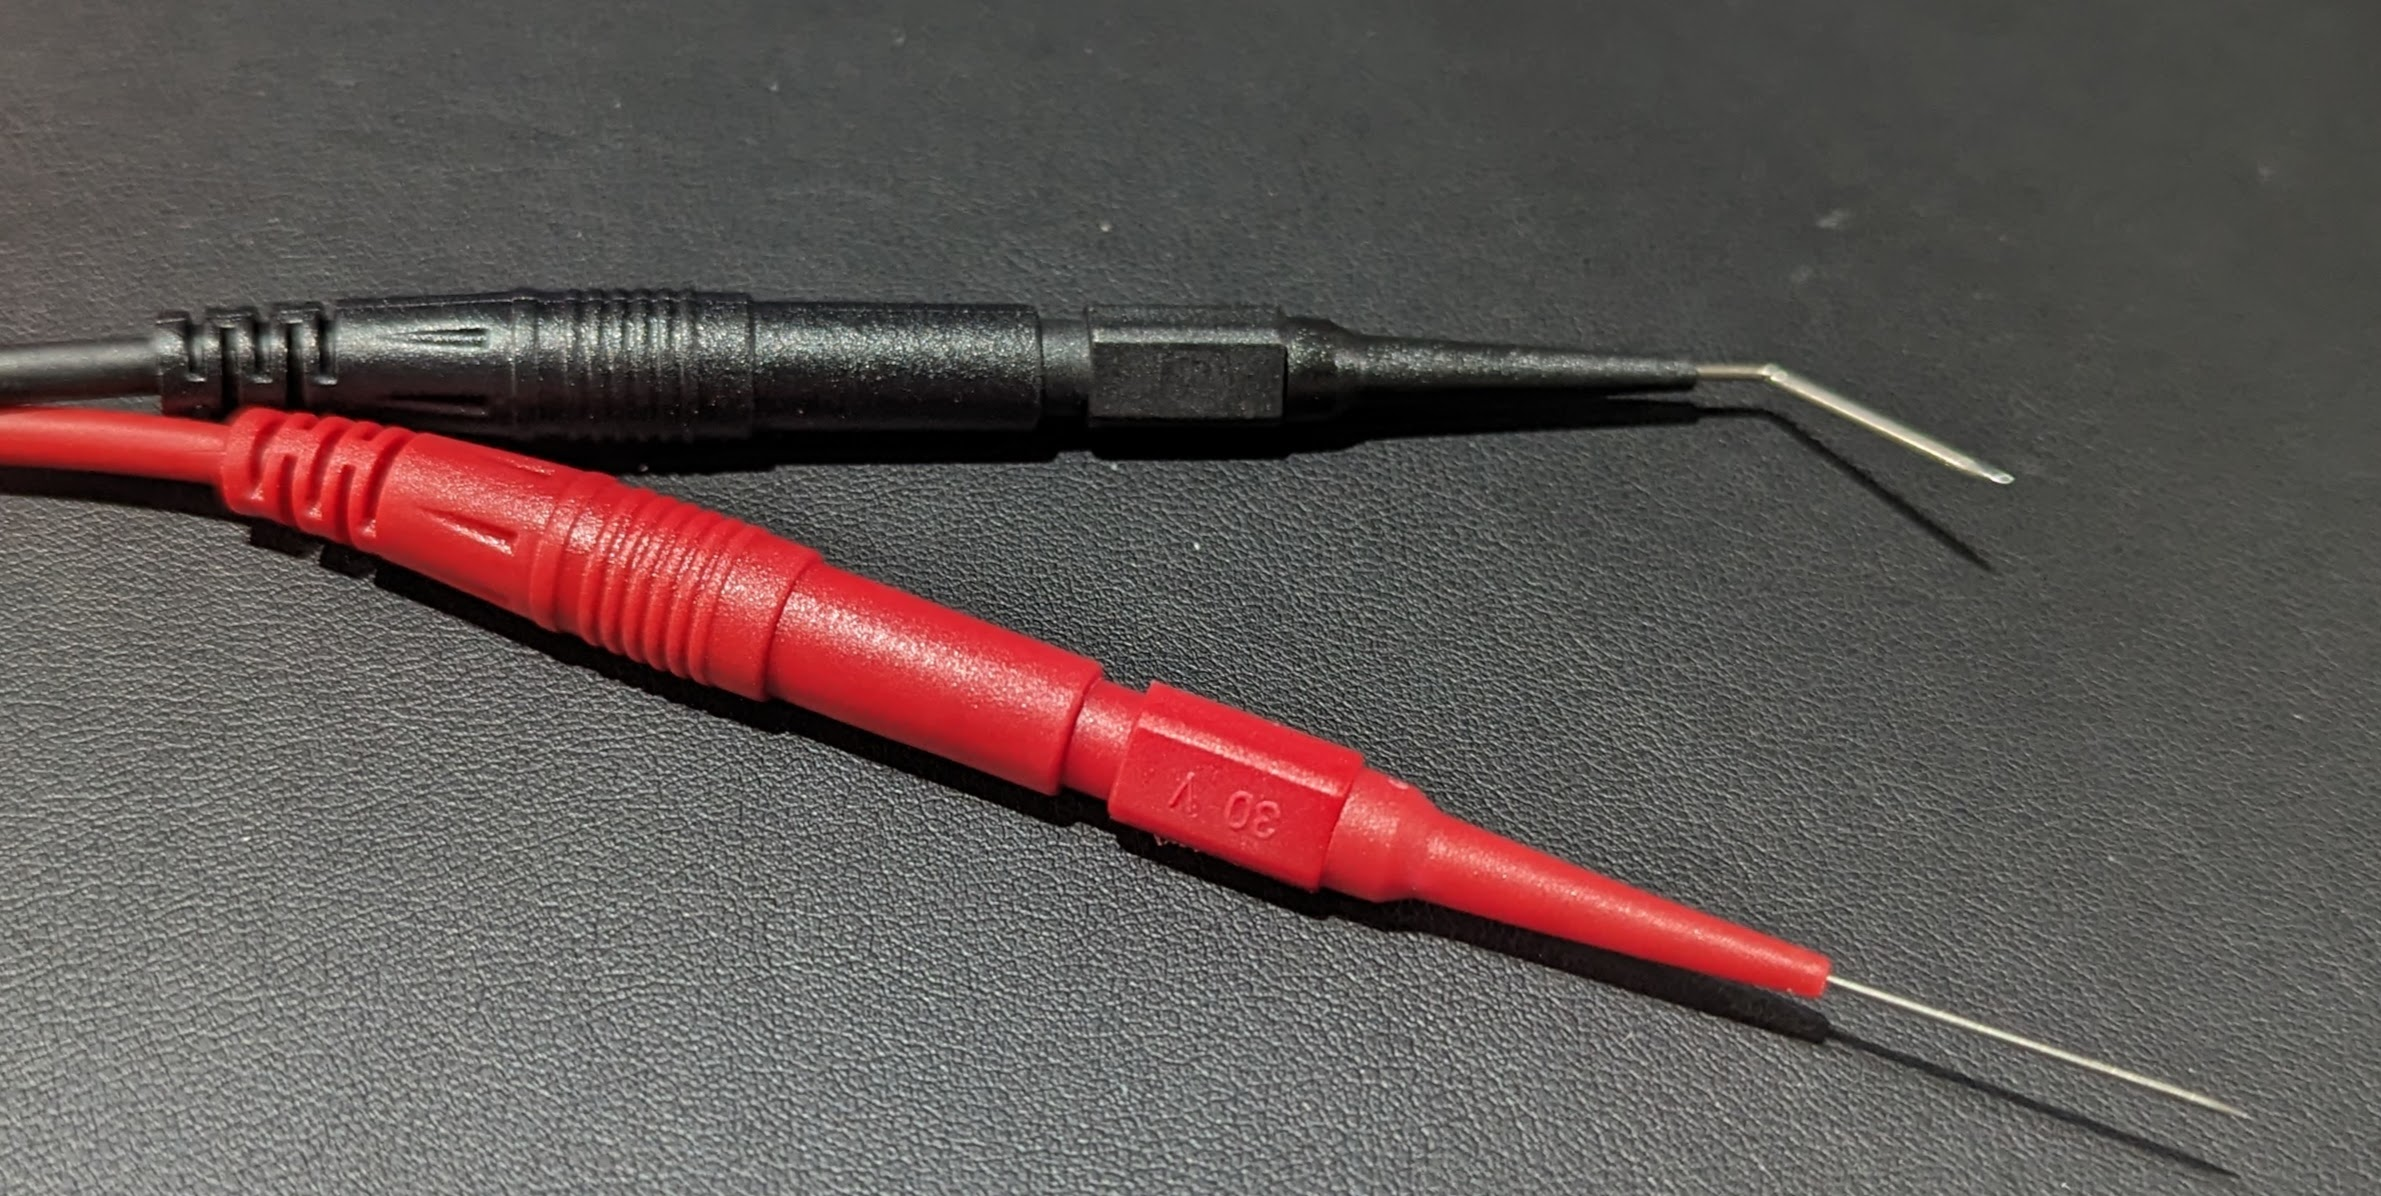
They are “back probes” because you can jam them in the back of connectors next to the wire. There are five colors of needles, and each color set has three items: a straight needle, a bent needle, and a 90-degree bend needle.
I’d never heard of this, and that started me down the rabbit hole of looking at what other exotic probes were out there. If you search the usual sources for “back probe,” you’ll see plenty of variations. There are also tons of inexpensive probe kits with many useful tips for different situations. Like everything, the price was much lower than I had paid for the rarely used kit I bought years ago. The only thing I really use out of that kit are the test hook clips and you can buy those now for a few bucks that just push over your probes.
Choices
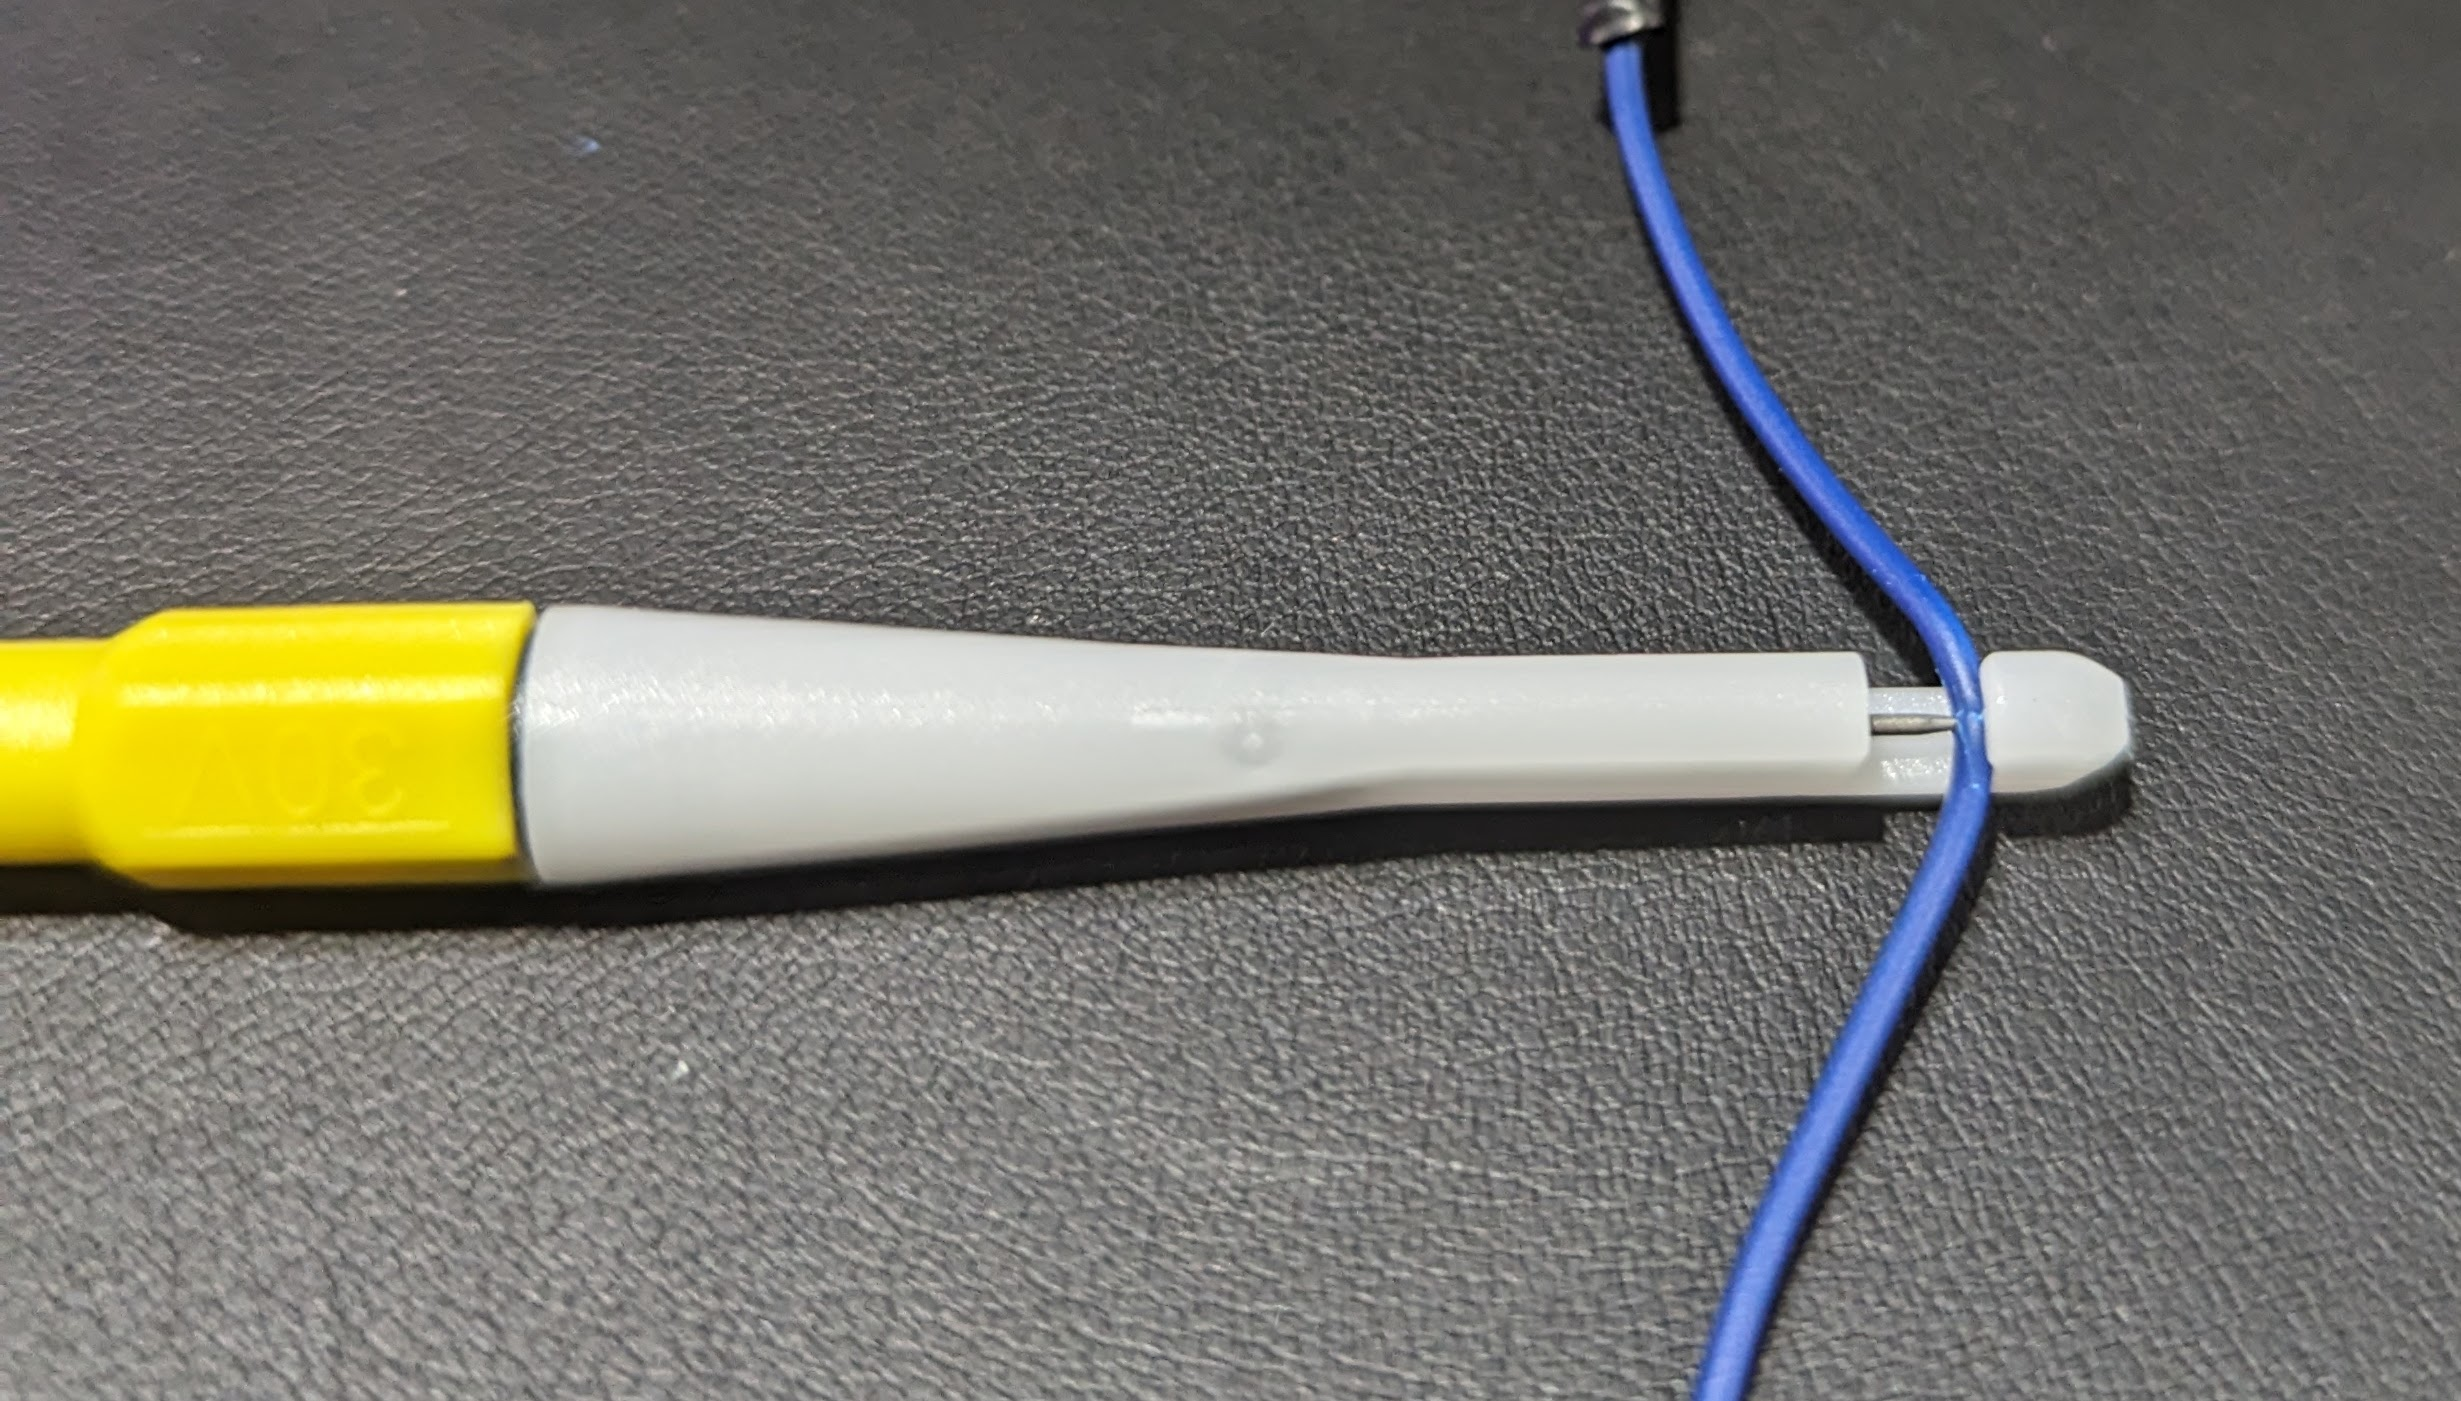
Wire-piercing probe works best for larger wires.
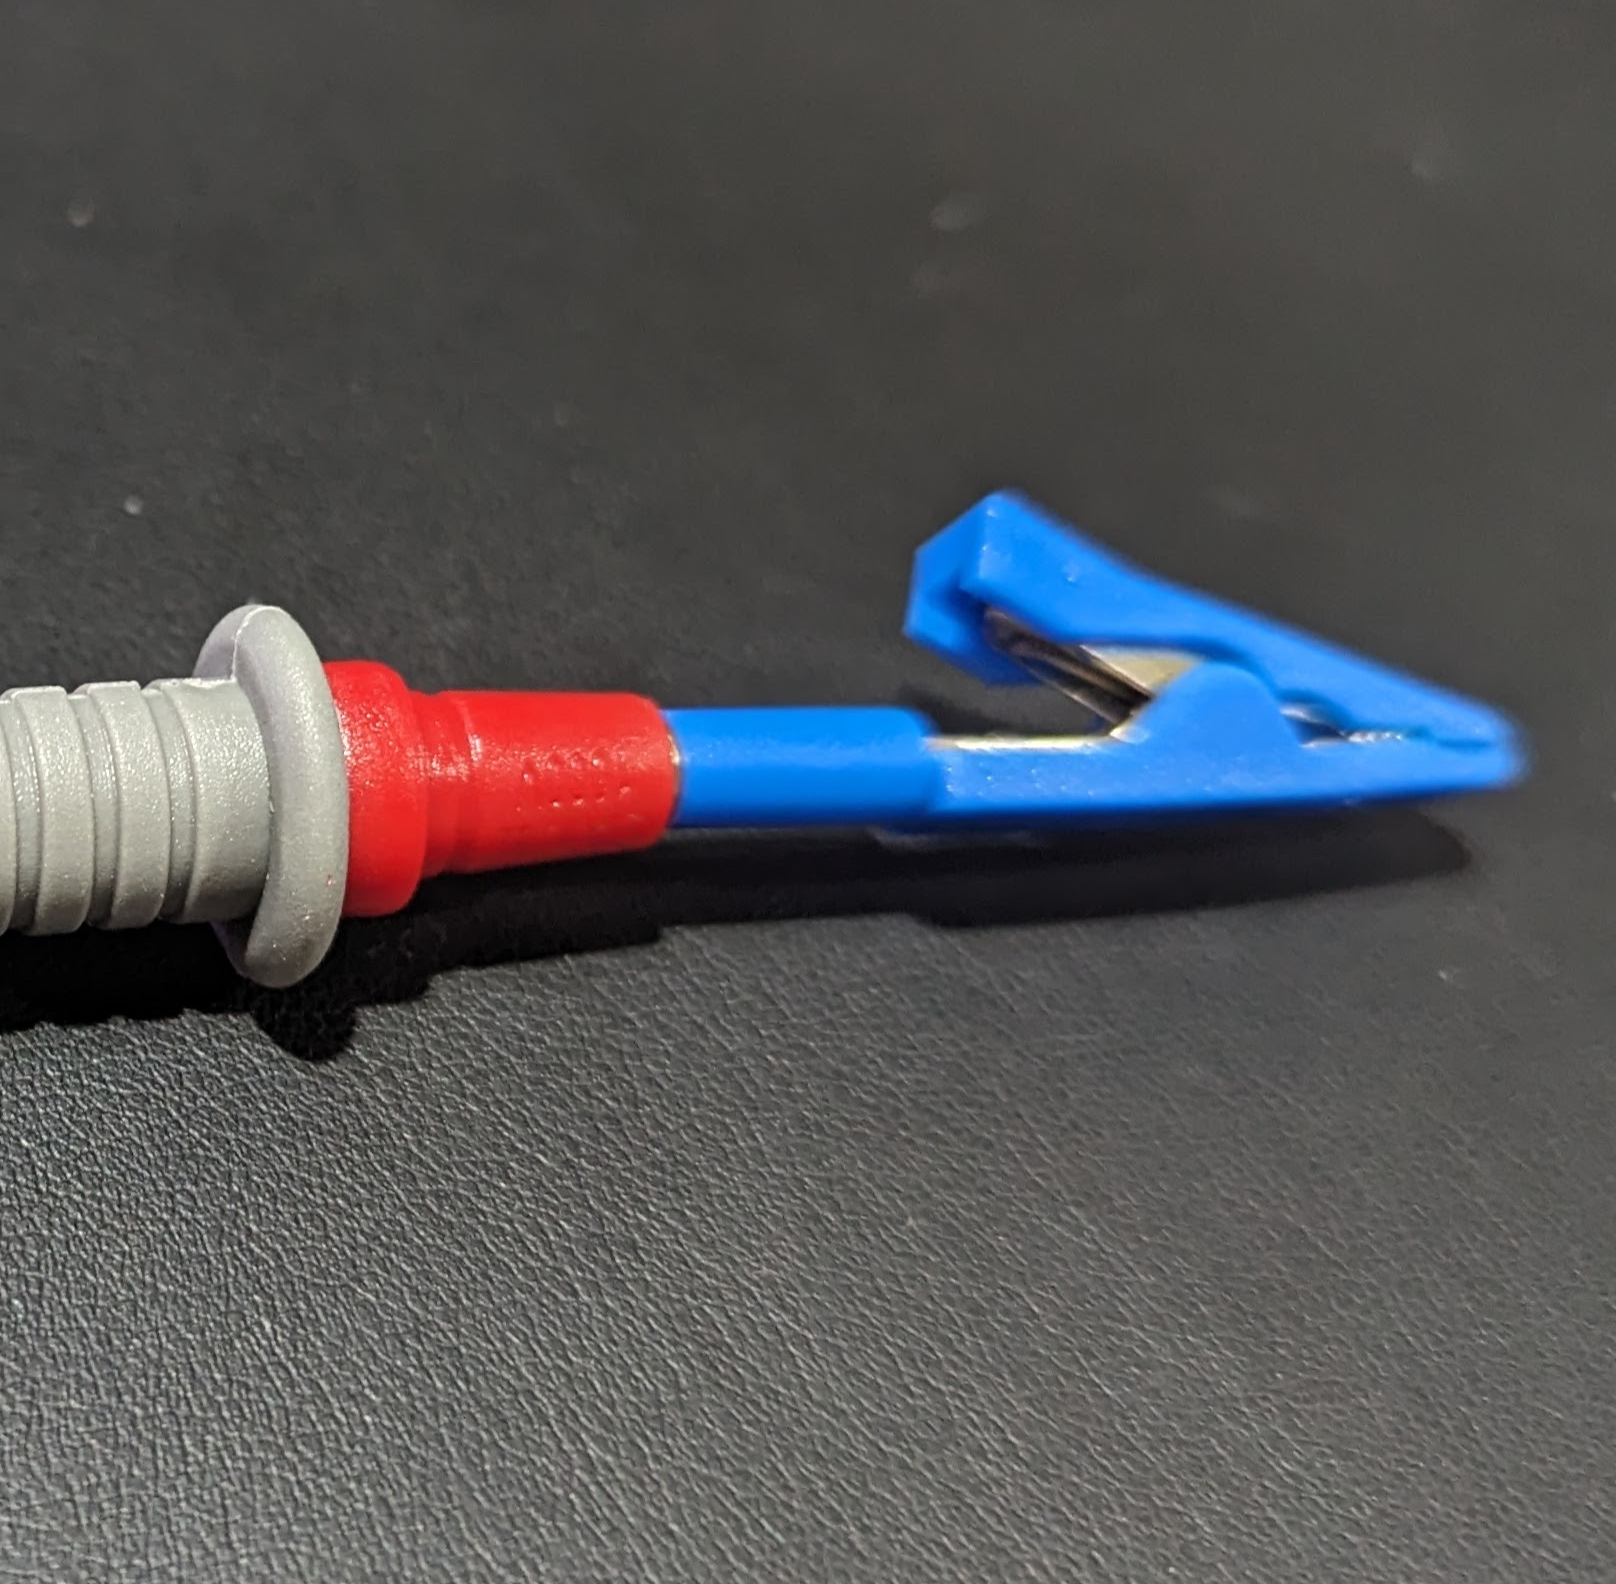
You could probably use the needles to stick through insulation, too. But if that’s your goal, they make piercing clip test probes specifically for that purpose. A little plastic holder has a hook for your wire and a needle that threads in to penetrate the wire.
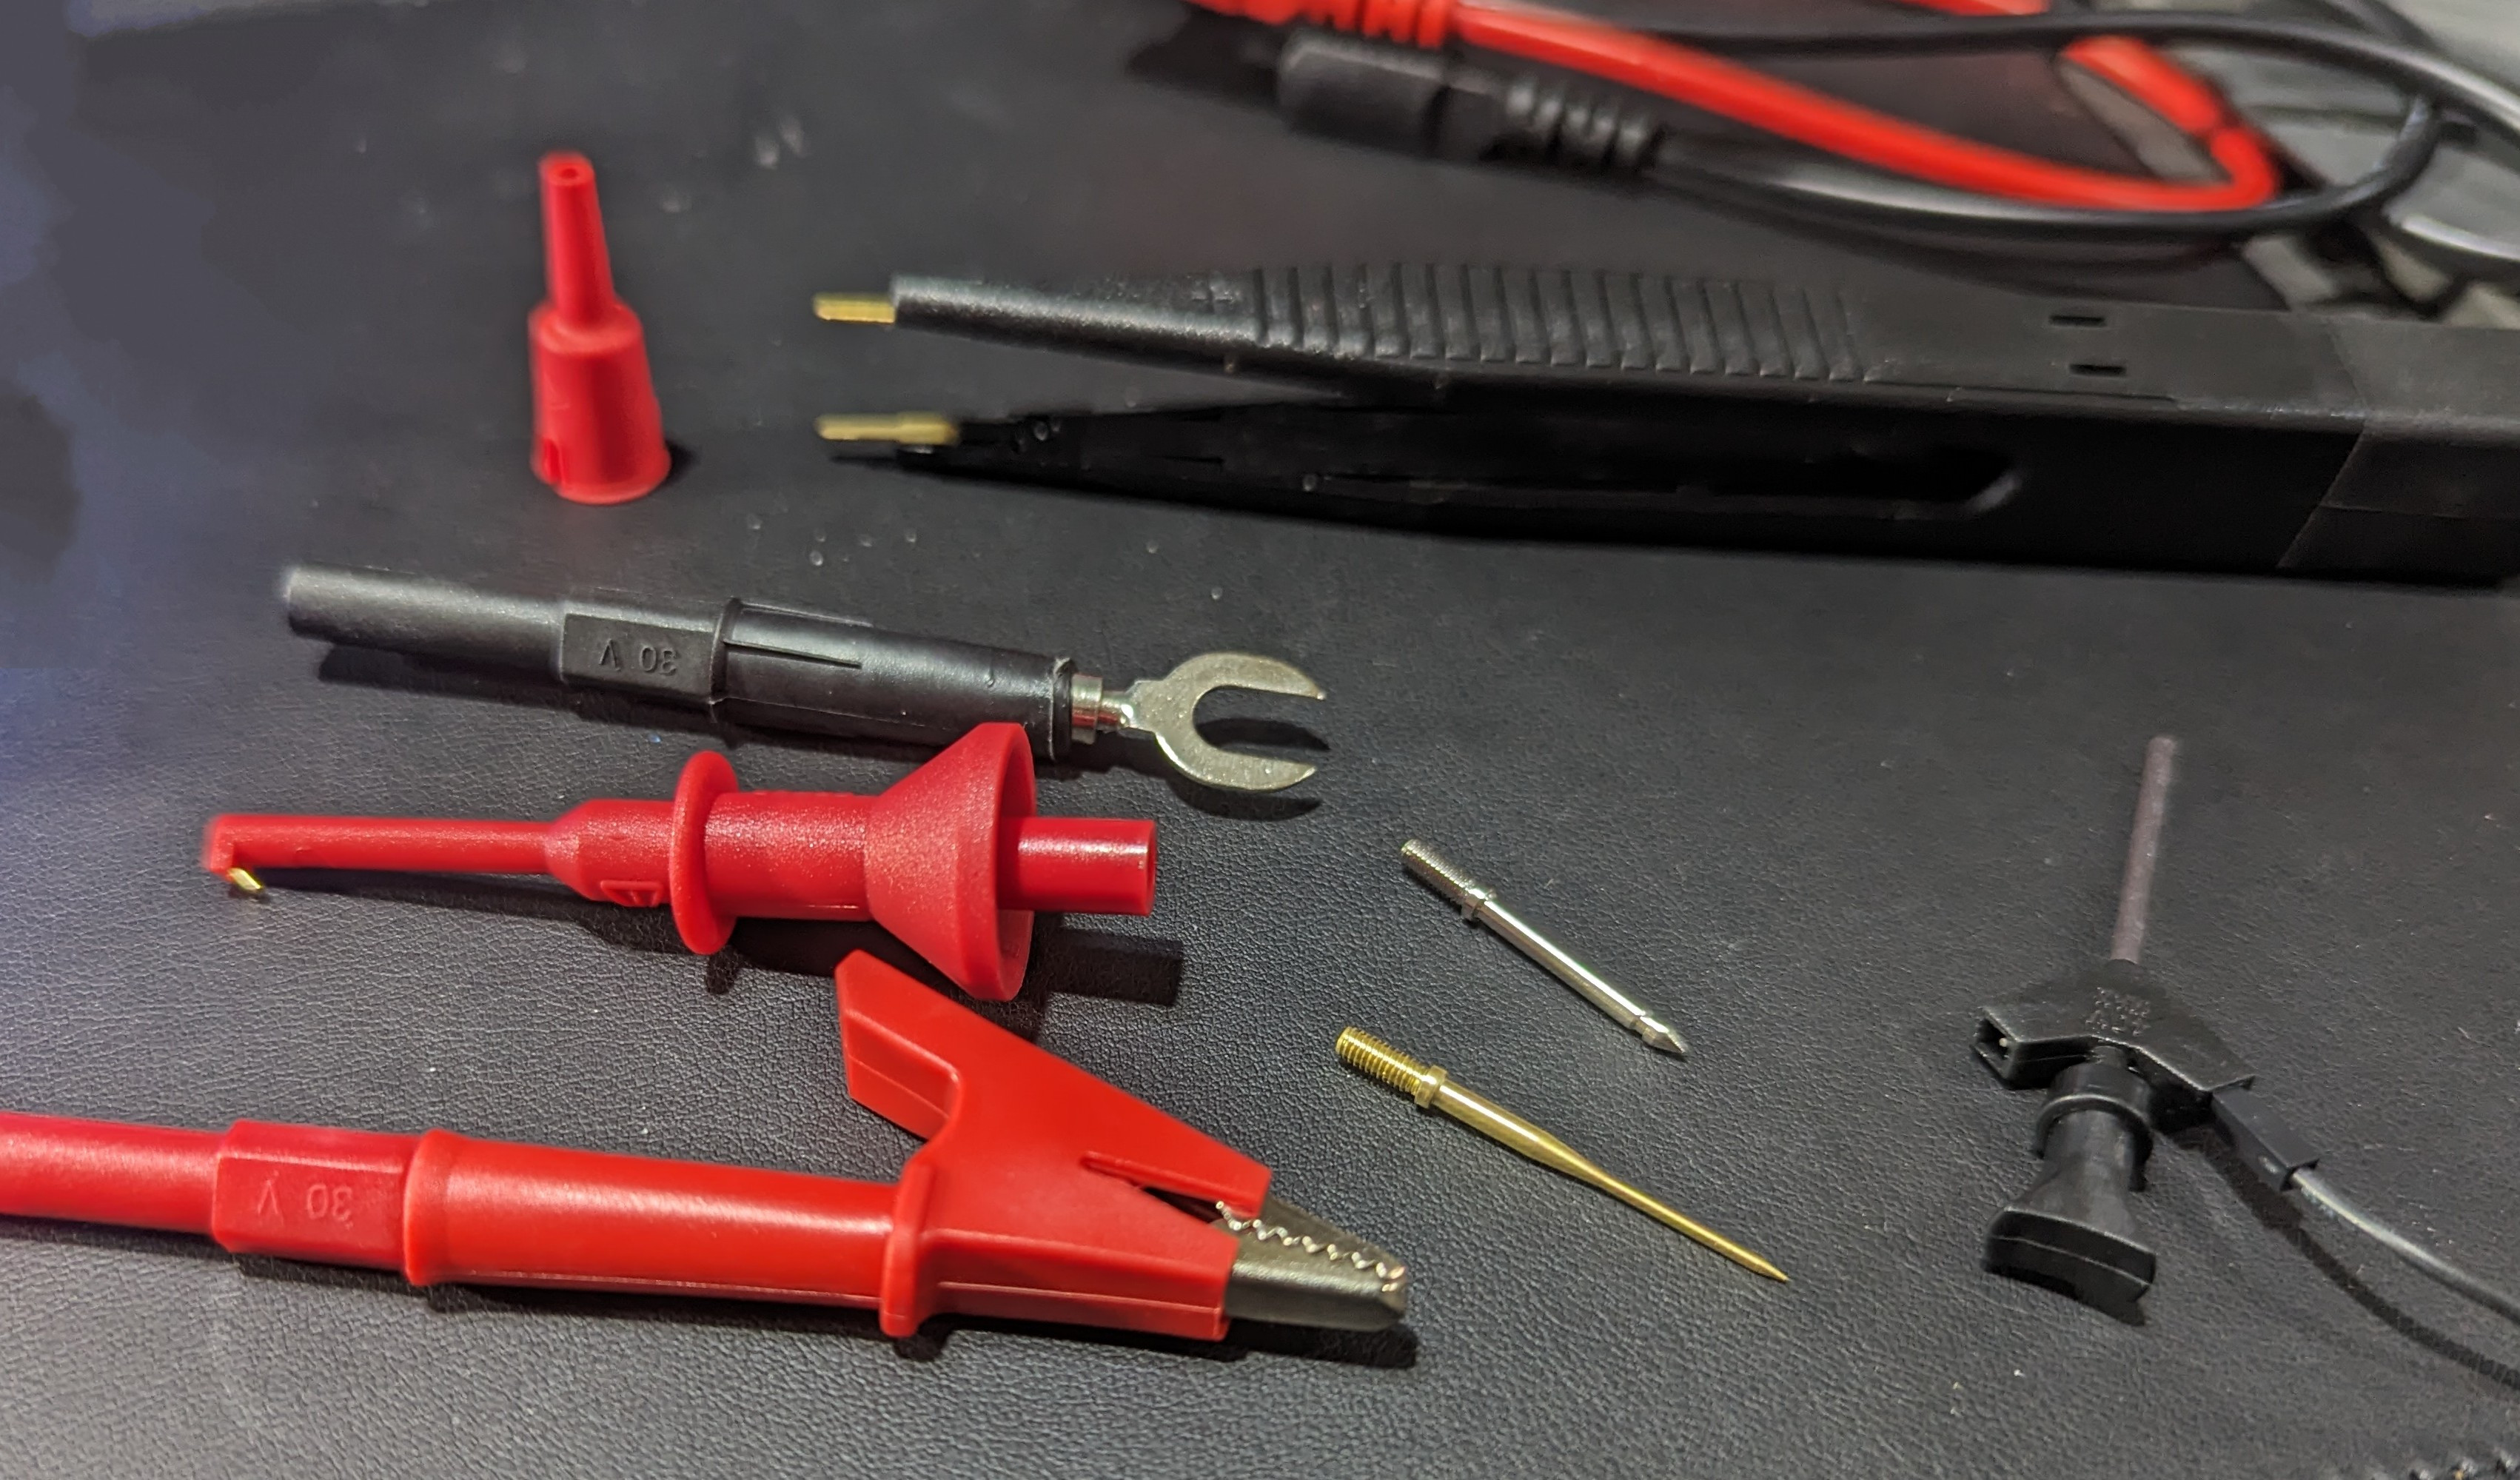
These alligator clips fit over most probes.
I also picked up some little alligator clips that slide over standard 2mm probe tips. These are very handy and prevent you from having to clip a lead to your probe so you can clip the other end to the circuit. However, if you look for a “test lead kit,” you’ll find many options for about $20. One kit had interchangeable probe tips, alligator clips, spades, SMD tweezers, and tiny hooks for IC legs. The alligator clips on the one I bought are the newer style that has a solid insulating body — not the cheap rubbery covers. They feel better and are easier to handle, too.
Breadboarding
Some of the accessories in the test probe kit.
Of course, you can make your own solderless breadboard jumpers, and you’ve probably seen that you can buy jumpers of various kinds. But if you search, you can even find test probes with breadboard wire ends. The other end will terminate in a test hook or alligator clips. You can also get them with banana plugs on the end to plug right into your meter. You can usually find versions with the male pin for a breadboard or a female receptacle for connecting to pins.
The voice interface for the holodeck in Star Trek had users create objects by saying things like “create a table” and “now make it a metal table” and so forth, all with immediate feedback. This kind of interface may have been pure fantasy at the time of airing, but with the advent of AI and LLMs (large language models) this kind of natural language interface is coming together almost by itself.
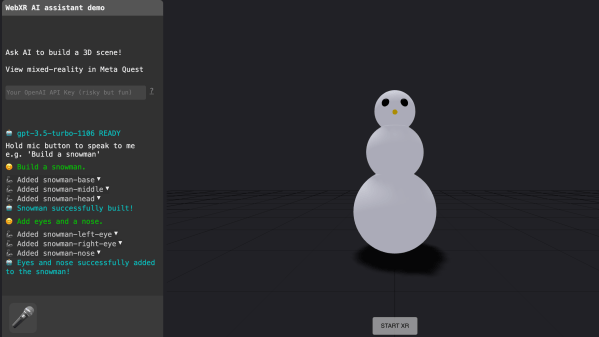
A fun demonstration of that is [Dominic Pajak]’s demo project called VoxelAstra. This is a WebXR demo that works both in the Meta Quest 3 VR headset (just go to the demo page in the headset’s web browser) as well as on desktop.
The catch is that since the program uses OpenAI APIs on the back end, one must provide a working OpenAI API key. Otherwise, the demo won’t be able to do anything. Providing one’s API key to someone’s web page isn’t terribly good security practice, but there’s also the option of running the demo locally.
Either way, once the demo is up and running the user simply tells the system what to create. Just keep it simple. It’s a fun and educational demo more than anything and will try to do its work with primitive shapes like spheres, cubes, and cylinders. “Build a snowman” is suggested as a good starting point.
Intrigued by what you see and getting ideas of your own? WebXR can be a great way to give those ideas some life and looking at how someone else did something similar is a fine way to begin. Check out another of [Dominic]’s WebXR projects: a simulated BBC Micro, in VR.
Another week in football, another VAR controversy to fill the column inches and rile up the fans. If you missed it, Coventry scored a last-minute winner in extra time in a crucial match—an FA Cup semi-final. Only, oh wait—computer says no. VAR ruled Haji Wright was offside, and the goal was disallowed. Coventry fans screamed that the system got it wrong, but no matter. Man United went on to win and dreams were forever dashed.
Systems like the Video Assistant Referee were brought in to make sport fairer, with the aim that they would improve the product and leave fans and competitors better off. And yet, years later, with all this technology, we find ourselves up in arms more than ever.
We were sad to hear that after 52 years in operation, iconic ham radio supplier MFJ will close next month. On the one hand, it is hard not to hear such news and think that it is another sign that ham radio isn’t in a healthy space. After all, in an ideal world, [Martin Jue] — the well-known founder of MFJ — would have found an anxious buyer. Not only is the MFJ line of ham radio gear well regarded, but [Martin] had bought other ham radio-related companies over the years, such as Ameritron, Hygain, Cushcraft, Mirage, and Vectronics. Now, they will all be gone, too.
However, on a deeper reflection, maybe we shouldn’t see it as another nail in ham radio’s coffin. It is this way in every industry. There was a time when it was hard to imagine ham radio without, say, Heathkit. Yet they left, and the hobby continued. We could name a slew of other iconic companies that had their day: Eico, Hammarlund, Hallicrafters, and more. They live on at hamfests, their product lines are frozen in time, and we’re sure we’ll see a used market for MFJ gear well into the next century.
Like most waves in the electromagnetic spectrum, radio waves tend to bounce off of various objects. This can be frustrating to anyone trying to use something like a GMRS or LoRa radio in a dense city, for example, but these reflections can also be exploited for productive use as well, most famously by radar. Radar has plenty of applications such as weather forecasting and various military uses. With some software-defined radio tools, it’s also possible to use radar for tracking aircraft in real-time at home like this DIY radar system.
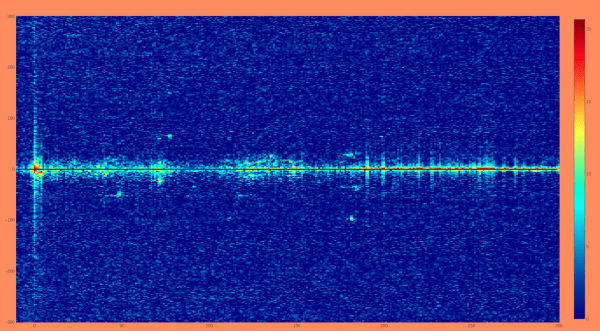
Unlike active radar systems which use a specific radio source to look for reflections, this system is a passive radar system that uses radio waves already present in the environment to track objects. A reference antenna is used to listen to the target frequency, and in this installation, a nine-element Yagi antenna is configured to listen for reflections. The radio waves that each antenna hears are sent through a computer program that compares the two to identify the reflections of the reference radio signal heard by the Yagi.
Even though a system like this doesn’t include any high-powered active elements, it still takes a considerable chunk of computing resources and some skill to identify the data presented by the software. [Nathan] aka [30hours] gives a fairly thorough overview of the system which can even recognize helicopters from other types of aircraft, and also uses the ADS-B monitoring system as a sanity check. Radar can be used to monitor other vehicles as well, like this 24 GHz radar module found in some modern passenger vehicles.