FreeCAD Parametrics Made Simple

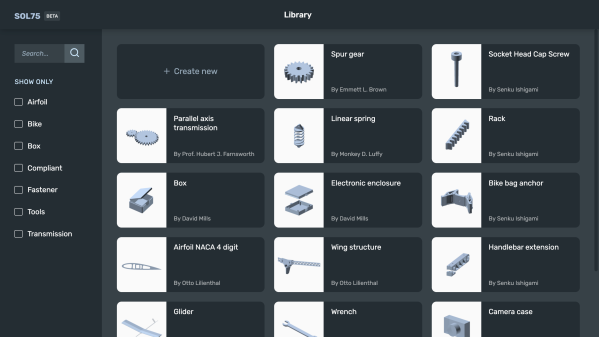
Simple drafting programs just let you draw like you’d use a pencil. But modern programs use parametric models to provide several benefits. One is that you can use parameters to change parts of your design and other parts will alter to take account of your changes. The other advantage is you can use one model for many similar but different designs. [Brodie Fairhall] has a nice video about how to use parameters in FreeCAD.

The nice thing about parameters is they don’t have to be just constants. You can put in formulae as well. For example, you could define one line as being twice as big as another line. You provide various constraints and parameters and FreeCAD works out the shape for you, keeping all the constraints and formulae satisfied.

Continue reading “FreeCAD Parametrics Made Simple”

The Prusa I3 MK3S And A Tale Of Two Sensors

When the Prusa i3 MK3 was released in 2017, it was marketed as being “bloody smart” thanks to the impressive number of sensors that had been packed into the printer. The update wasn’t really about improving print quality over the MK2, but rather to make the machine easier to use and more reliable. There was a system for resuming prints that had stopped during a power outage, a thermometer so the firmware could compensate against thermal drift in the inductive bed sensor, RPM detection on all of the cooling fans, and advanced Trinamic stepper drivers that could detect when the printer had slipped or gotten stuck.

The optical filament sensor of the Prusa i3 MK3.

But the most exciting upgrade of all was the new filament sensor. Using an optical encoder similar to what you’d find in a mouse, the Prusa i3 MK3 could detect when filament had been inserted into the extruder. This allowed the firmware to pause the print if the filament had run out, a feature that before this point was largely unheard of on consumer-grade desktop 3D printers. More than that, the optical encoder could also detect whether or not the filament was actually moving through the extruder.

In theory, this meant the MK3 could sense problems such as a jammed extruder or a tangle in the filament path that was keeping the spool from unrolling. Any other consumer 3D printer on the market would simply continue merrily along, not realizing that it wasn’t actually extruding any plastic. But the MK3 would be able to see that the filament had stalled and alert the user. The capabilities of the optical filament sensor represented a minor revolution in desktop 3D printing, and combined with the rest of the instrumentation in the MK3, promised to all but eradicate the heartbreak of failed prints.

Fast forward to February of 2019, and the announcement of the Prusa i3 MK3S. This relatively minor refresh of the printer collected up all the incremental tweaks that had been made during the production of the MK3, and didn’t really add any new features. Though it did delete one: the MK3S removed the optical encoder sensor used in the MK3, and with it the ability to sense filament movement. Users would have to decide if keeping the ability to detect clogs and tangles was worth giving up all of the other improvements offered by the update.

But why? What happened in those three years that made Prusa Research decide to abandon what promised to be a huge usability improvement for their flagship product? The answer is an interesting look at how even the cleverest of engineering solutions don’t always work as expected in the real-world.

Continue reading “The Prusa I3 MK3S And A Tale Of Two Sensors”

Portable Printer Is A Top Notch High School Project

When we think 3D printers, we most commonly think of the fused-deposition modelling type that squirts molten plastic out of a hot nozzle. Typically, these are tabletop units designed to be set up and used in a workshop environment. [BingoFishy] dared to think outside the box however, and whipped up a compact, portable 3D printer for working out on the road.

The printer is almost entirely self-contained, running an OctoPrint controller with built-in hotspot which allows print files to be sent to the unit over a smartphone. The motion platform is built out of DVD drive stepper motors and rails, with dual motors used on the Z-axis to ensure there’s enough torque to move smoothly. Power is courtesy of 26650 cells, in a 2S3P configuration, which provides 3 hours of runtime. While this might not sound like much, for a compact printer with a small build volume, it’s a useful period of time to work with.

While such a build will never replace a solid desktop unit with a large build volume, it nevertheless could come in handy for producing small parts out in the field. We can imagine a college robotics team toting one of these to a regional contest, where it could prove invaluable for whipping up some bushings after something breaks unexpectedly. The finish of the project is great, too, though we’ve seen great results from less-polished builds in the past as well. Video after the break.

Continue reading “Portable Printer Is A Top Notch High School Project”

Art of 3D printer in the middle of printing a Hackaday Jolly Wrencher logo

3D Printering: Wash Parts Better And Make Solvent Last Longer

SLA printing in resin is great, but part washing can be a hassle. The best results come from a two-stage wash, but that also means more material and more processing steps. Fortunately, there are ways to make it easier and more effective. One such way is to use a part washing machine, and I’ll cover a DIY option to make your own, but despite what the advertising implies for the commercial ones, a wash machine isn’t a cure-all.

Let’s go through how to get the best results from part washing, how to make the solvent last as long as possible, and how to dispose of the eventual waste.

Resin-Printed Parts Need Washing

All parts printed in resin emerge from the printer coated in syrupy, uncured goop. This needs to be removed completely, or the print ends up sticky and no amount of drying or additional UV curing will change that. (There is a way to fix sticky prints, but it’s better to avoid the situation in the first place.)

Simple part washing can be done with nothing more than a jar in which to rinse and soak a small part for about ten minutes, but agitation and a secondary wash will go a long way toward better and more consistent results. As mentioned, part washing machines like to present themselves as a one-appliance solution, but best results still come from a two-stage wash, and that means some additional steps.

Continue reading “3D Printering: Wash Parts Better And Make Solvent Last Longer”

Spare SMD Storage, With Stacking SMT Tape Reels

[Kadah]’s solution for storing short tapes of SMT parts is as attractive as it is clever. The small 3D-printed “tape reels” can double as dispensers, and stack nicely onto each other thanks to the sockets for magnets. The units come in a few different sizes, but are designed to stack in a consistent way.

We love the little touches such as recessed areas for labels, and the fact that the parts can print without supports (there are a couple of unsupported bridges, but they should work out fine.) Also, the outer dimensions of the units are not an accident. They have been specifically chosen to nestle snugly into the kind of part drawers that are a nearly ubiquitous feature of every hardware hacker’s work bench.

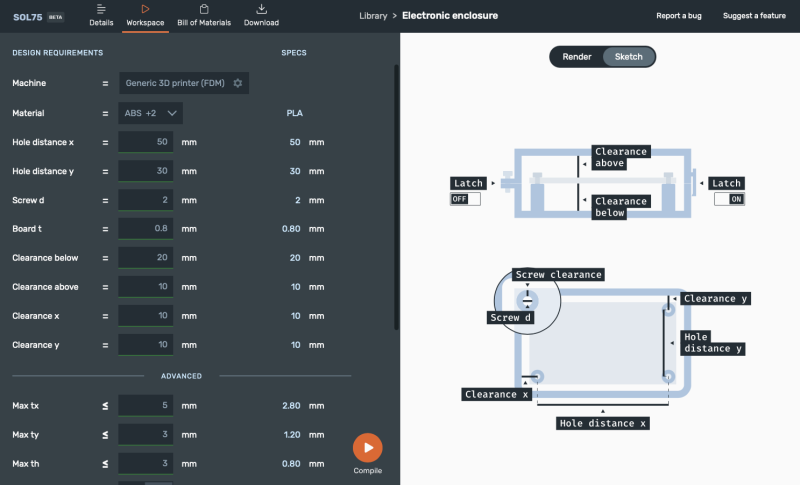
STLs are provided for handy download but [Kadah] also provides the original Fusion 360 design file, with all sizes defined as easily-customized parameters. In addition, [Kadah] thoughtfully provided each model in STEP format as well, making it easy to import and modify in almost any 3D CAD program.

Providing 3D models in STEP format alongside STLs is nice to see, because it gives more options to people if things need some tweaking, because editing the STL file can be done if needed, but isn’t optimal. Thankfully the ability to export STEP files is still open to hobbyists using Fusion 360, since Autodesk decided to leave that feature available to personal use licenses.

Sunshine In A Bag

Ultraviolet (UV) curing lamps are crucial if you have a resin 3D printer or work with UV adhesives. Some folks line an old Amazon shipping box with foil and drop a spotlight somewhere inside. Other folks toss their work under the all-natural light source, Sol. Both options have portability and reliability problems, but [AudreyObscura] has it covered with a reflective mat lined with UV strip lights. This HackadayPrize2020 finalist exemplifies the ideal that good ideas are often simple, and this has a remarkably short bill of materials.

Foil bubble insulation is the medium because it provides structure and reflectivity, but it doesn’t cooperate with the LED strip’s adhesive. [AudreyObscura] demonstrates that masking tape as an interfacing layer makes everyone play nicely. A fine example of an experienced maker, their design covers bundling wires and insulating connections to keep everything tidy and isolated. With different arrangements, this can form a tunnel lit from above, a chimney lit from the walls, or you can drape it over some scaffolding.

If you need something a little less portable for your own shop you might consider a mirror-filled chamber. One nice touch to add is a turntable to help make sure the entire part is cured without any missing areas.

Continue reading “Sunshine In A Bag”

Paying It Forward

It’s all those little things. A month ago, I was working on the axes for a foam-cutting machine. (Project stalled, will pick back up soon!) A week ago, somewhere else on the Internet, people were working on sliders that would ride directly on aluminum rails, a problem I was personally experiencing, and recommended using drawer-glide tape — a strip of PTFE or UHMW PE with adhesive backing on one side. Slippery plastic tape solves the metal-on-metal problem. It’s brilliant, it’s cheap, and it’s just a quick trip to the hardware store.

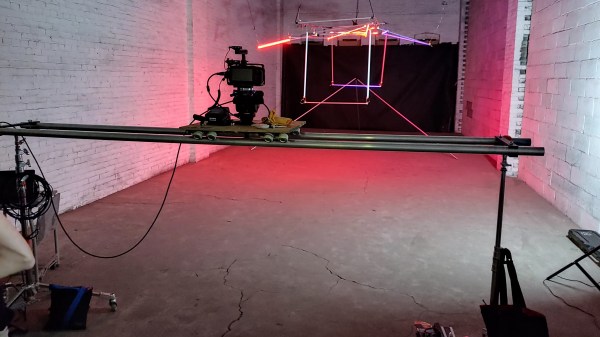
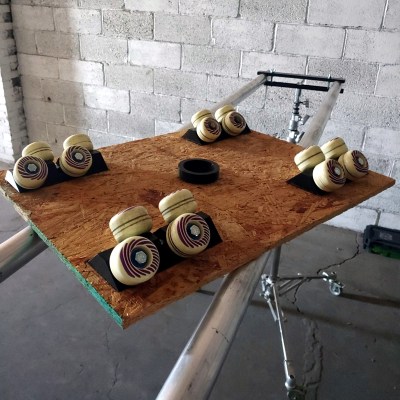
Just a few days ago, we covered another awesome linear-motion mechanical build in the form of a DIY camera rig that uses a very similar linear motion system to the one I had built as well: a printed trolley that slides on skate bearings over two rails of square-profile extruded aluminum. He had a very nice system of anchoring the spacers that hold the two rails apart, one of the sticking points in my build. I thought I’d glue things together, but his internal triangle nut holders are a much better solution because epoxy doesn’t like to stick to anodized aluminum. (And Alexandre, if you’re reading, that UHMW PE tape is just what you need to prevent bearing wear on your aluminum axes.)

Between these events, I got a message thanking me for an article that I wrote four years ago on debugging SPI busses. Apparently, it helped a small company to debug a problem and get their product out the door. Hooray!

So in one week, I got help from two different random strangers on a project that neither of them knew I was working on, and I somehow saved a startup. What kind of crazy marvelous world is this? It’s become so normal to share our ideas and experience, at least in our little corner of the Internet, that I sometimes fail to be amazed. But it’s entirely amazing. I know we’ve said it before, but we are living in the golden era of sharing ideas.

Thanks to all of you out there, and Read More Hackaday!